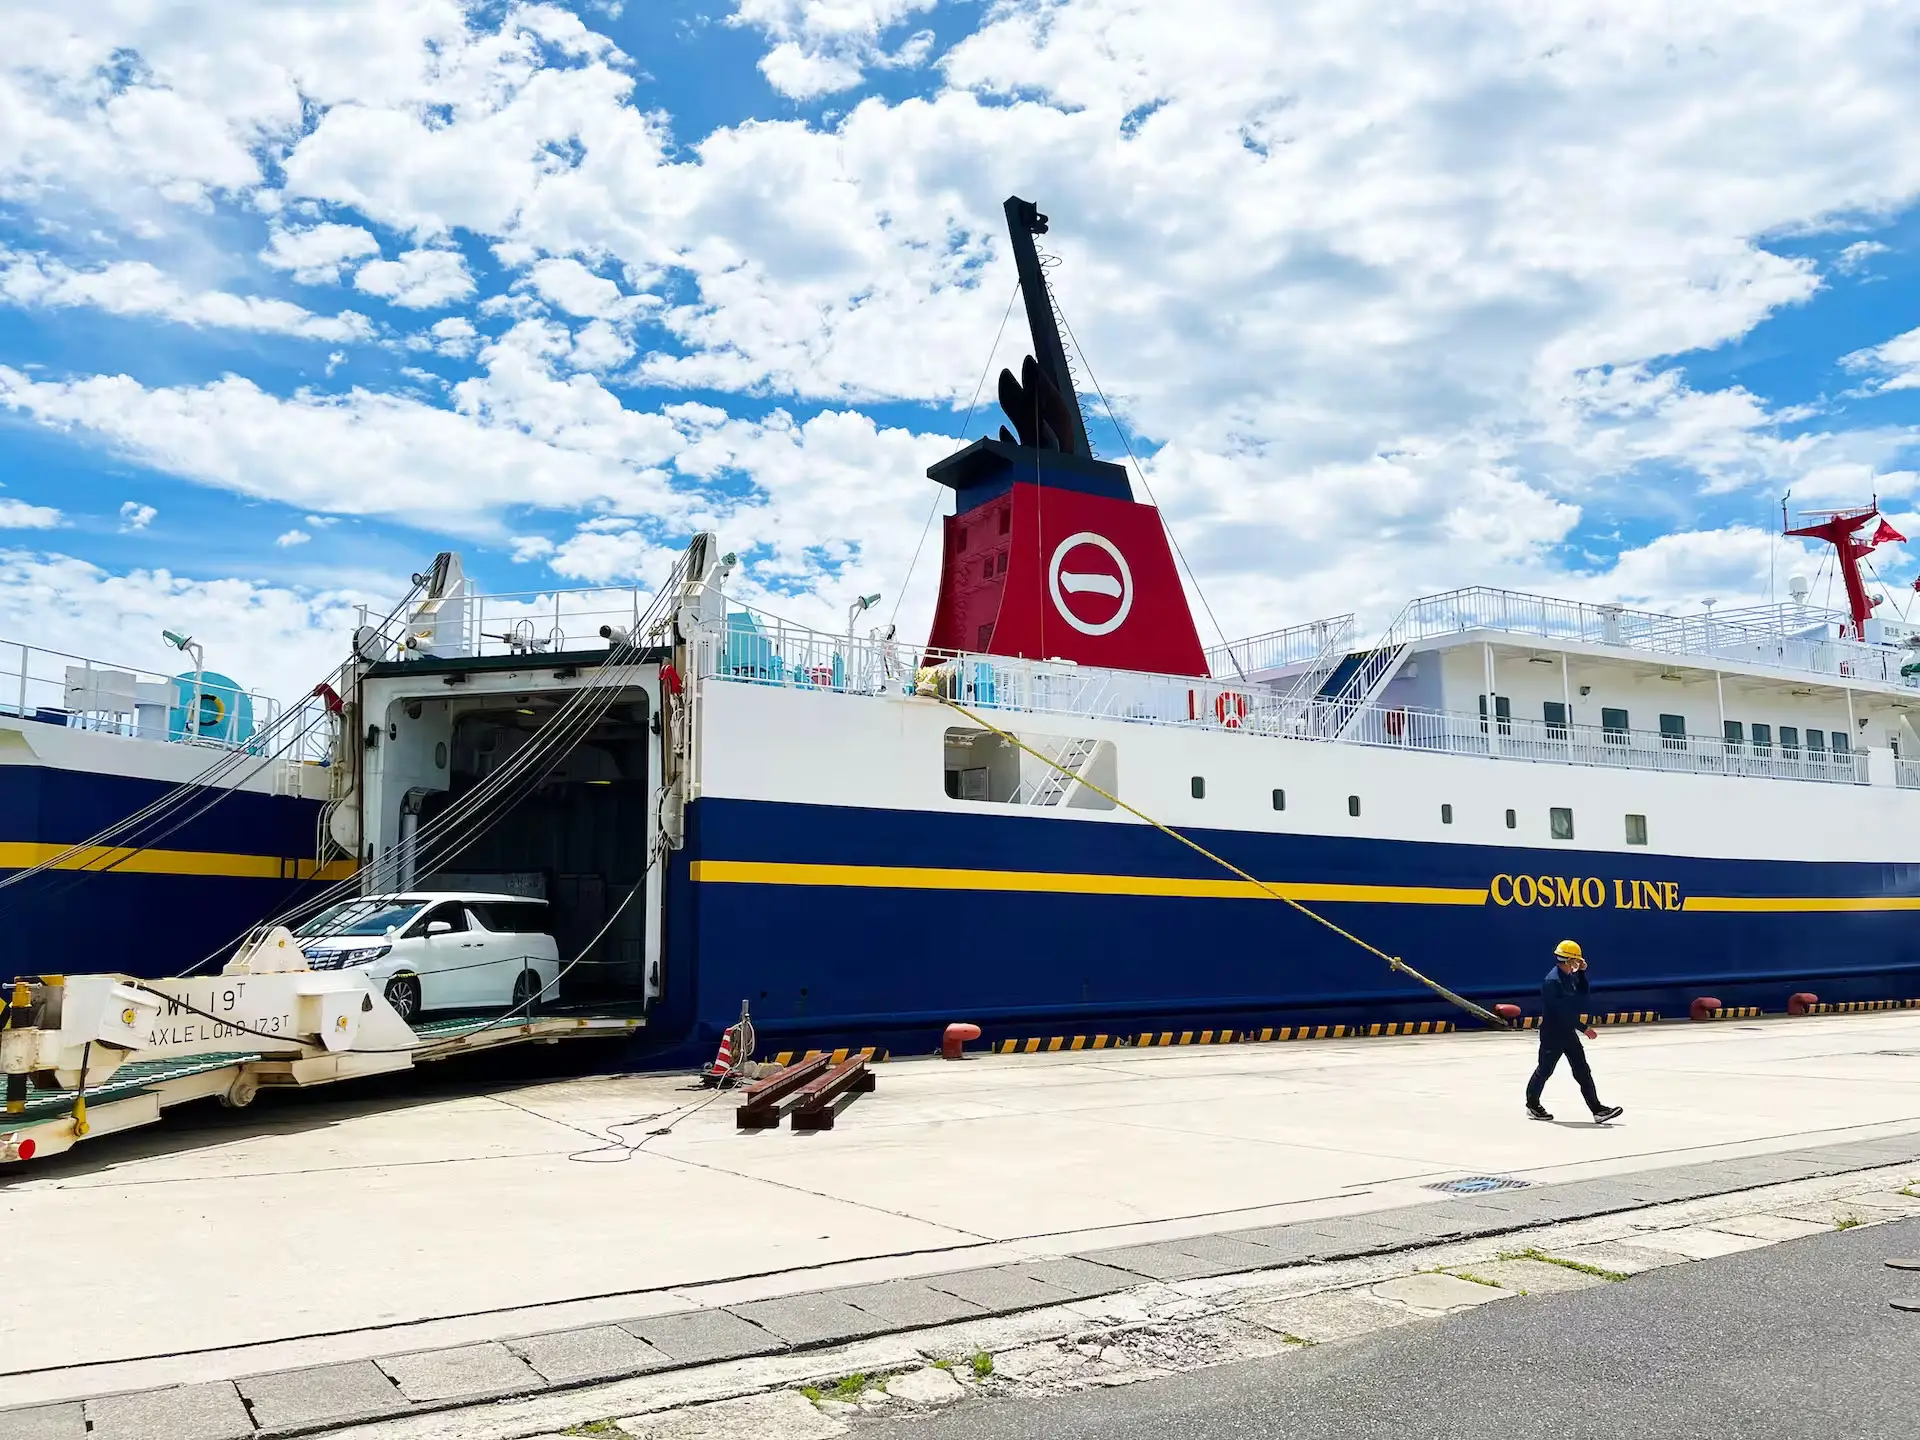
 Ferry Princess Wakasa Cruise Review | How to Travel to Tanegashima
Kagoshima North Pier - Tanegashima: CosmoLine Princess Wakasa Experience! 3.5 hour Japan's Ferry Ride
 Japan’s Airline Peach Aviation Flight Review | Travel Guide
Kansai Airport, Osaka - Fukuoka: Peach Aviation Experience! Japan's Airline Check-in Review & How to book
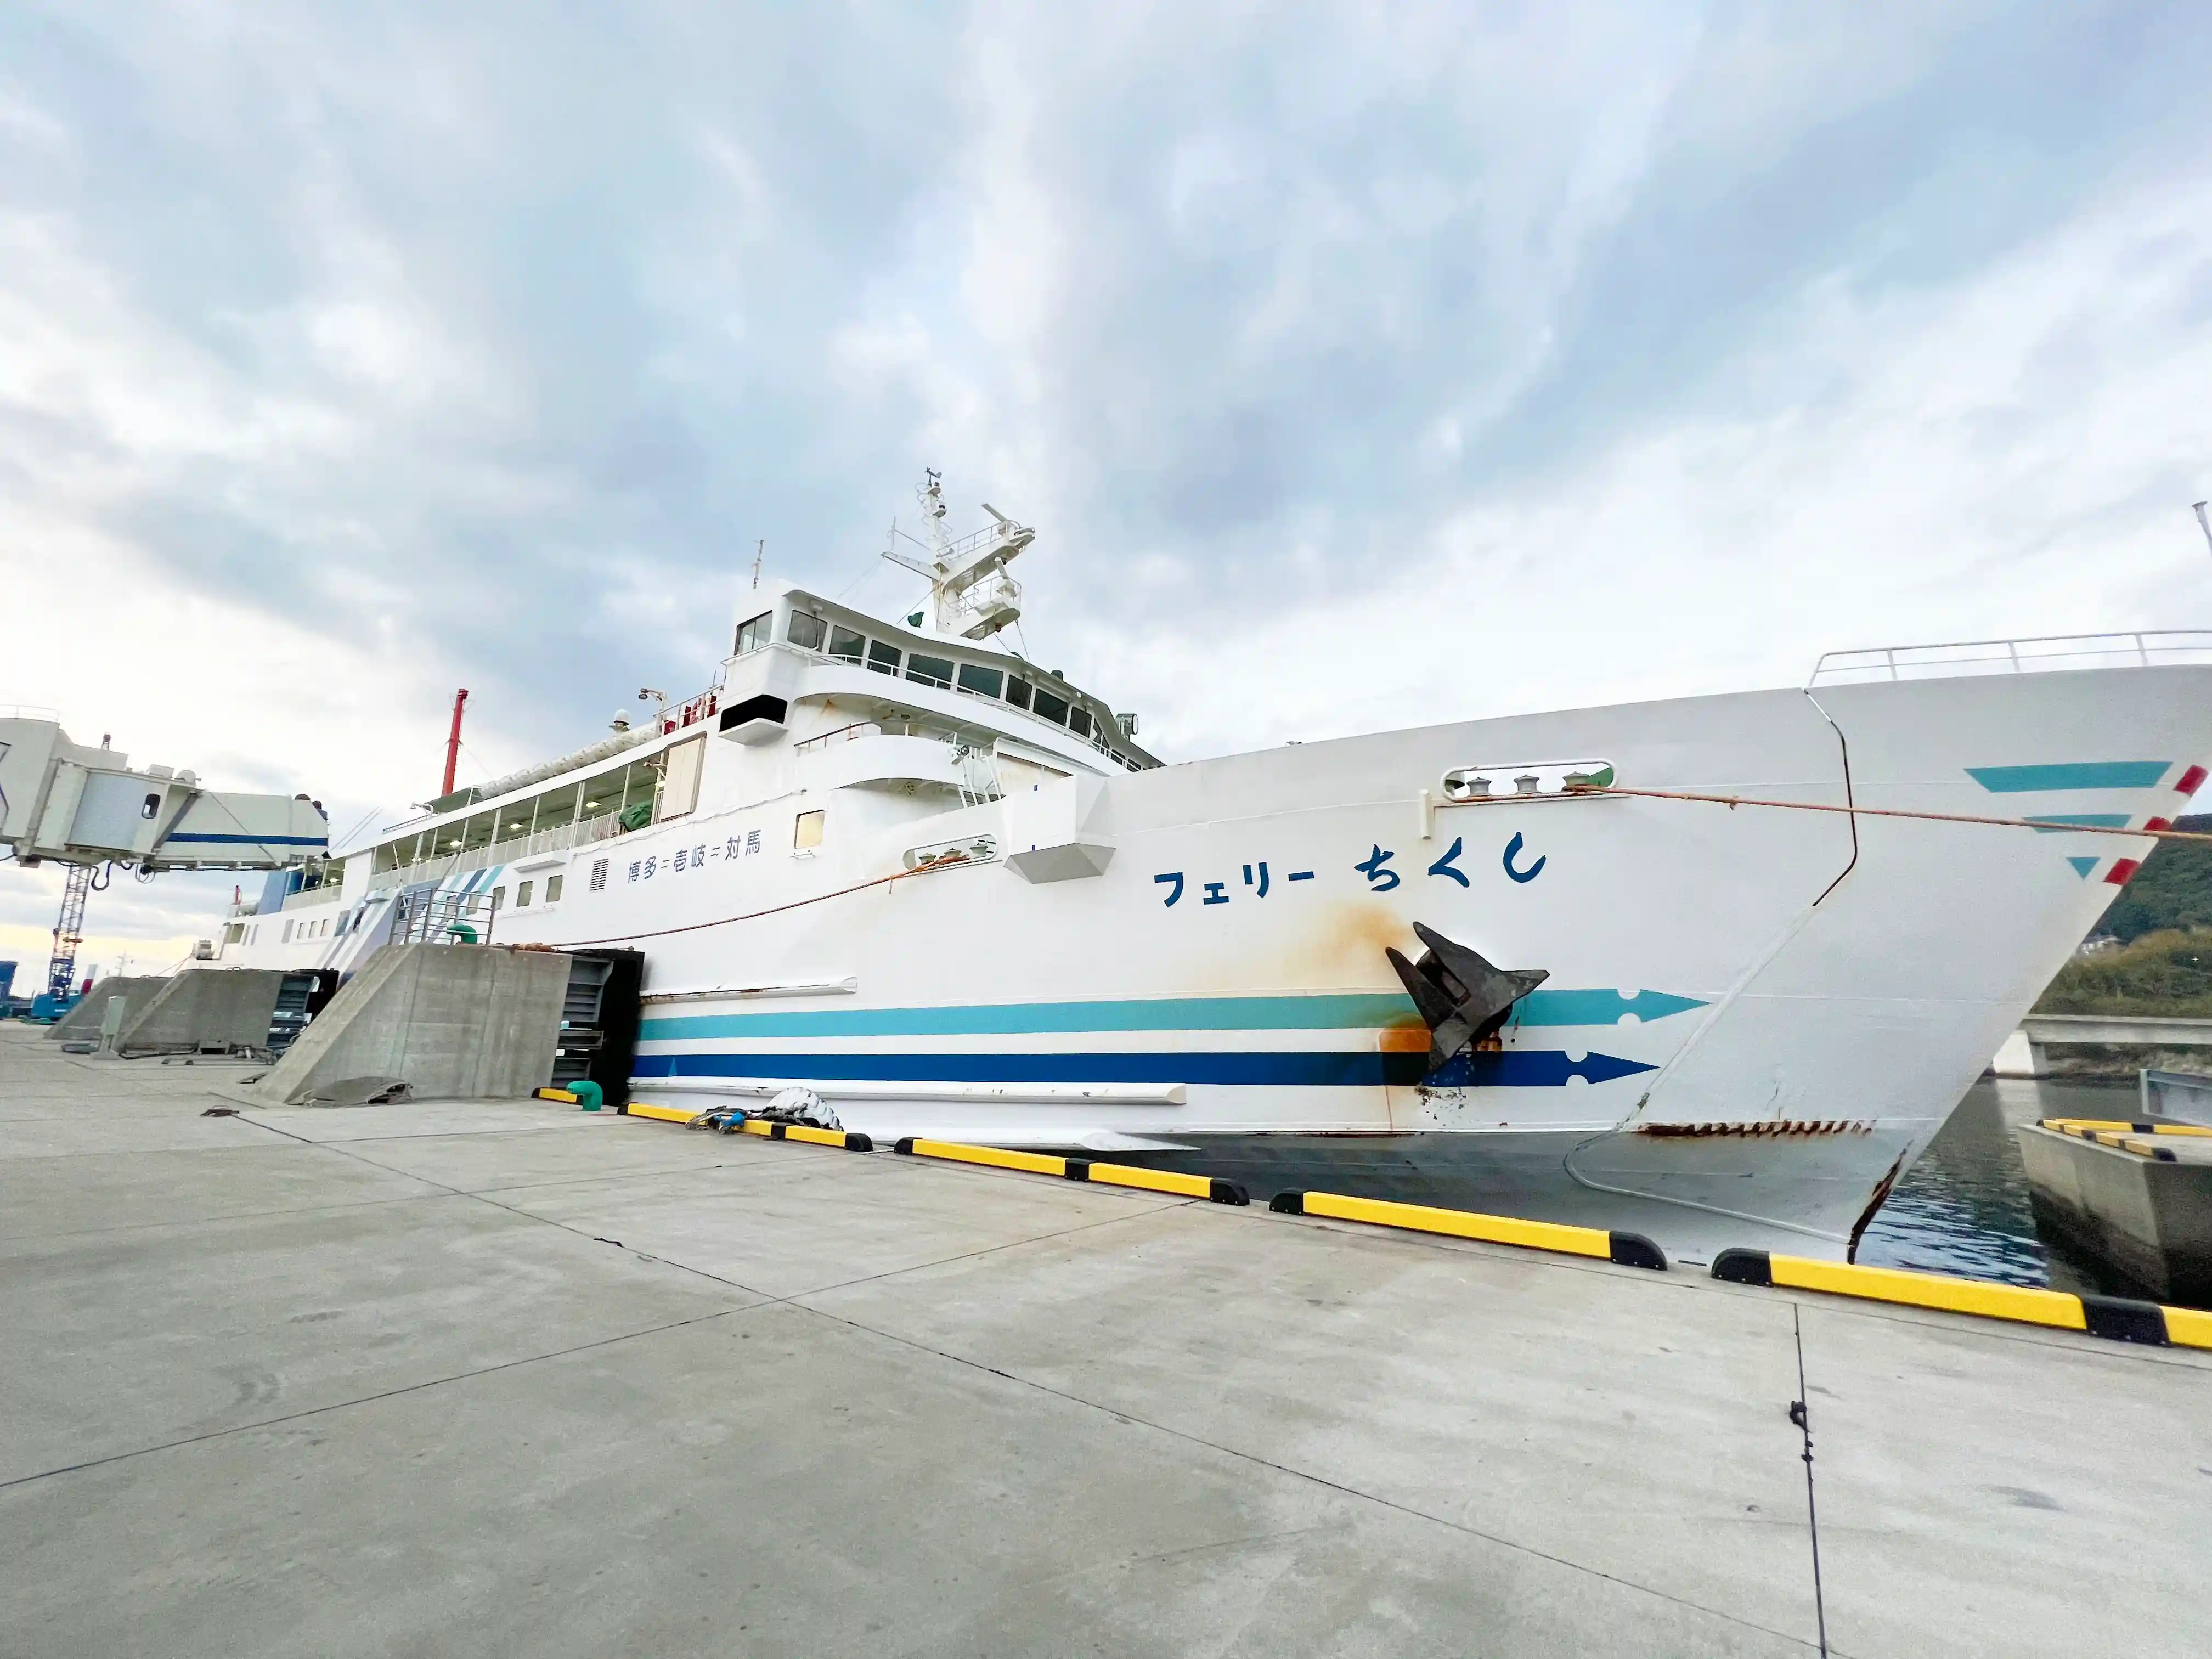 Ferry Chikushi Cruise Review | Iki & Tsushima Travel Guide
Hakata, Fukuoka - Tsushima / Iki Island: Kyushu Yusen Ferry Chikushi Experience! 5 hr Review of Japan's Ferry
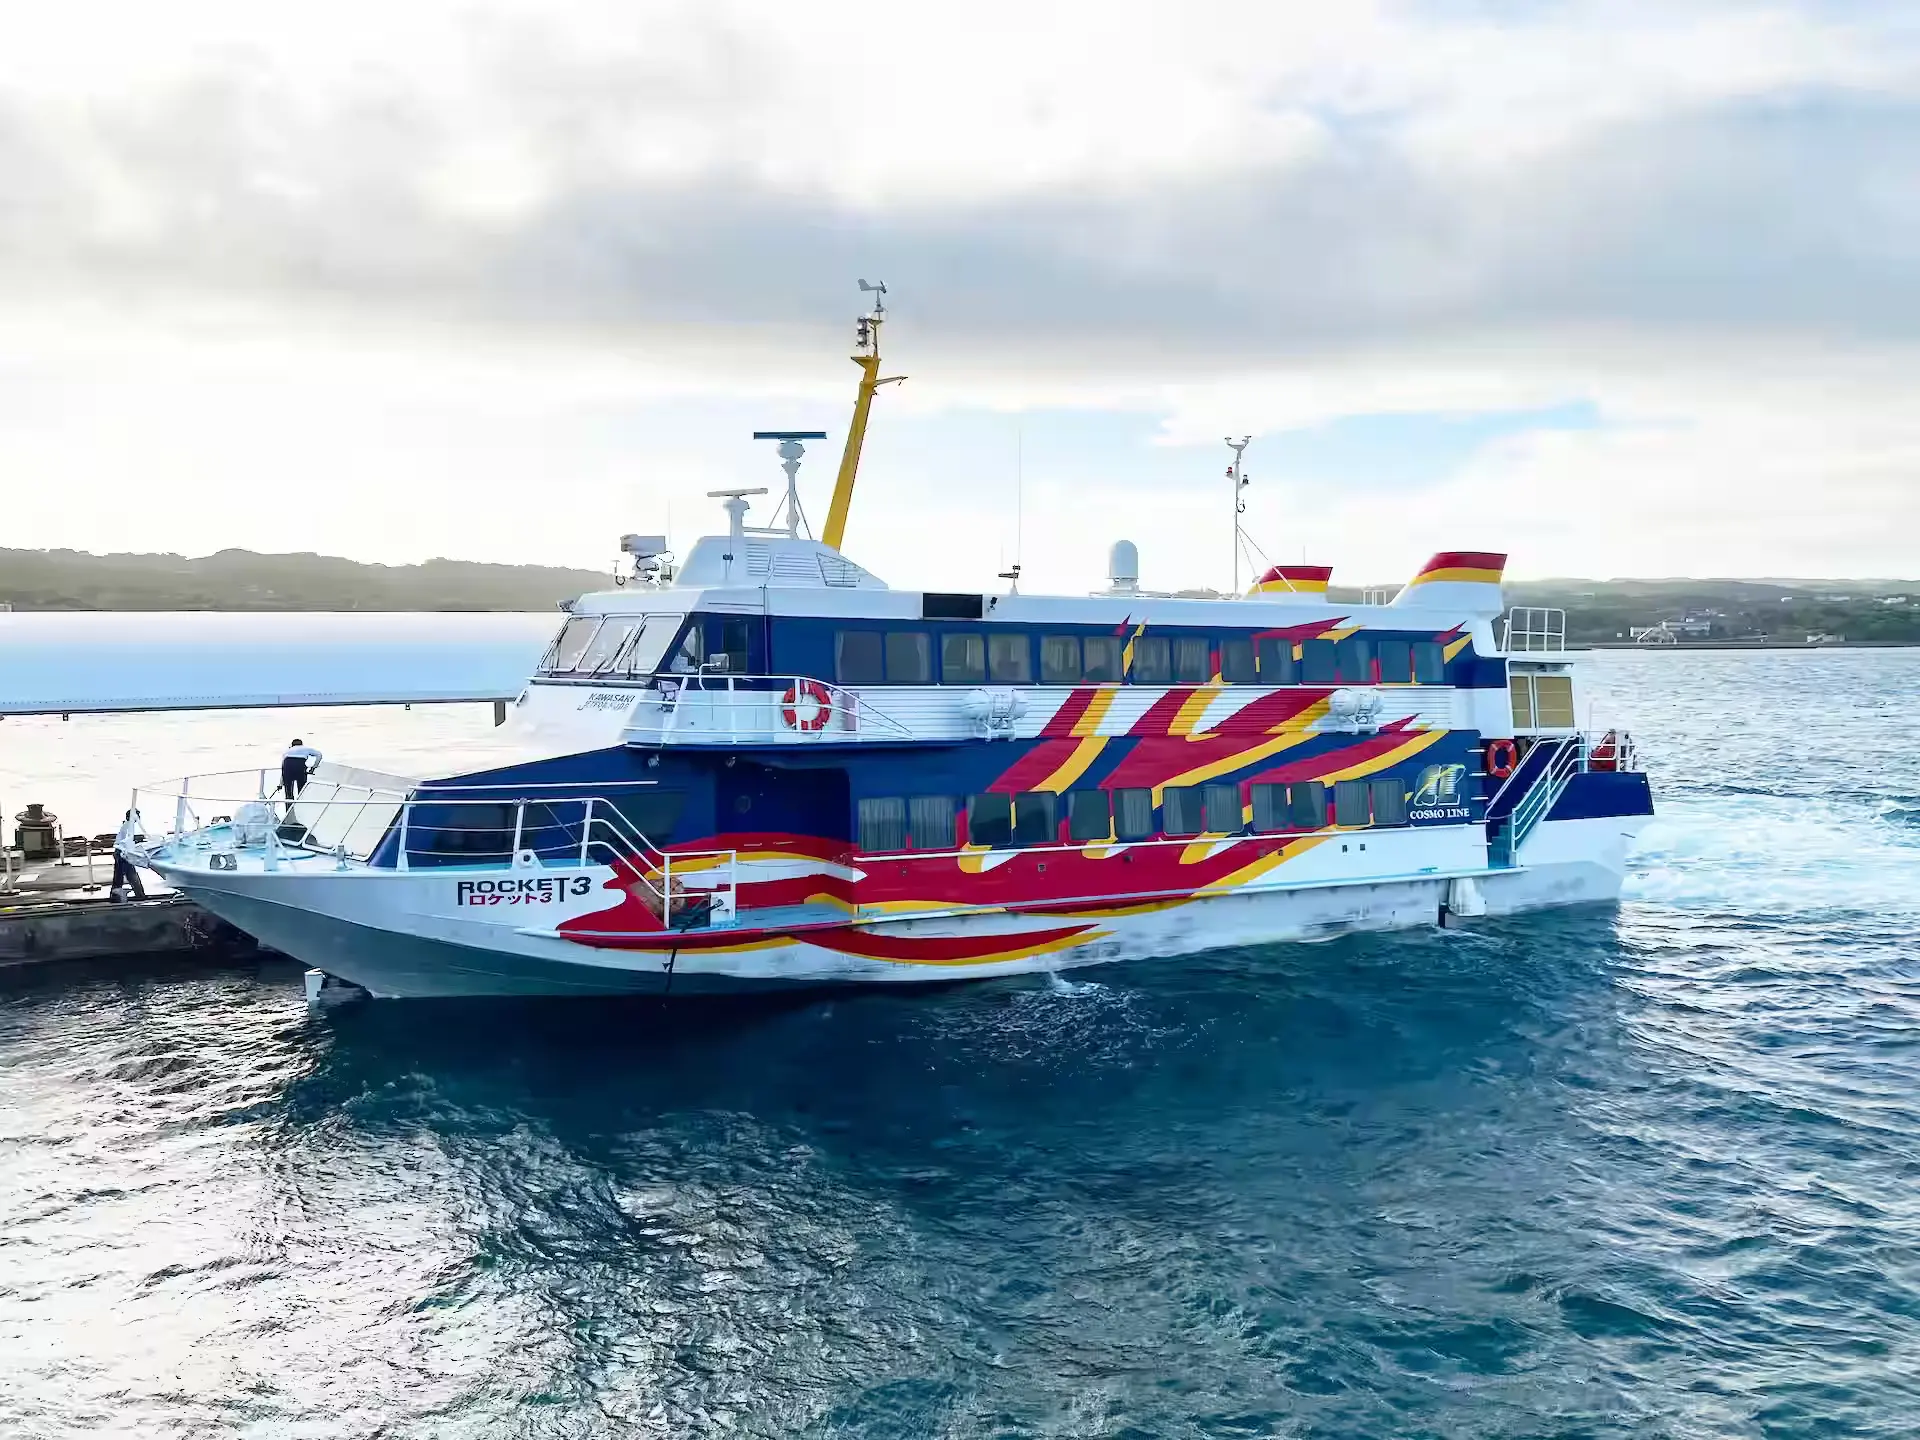 Jetfoil Toppy & Rocket Cruise Review | How to Travel to Kagoshima
Kagoshima North Pier - Tanegashima / Yakushima: Toppy & Rocket Experience! 2-hr Japan's Jetfoil Ride
 Meimon Taiyo Ferry Osaka II Review | Fukuoka to Osaka Cruise
Osaka - Fukuoka: Meimon Taiyo Ferry Osaka2 Experience! 12.5 hour Japan's overnight ferry Ride
Japan’s Airline Peach Aviation Flight Review | Travel Guide
Peach AviationKansai Airport, Osaka - Fukuoka: Peach Aviation Experience! Japan's Airline Check-in Review & How to bookPeach Aviation Flight Review
- Time: 07:00 → 08:05 (Approx. 1 hour 5 minutes)
- Route: Osaka (Kansai International Airport) → Fukuoka (Fukuoka Airport)
- Seat: Pleasure (window seat)
- Fare: ¥6,110 (Airfare ¥2,999 + Checked baggage + Handling fees)

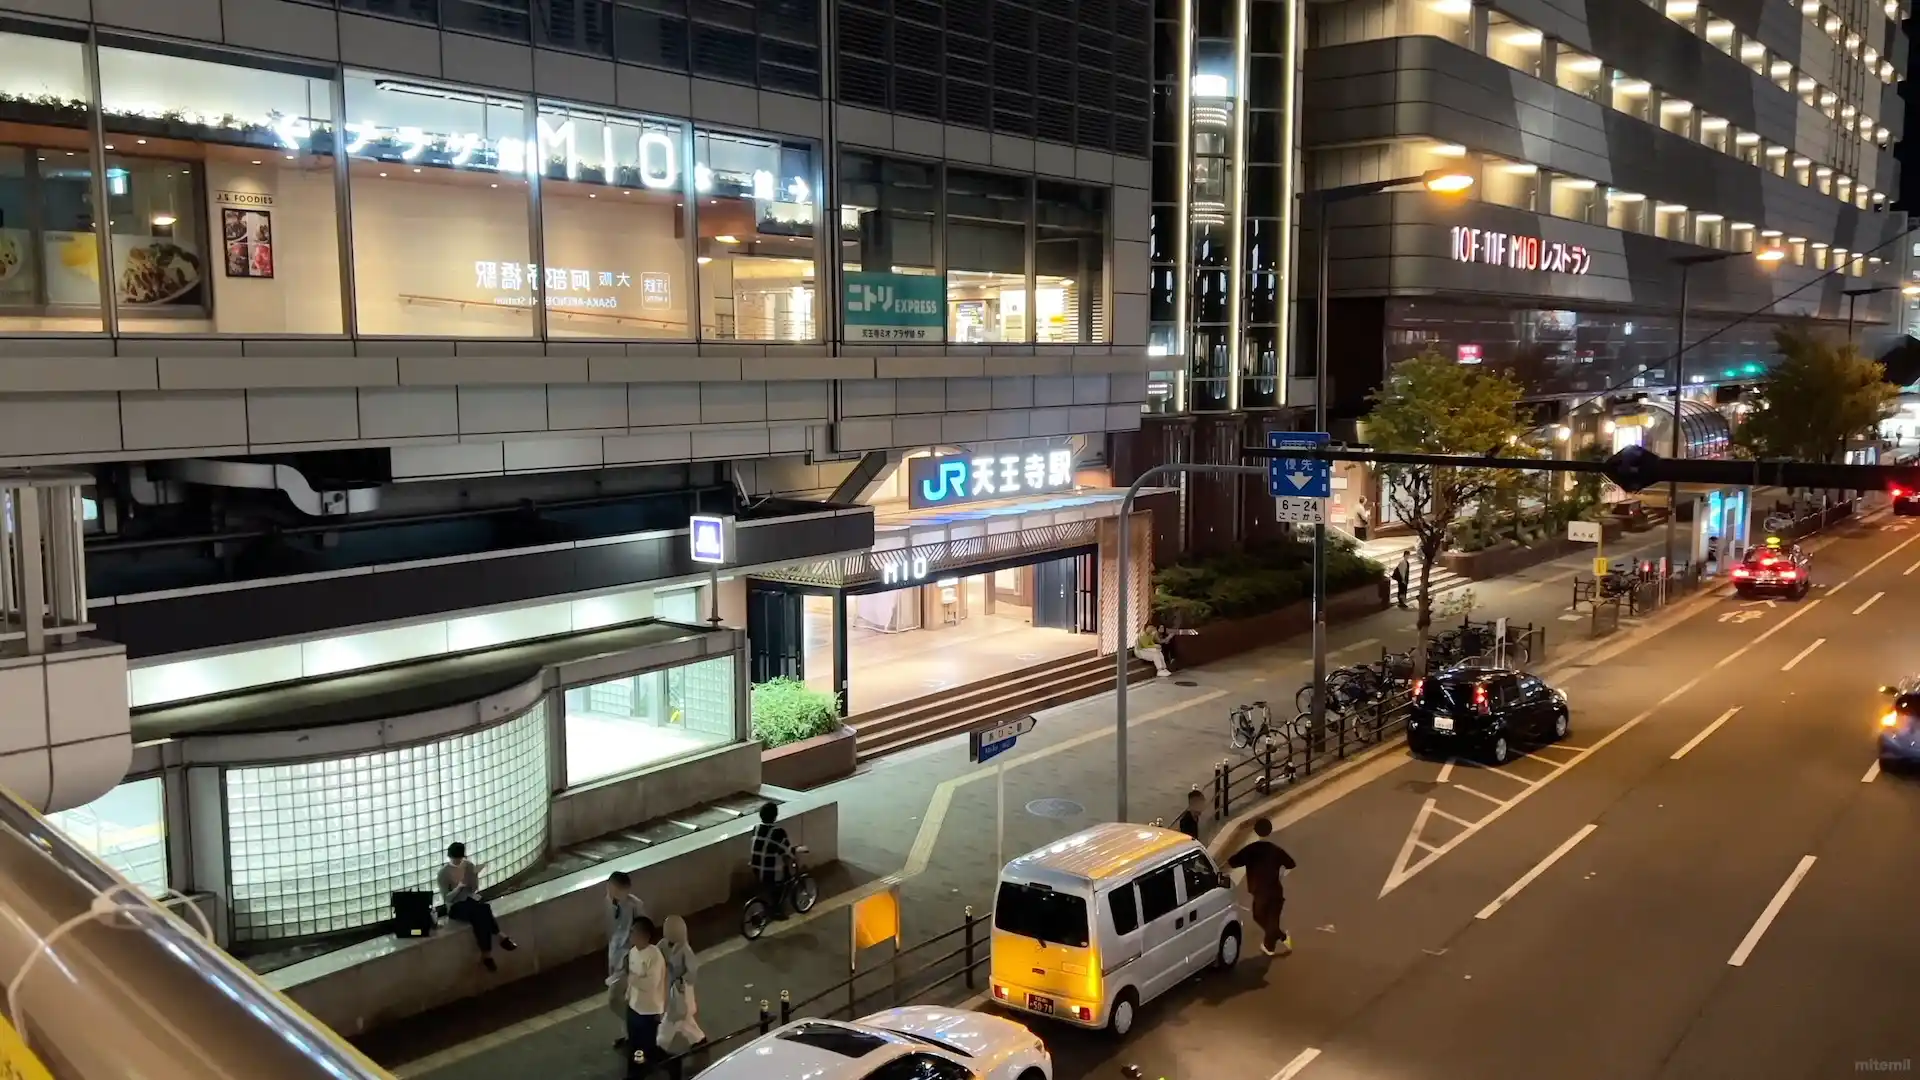
9:40 PM, Tennoji Station in Osaka.
Today’s flight is with Peach Aviation, a low-cost carrier (LCC).
This journey is a 1-hour and 5-minute flight from Osaka to Fukuoka.
I’ll be flying on a one-way ticket purchased during a sale for just ¥2,999.First, I’ll take a train from Tennoji Station to Kansai Airport.
I bought a ticket to the airport (¥1,060) from a vending machine.
After checking the timetable, I headed to Platform 15/16.
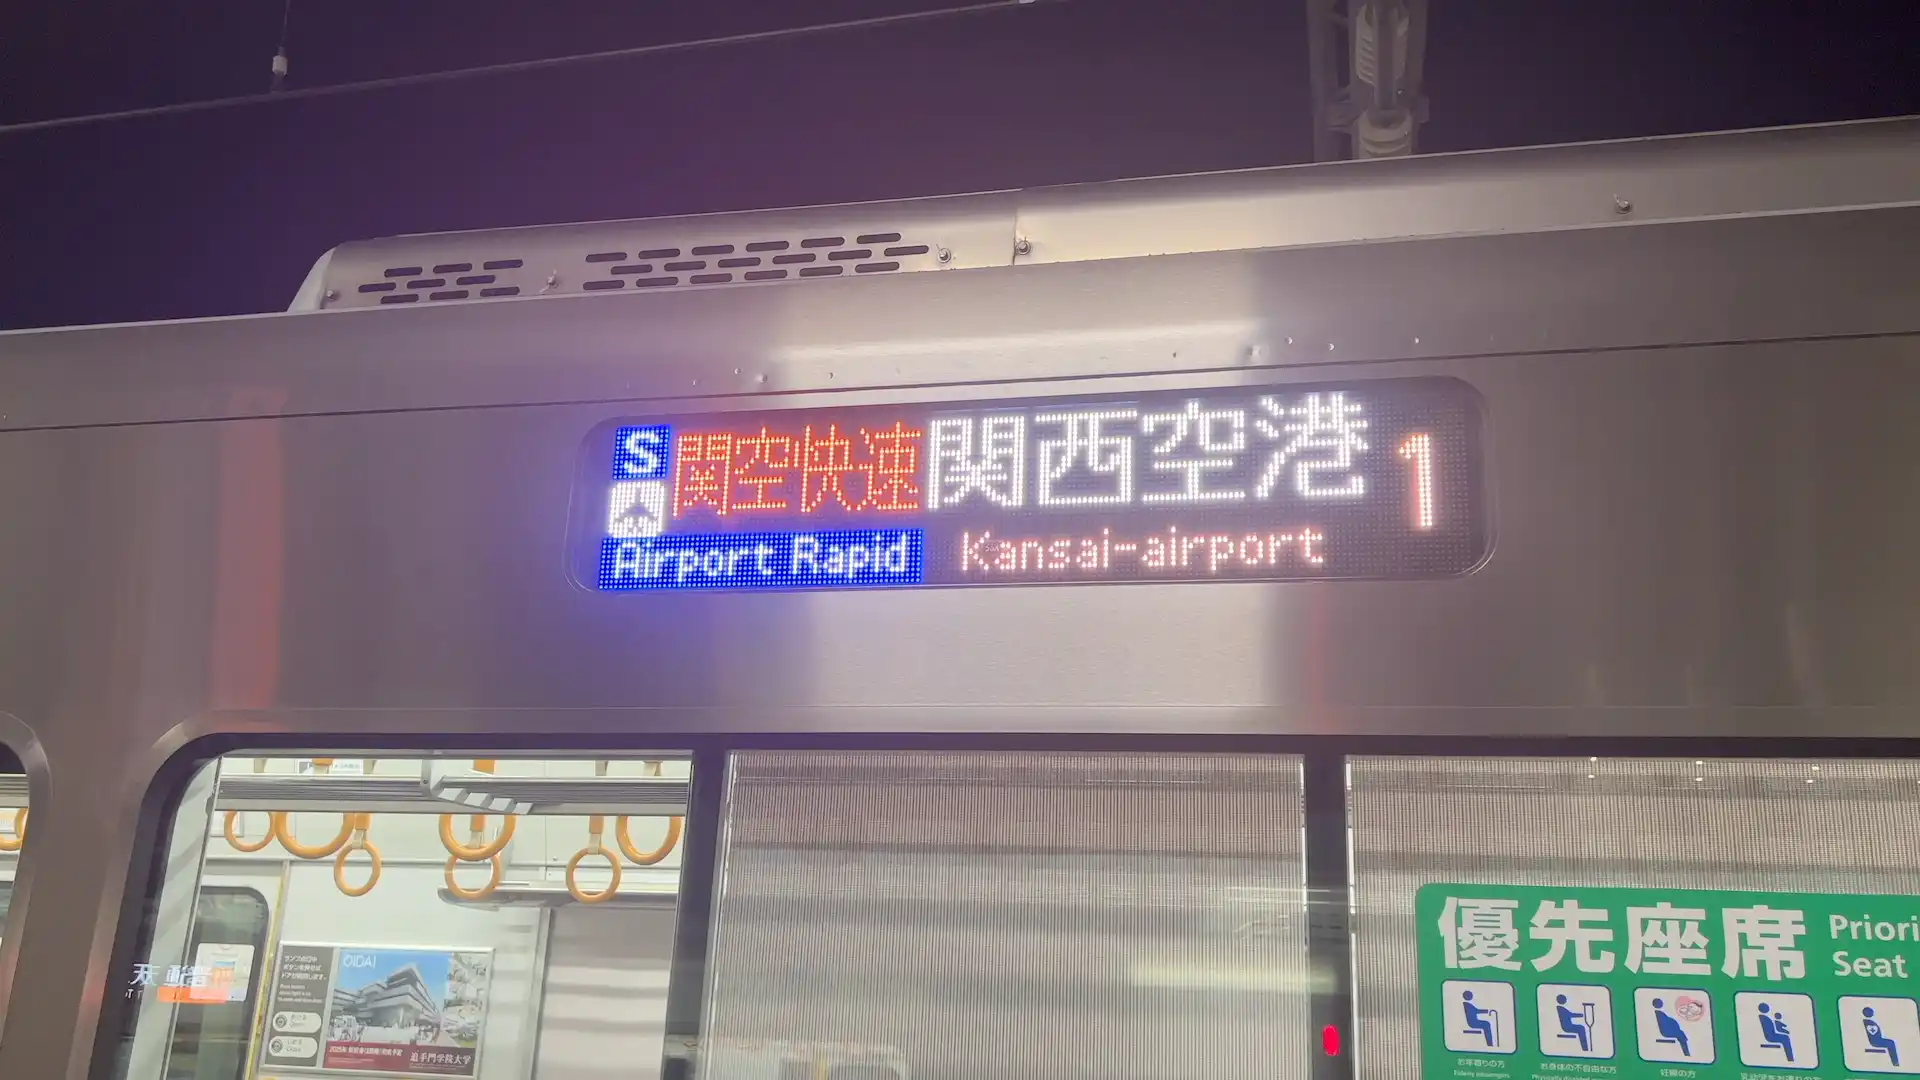
The train to the airport is called the “Kansai Airport Rapid Service.”
It splits at Hineno Station: the front four cars (Car 1–4) go to Kansai Airport, while the rear cars continue toward Wakayama as the Kishuji Rapid.To avoid mistakes, I boarded the frontmost car, Car 1.
It takes about 50 minutes from Tennoji to Kansai Airport.
When I boarded, the train was crowded with commuters, so I stood for about 40 minutes.At Hineno Station, about 90% of the passengers got off.
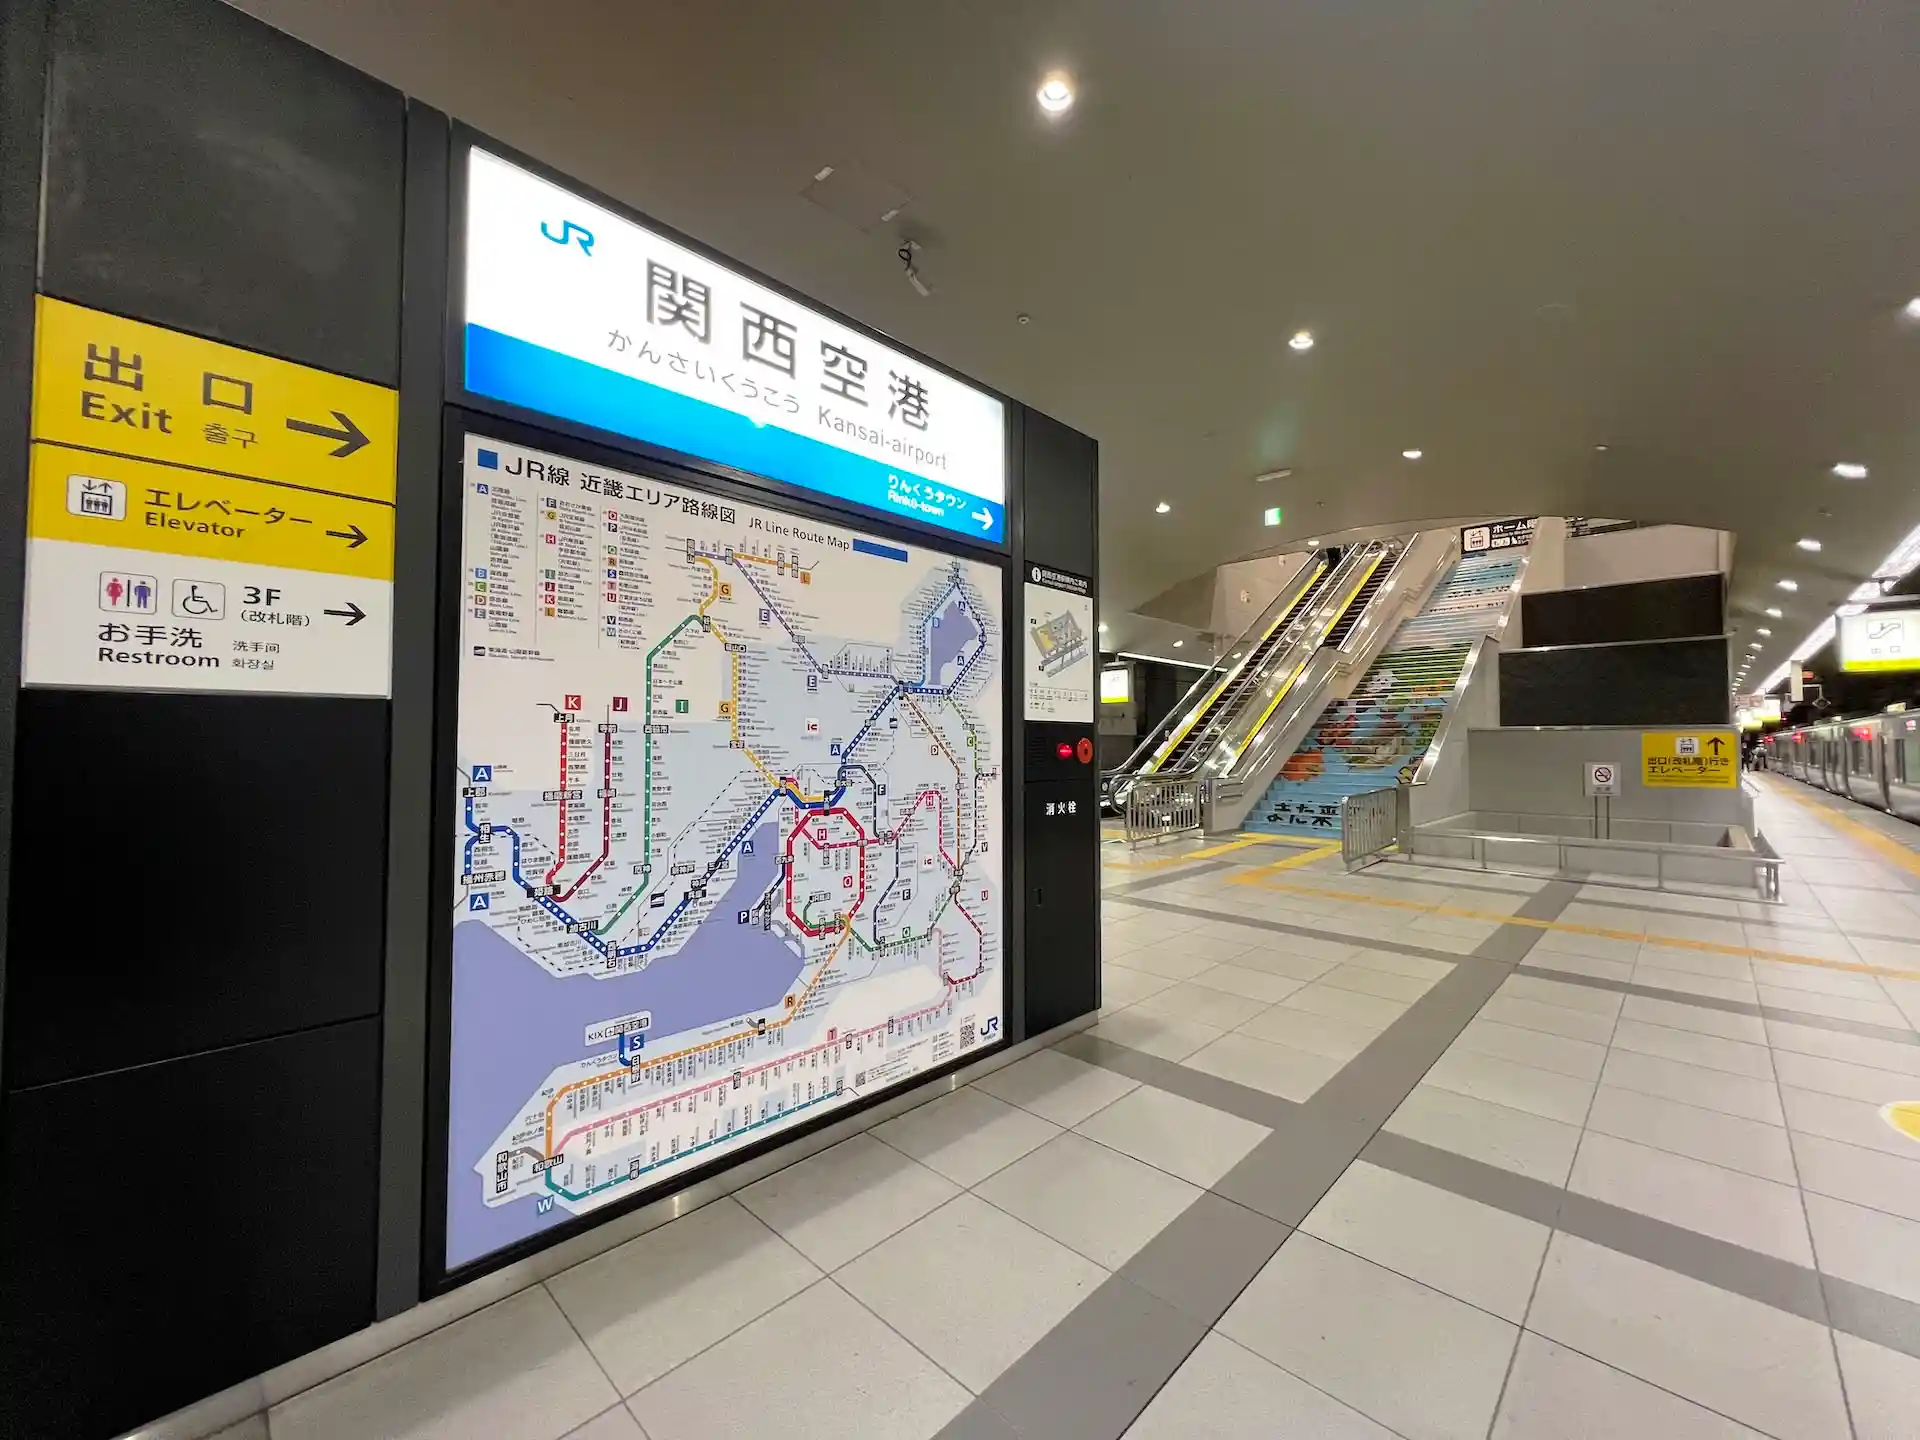
I finally got a seat for the last 10 minutes to Kansai Airport.At 10:52 PM, I arrived at Kansai Airport.
The platform was spacious and had an open feel.
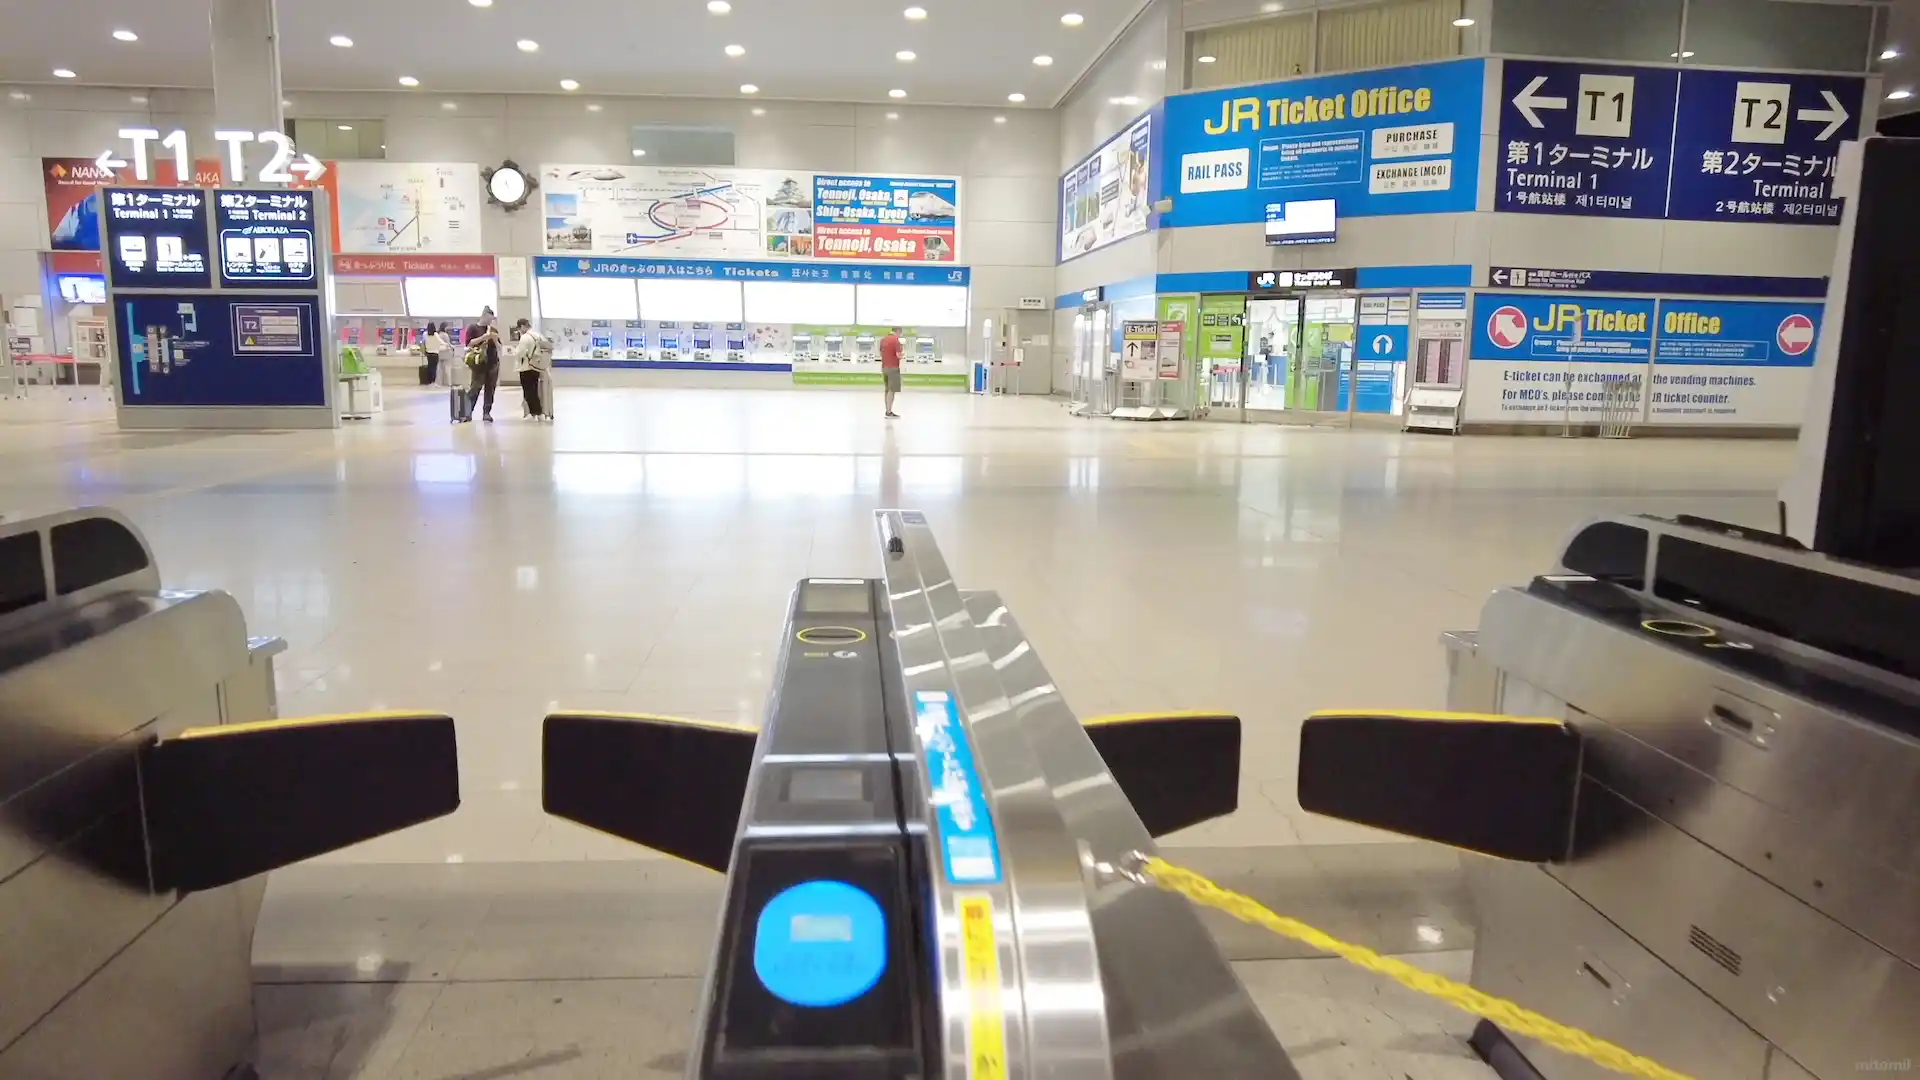
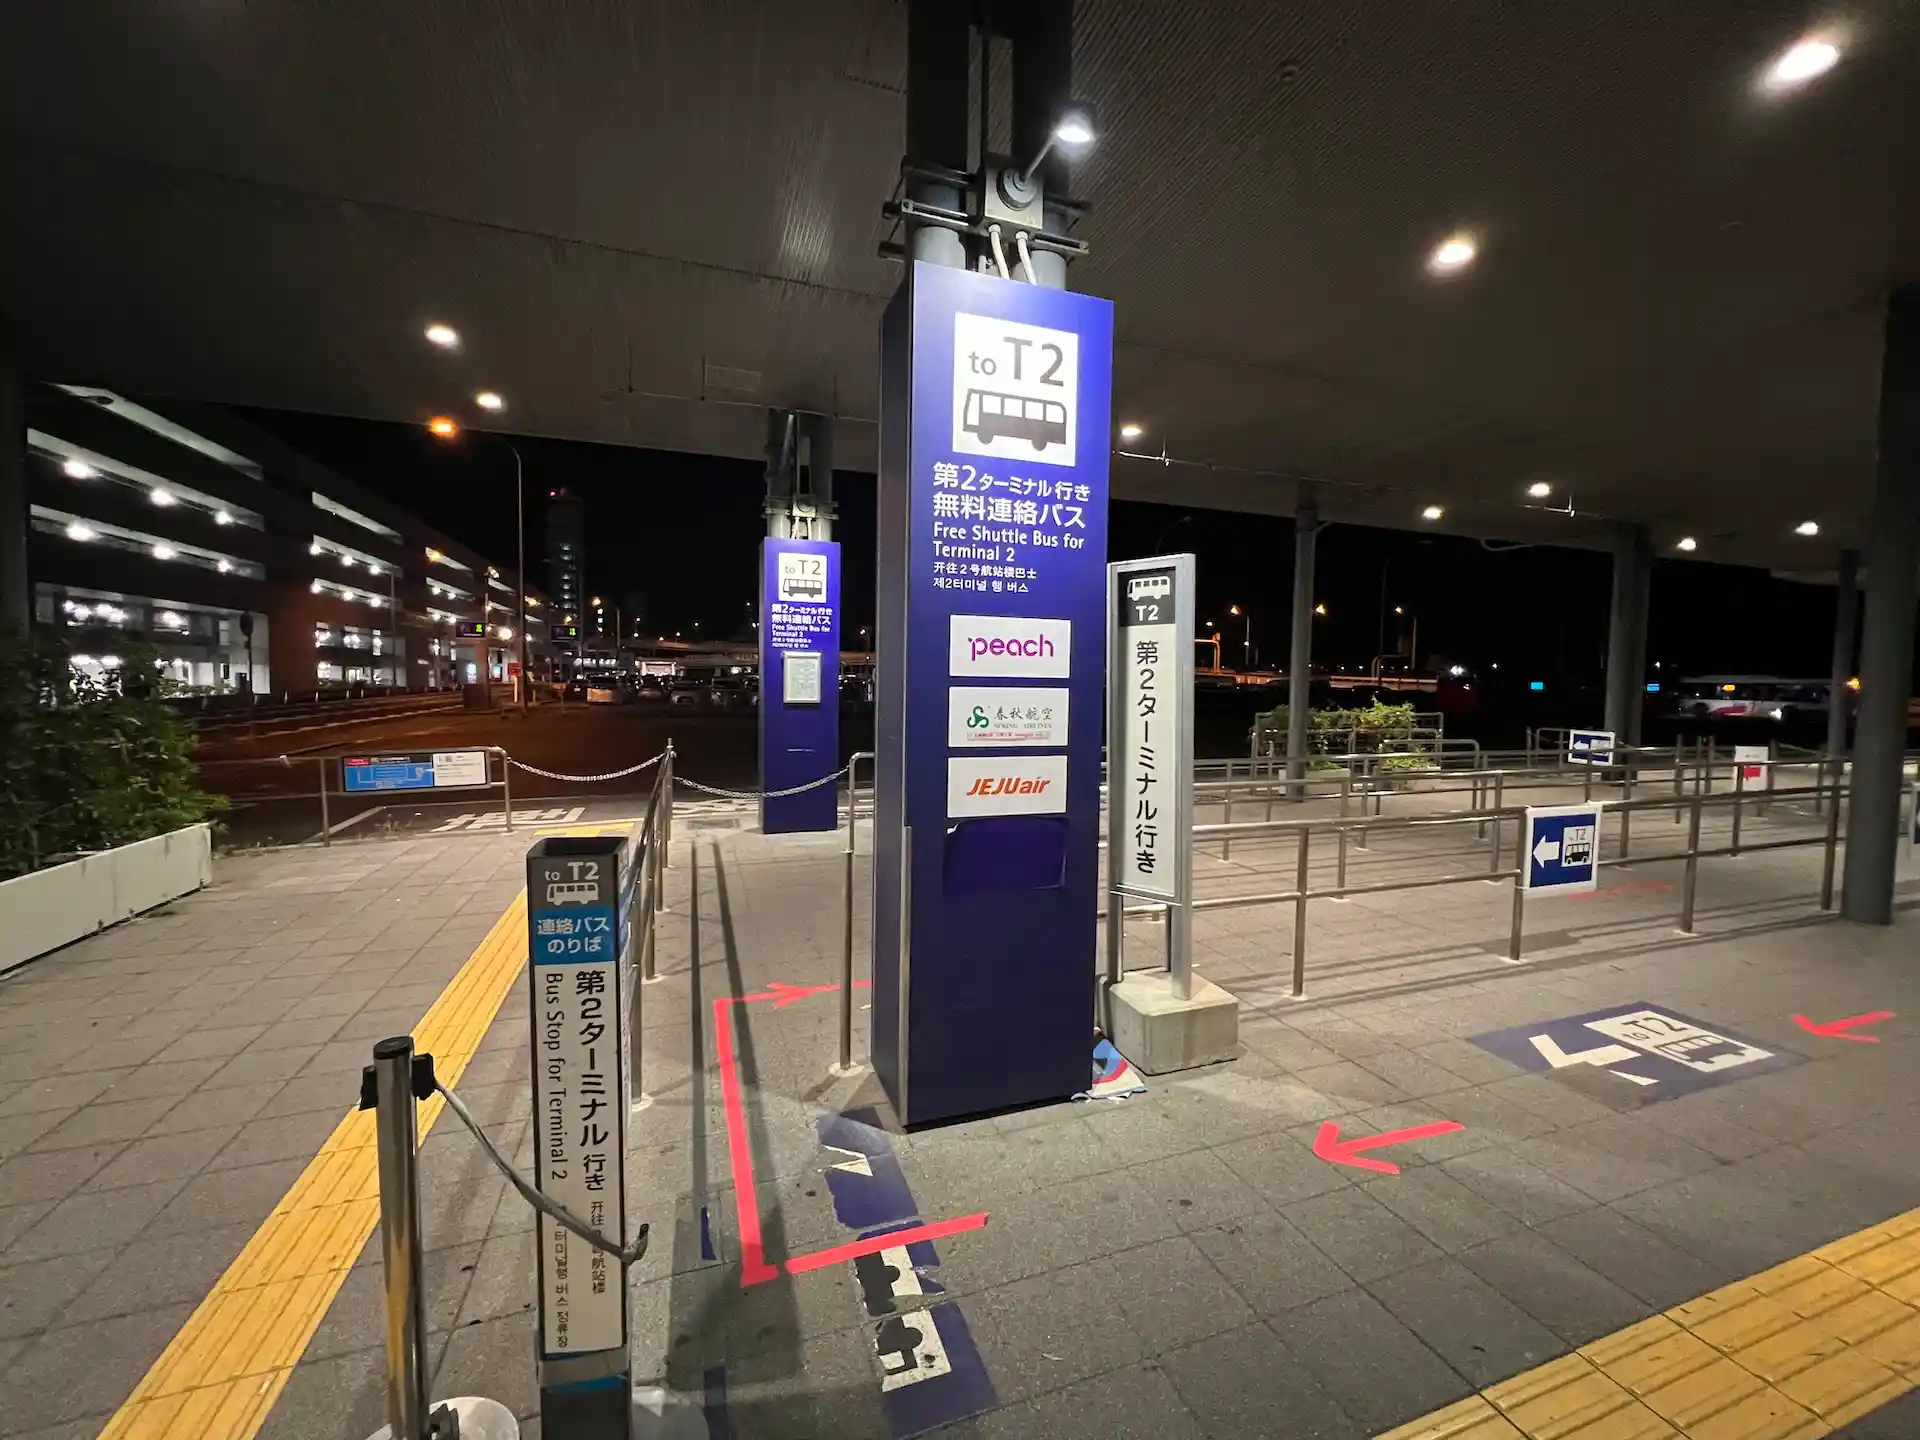
The ticket gates are on the second floor, so I used the nearby escalator.Kansai Airport has two terminals: Terminal 1 for ANA and JAL flights, and Terminal 2 exclusively for LCCs.
Since I’m flying with Peach, I’ll head to Terminal 2.
It’s a bit further away, so I need to take the free shuttle bus.
Right after exiting the ticket gate, I saw a signboard:
“Left T1 / Right T2.”
I followed the direction to T2 and spotted the Aero Plaza — a large building with hotels and restaurants.The Terminal 2 shuttle bus stop is located in front of the Aero Plaza on the first floor.
It was only about a one-minute walk from the gate.
I arrived at the bus stop for Terminal 2.
According to the timetable, buses run every five minutes.
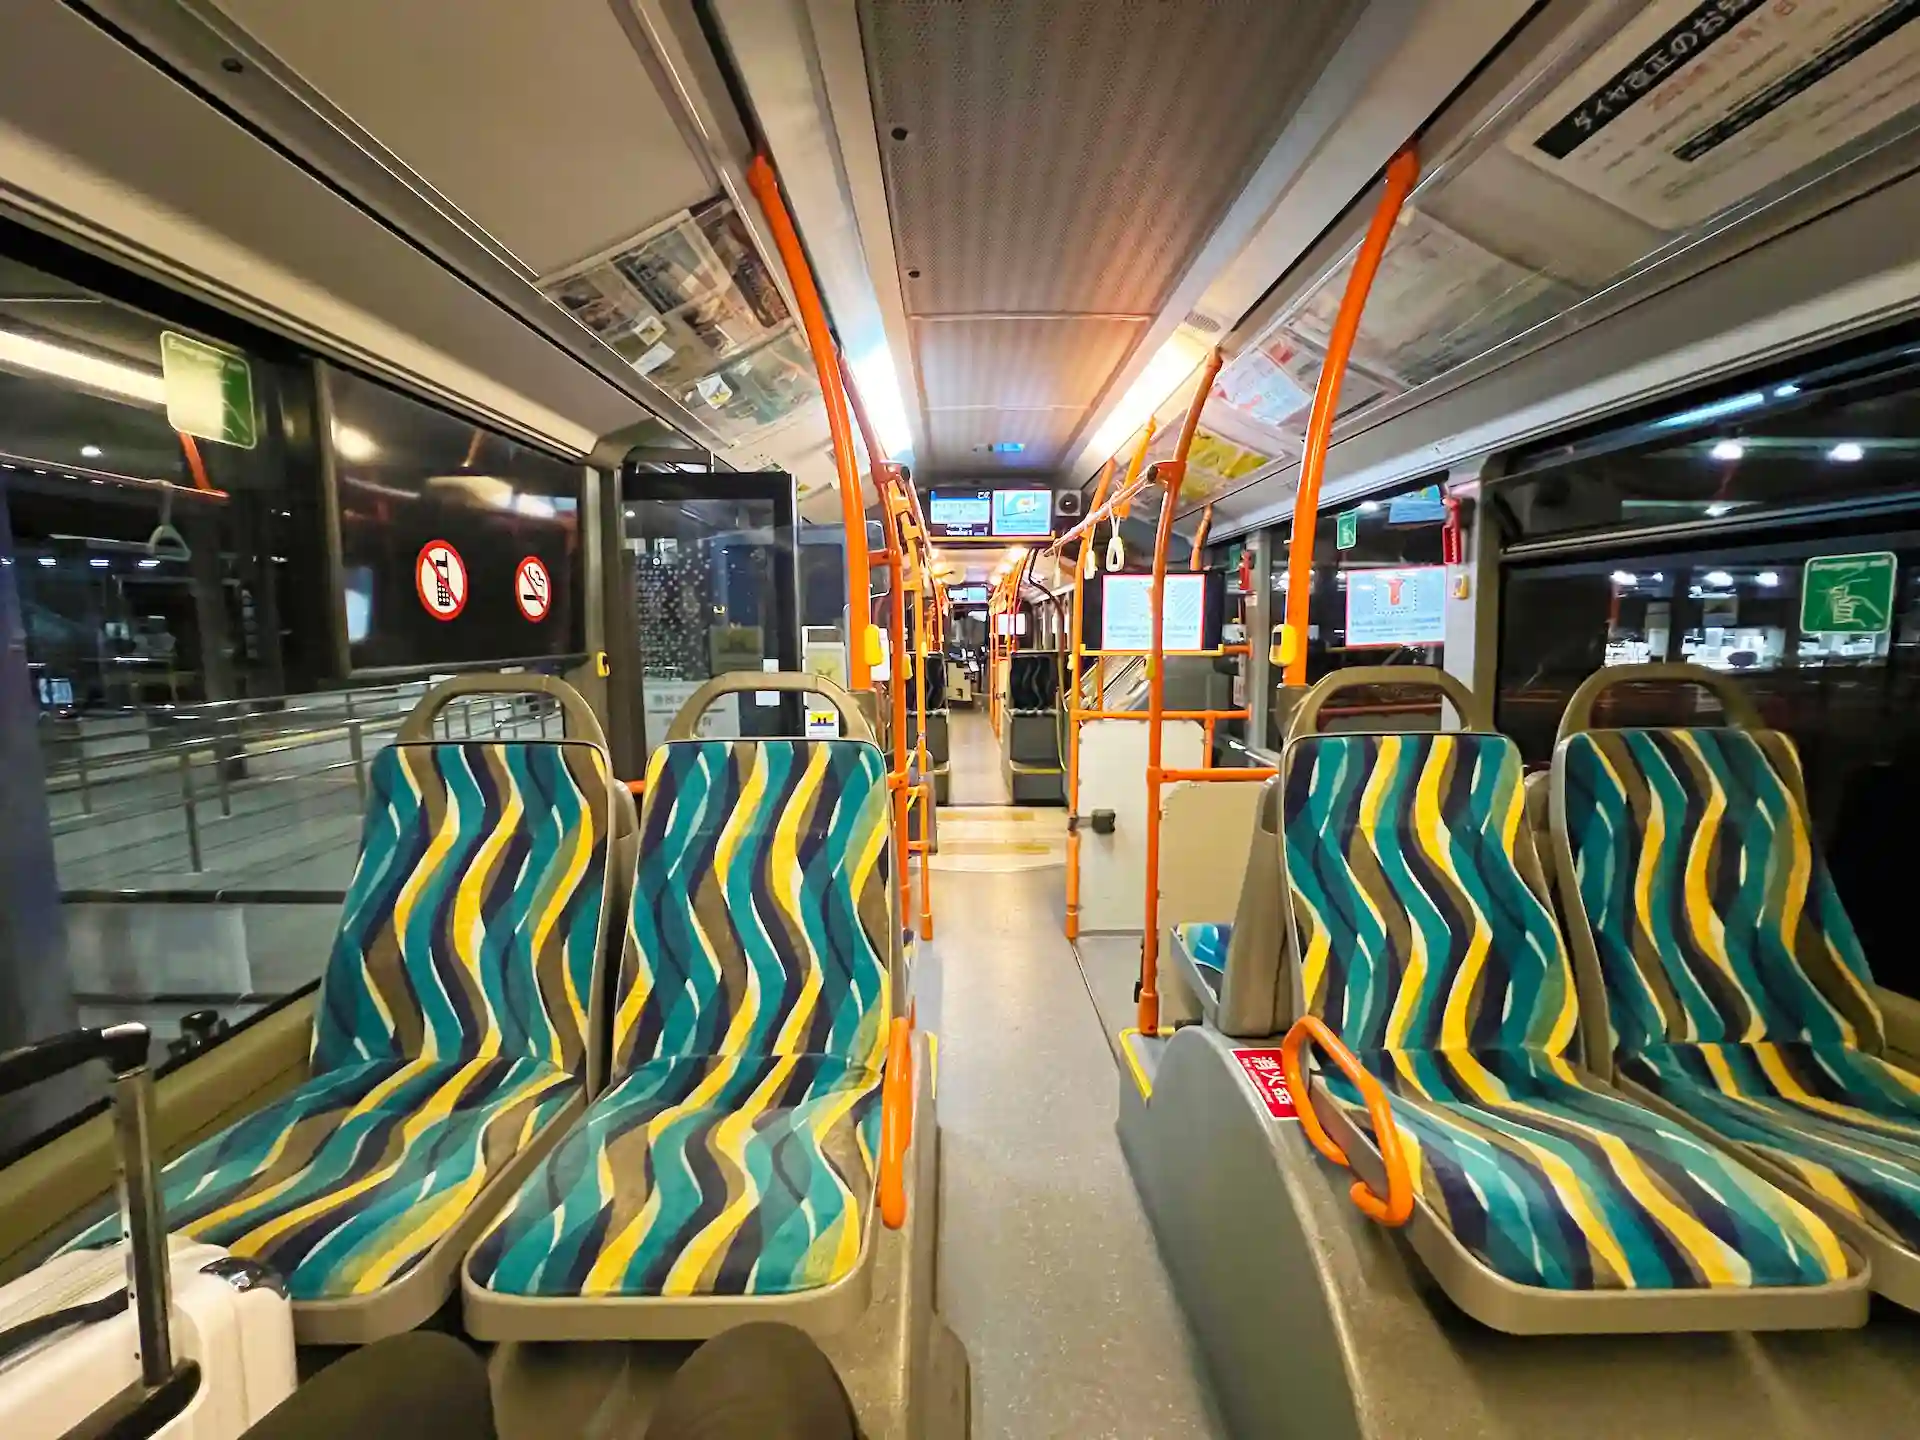
I barely had to wait before one arrived.The arriving bus was a Mercedes-Benz articulated bus called the “Citaro G.”
It featured colorful seats and a spacious interior.
A sign at the articulated section warned, “For your safety, please do not stand here.”There were hardly any passengers at this hour — I had the whole bus to myself.
It was a quiet, relaxing 7-minute ride to Terminal 2.
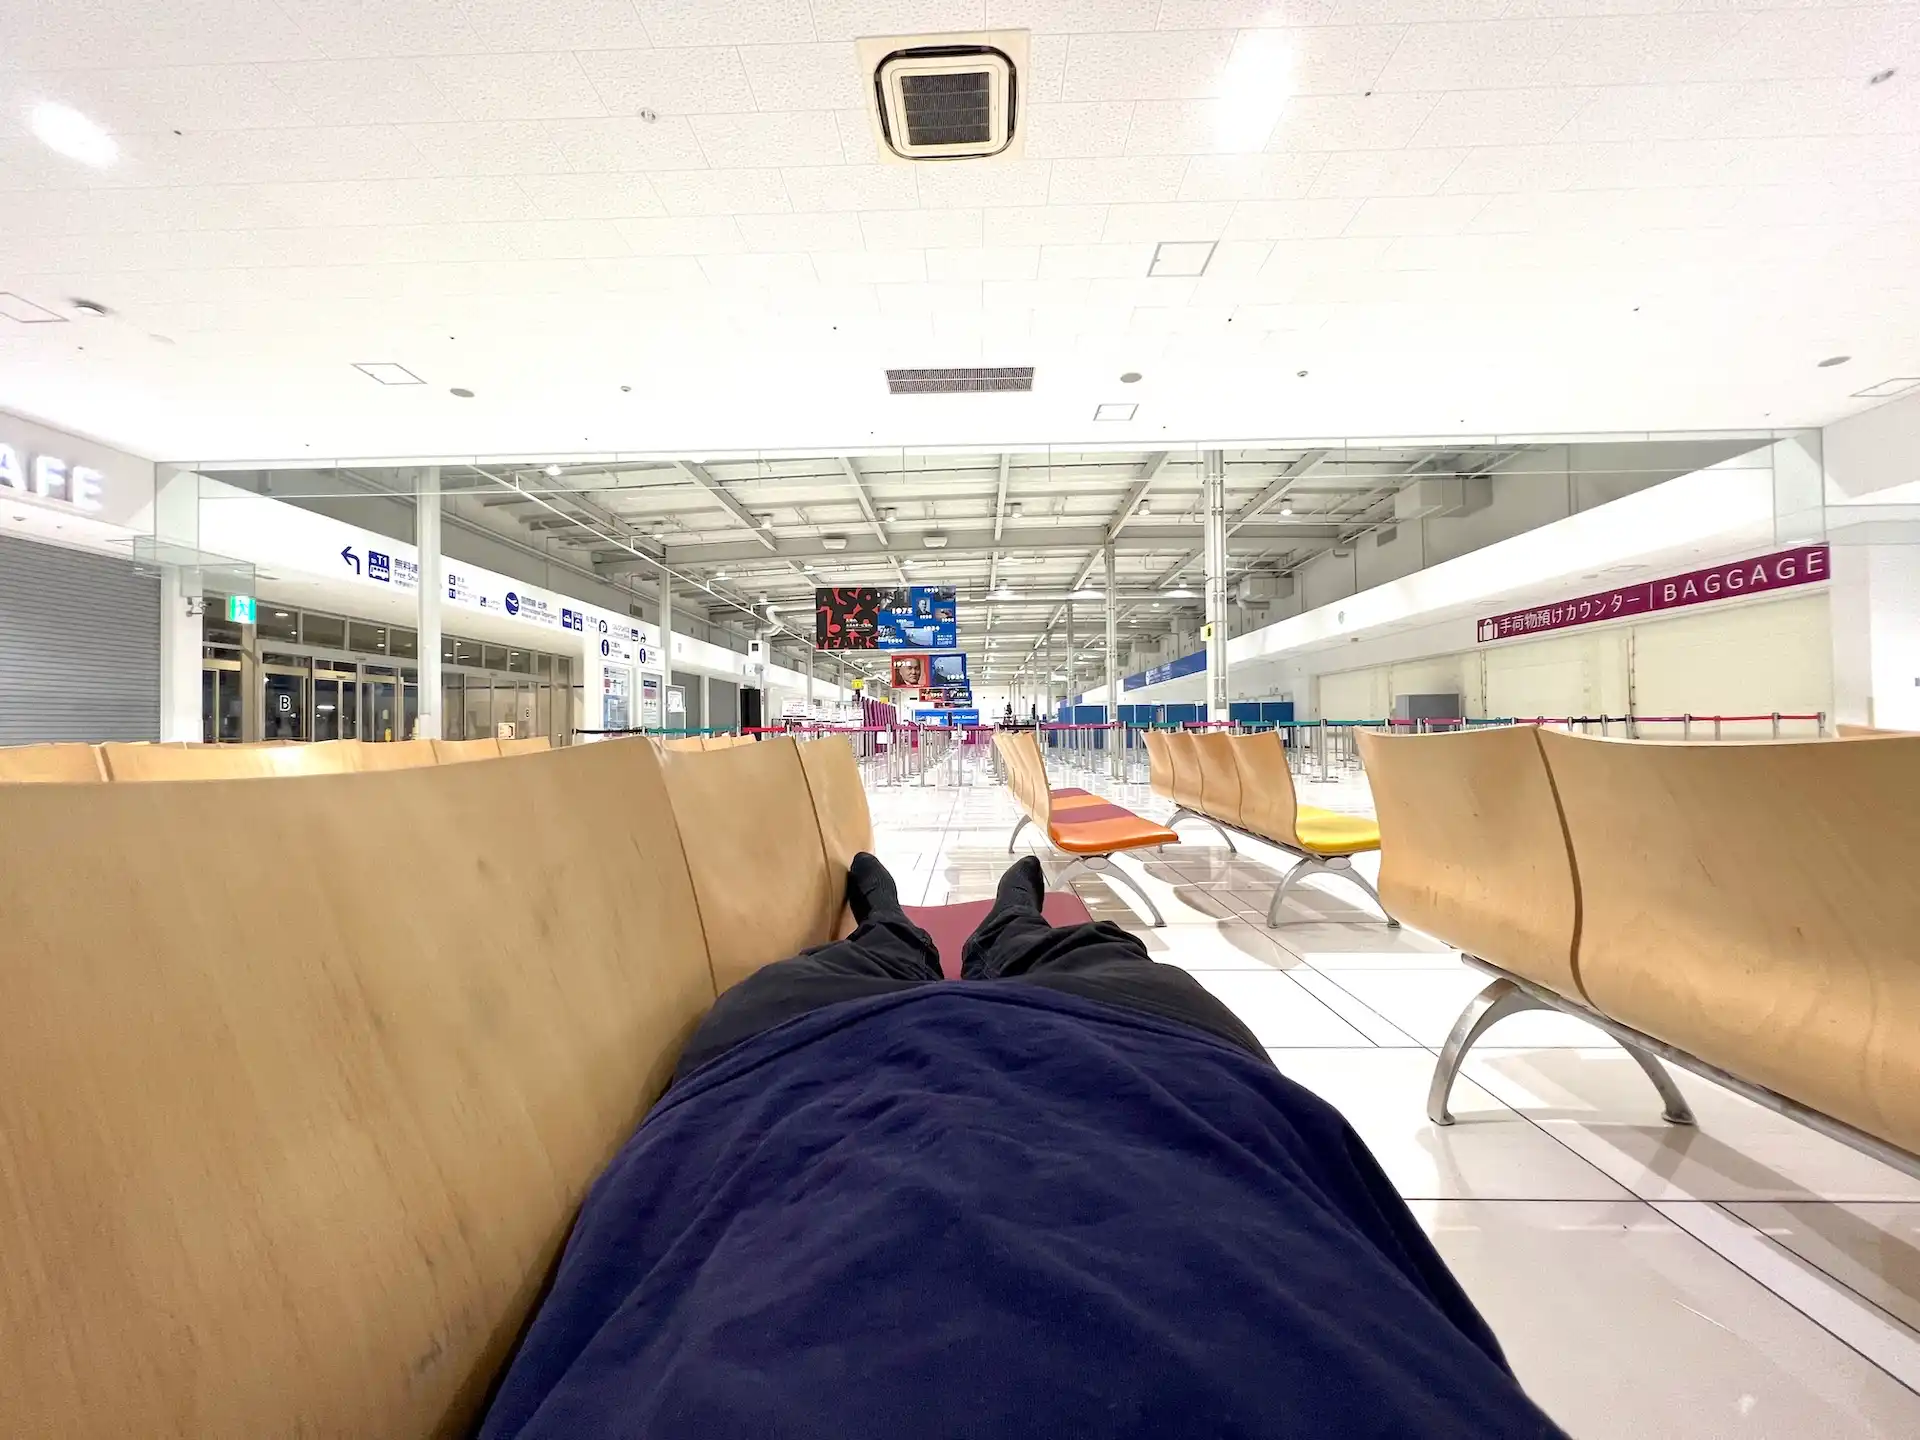
I didn’t book a hotel this time. Instead, I spent the night on a bench inside Terminal 2.
Since I got such a cheap flight ticket, I decided to save money this way.Check-in starts at 5:30 AM.
The terminal was surprisingly comfortable thanks to good air conditioning, even at night.
It was also quiet with very few people around.There was a soft guidance chime for the visually impaired playing periodically, but it wasn’t too loud.
I found an available bench, laid down, and managed to get some rest.
5:37 AM — I woke up.
My body ached a bit, but I actually slept better than expected.
I brushed my teeth and quickly freshened up.The airport was still quiet with only a few people around.
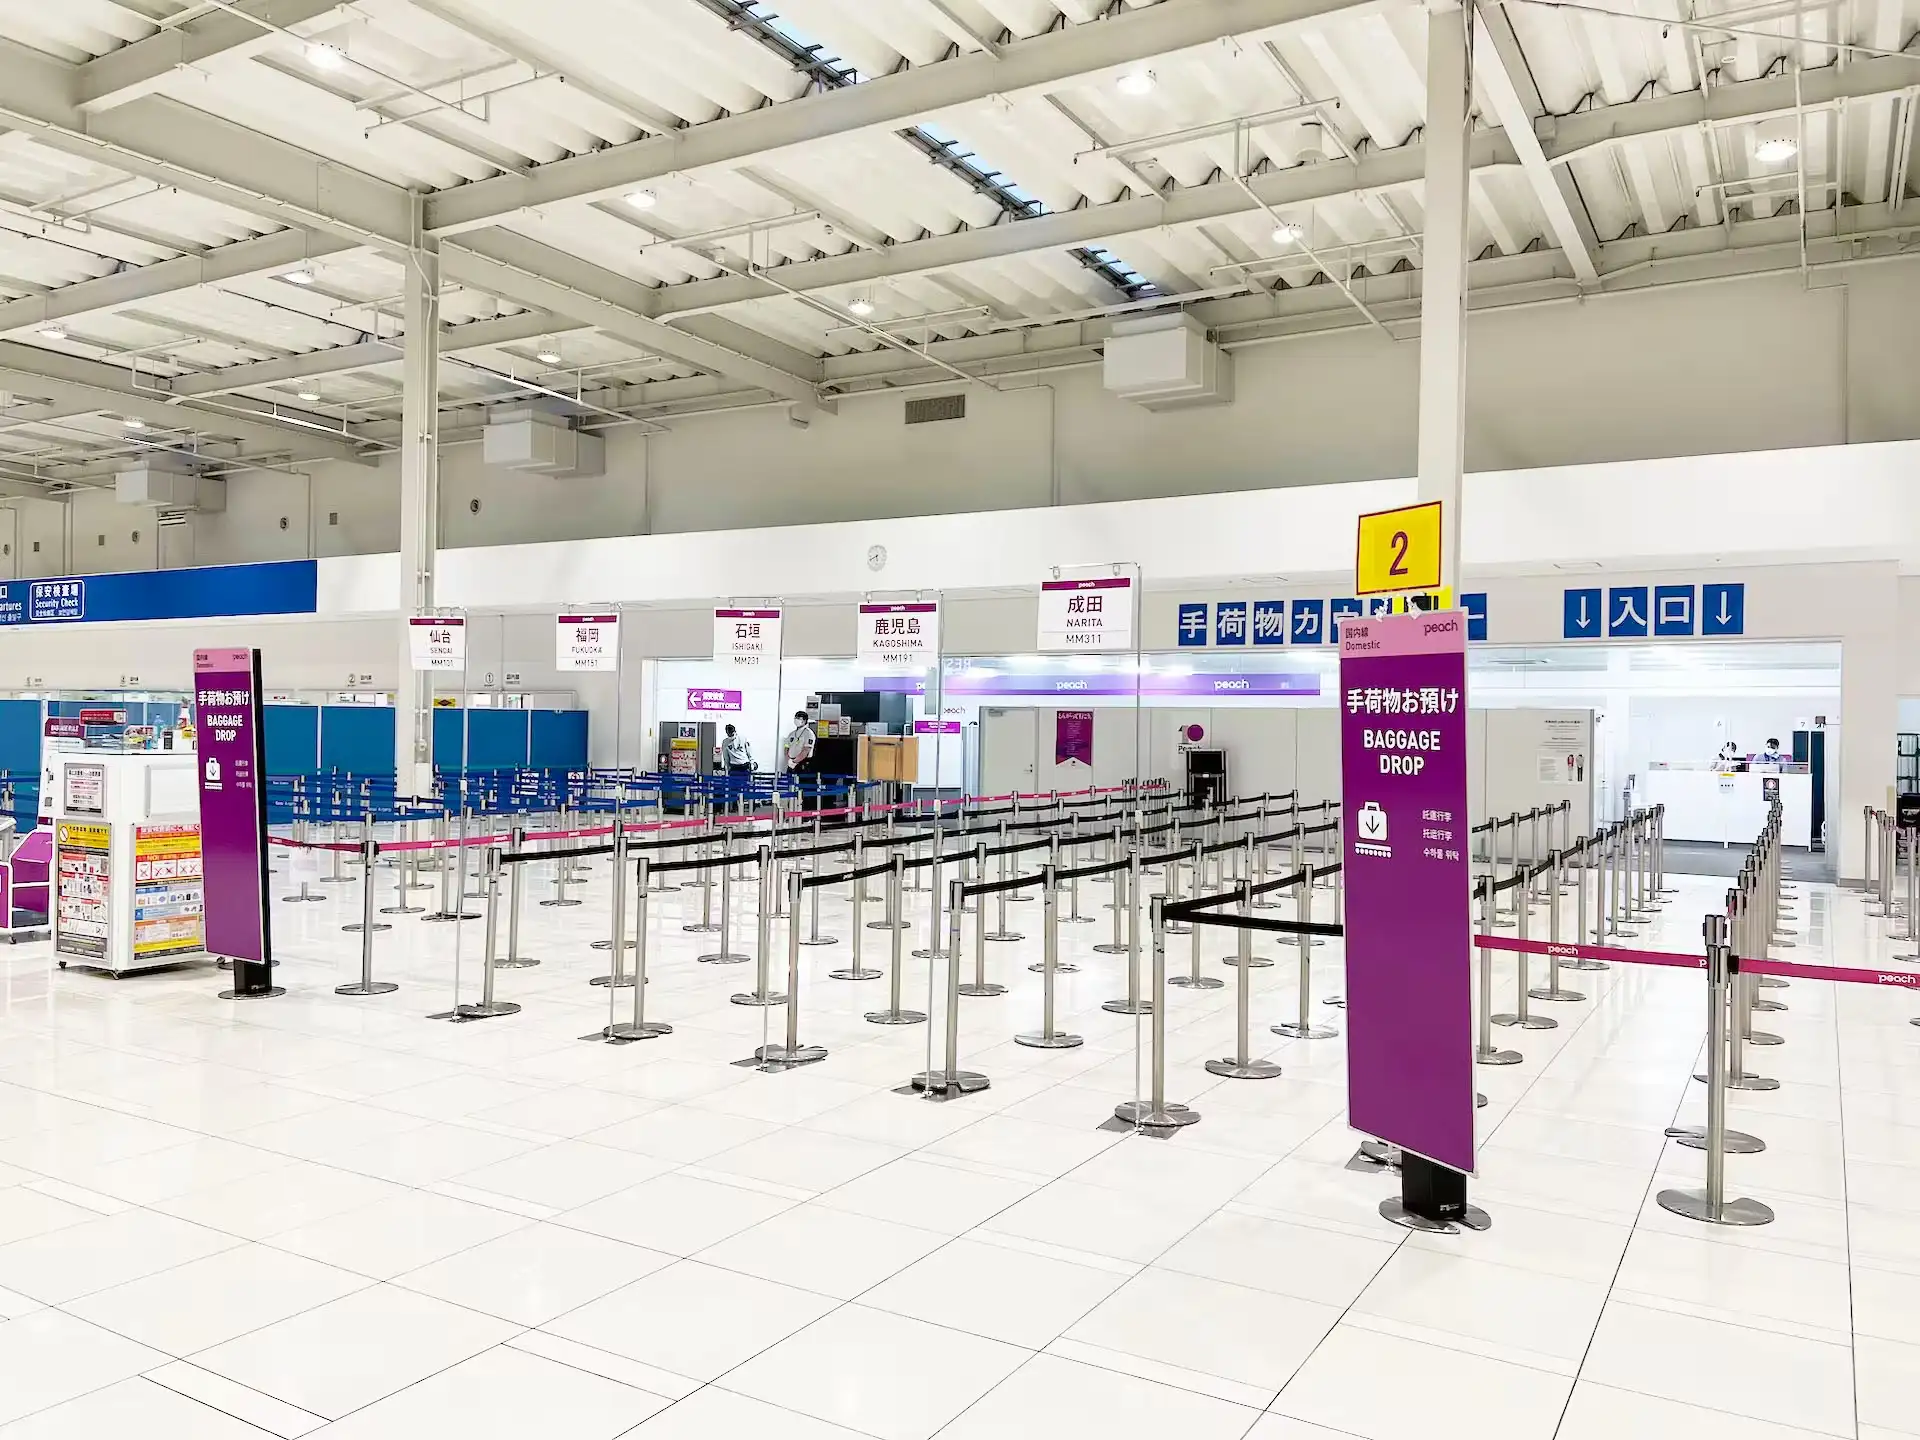
I printed my boarding pass at a self-service kiosk and checked my luggage at the counter.
Then I passed through security and headed to the gate.
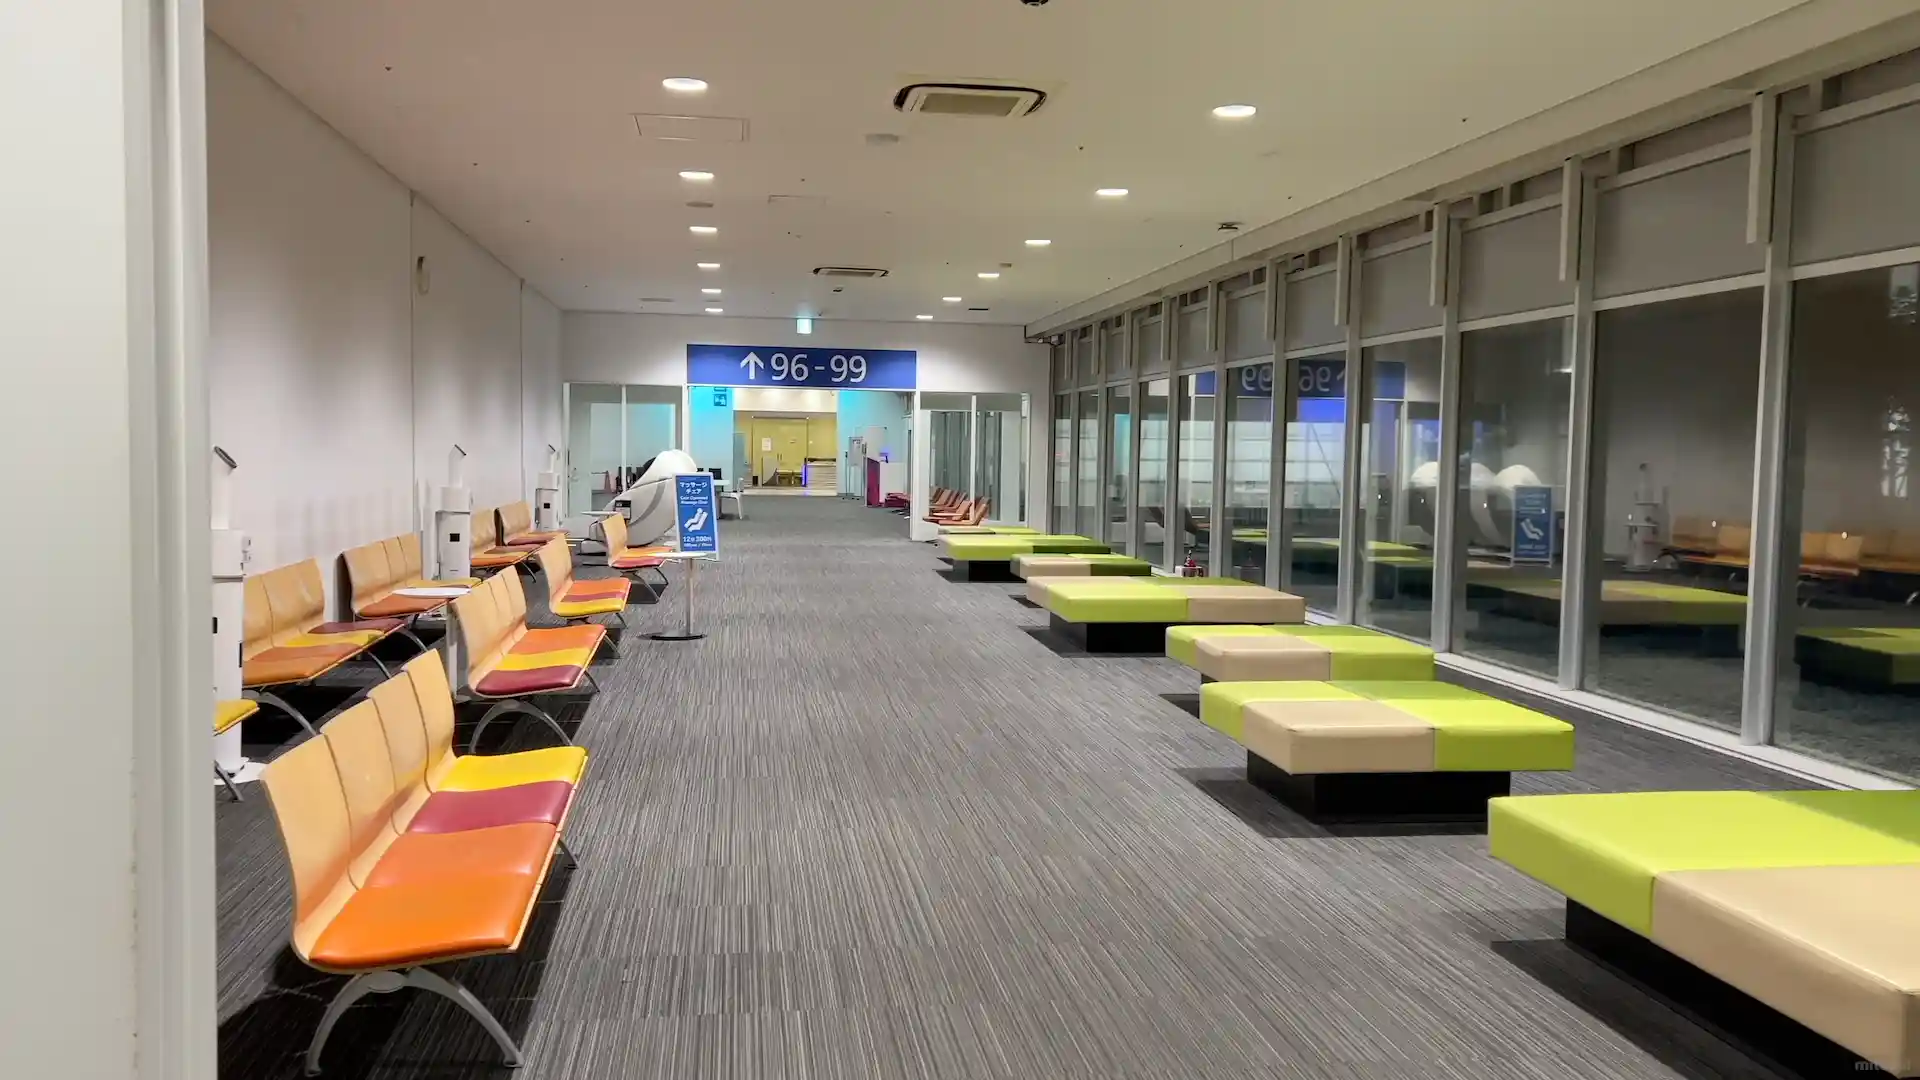
After clearing security, I entered the waiting area.
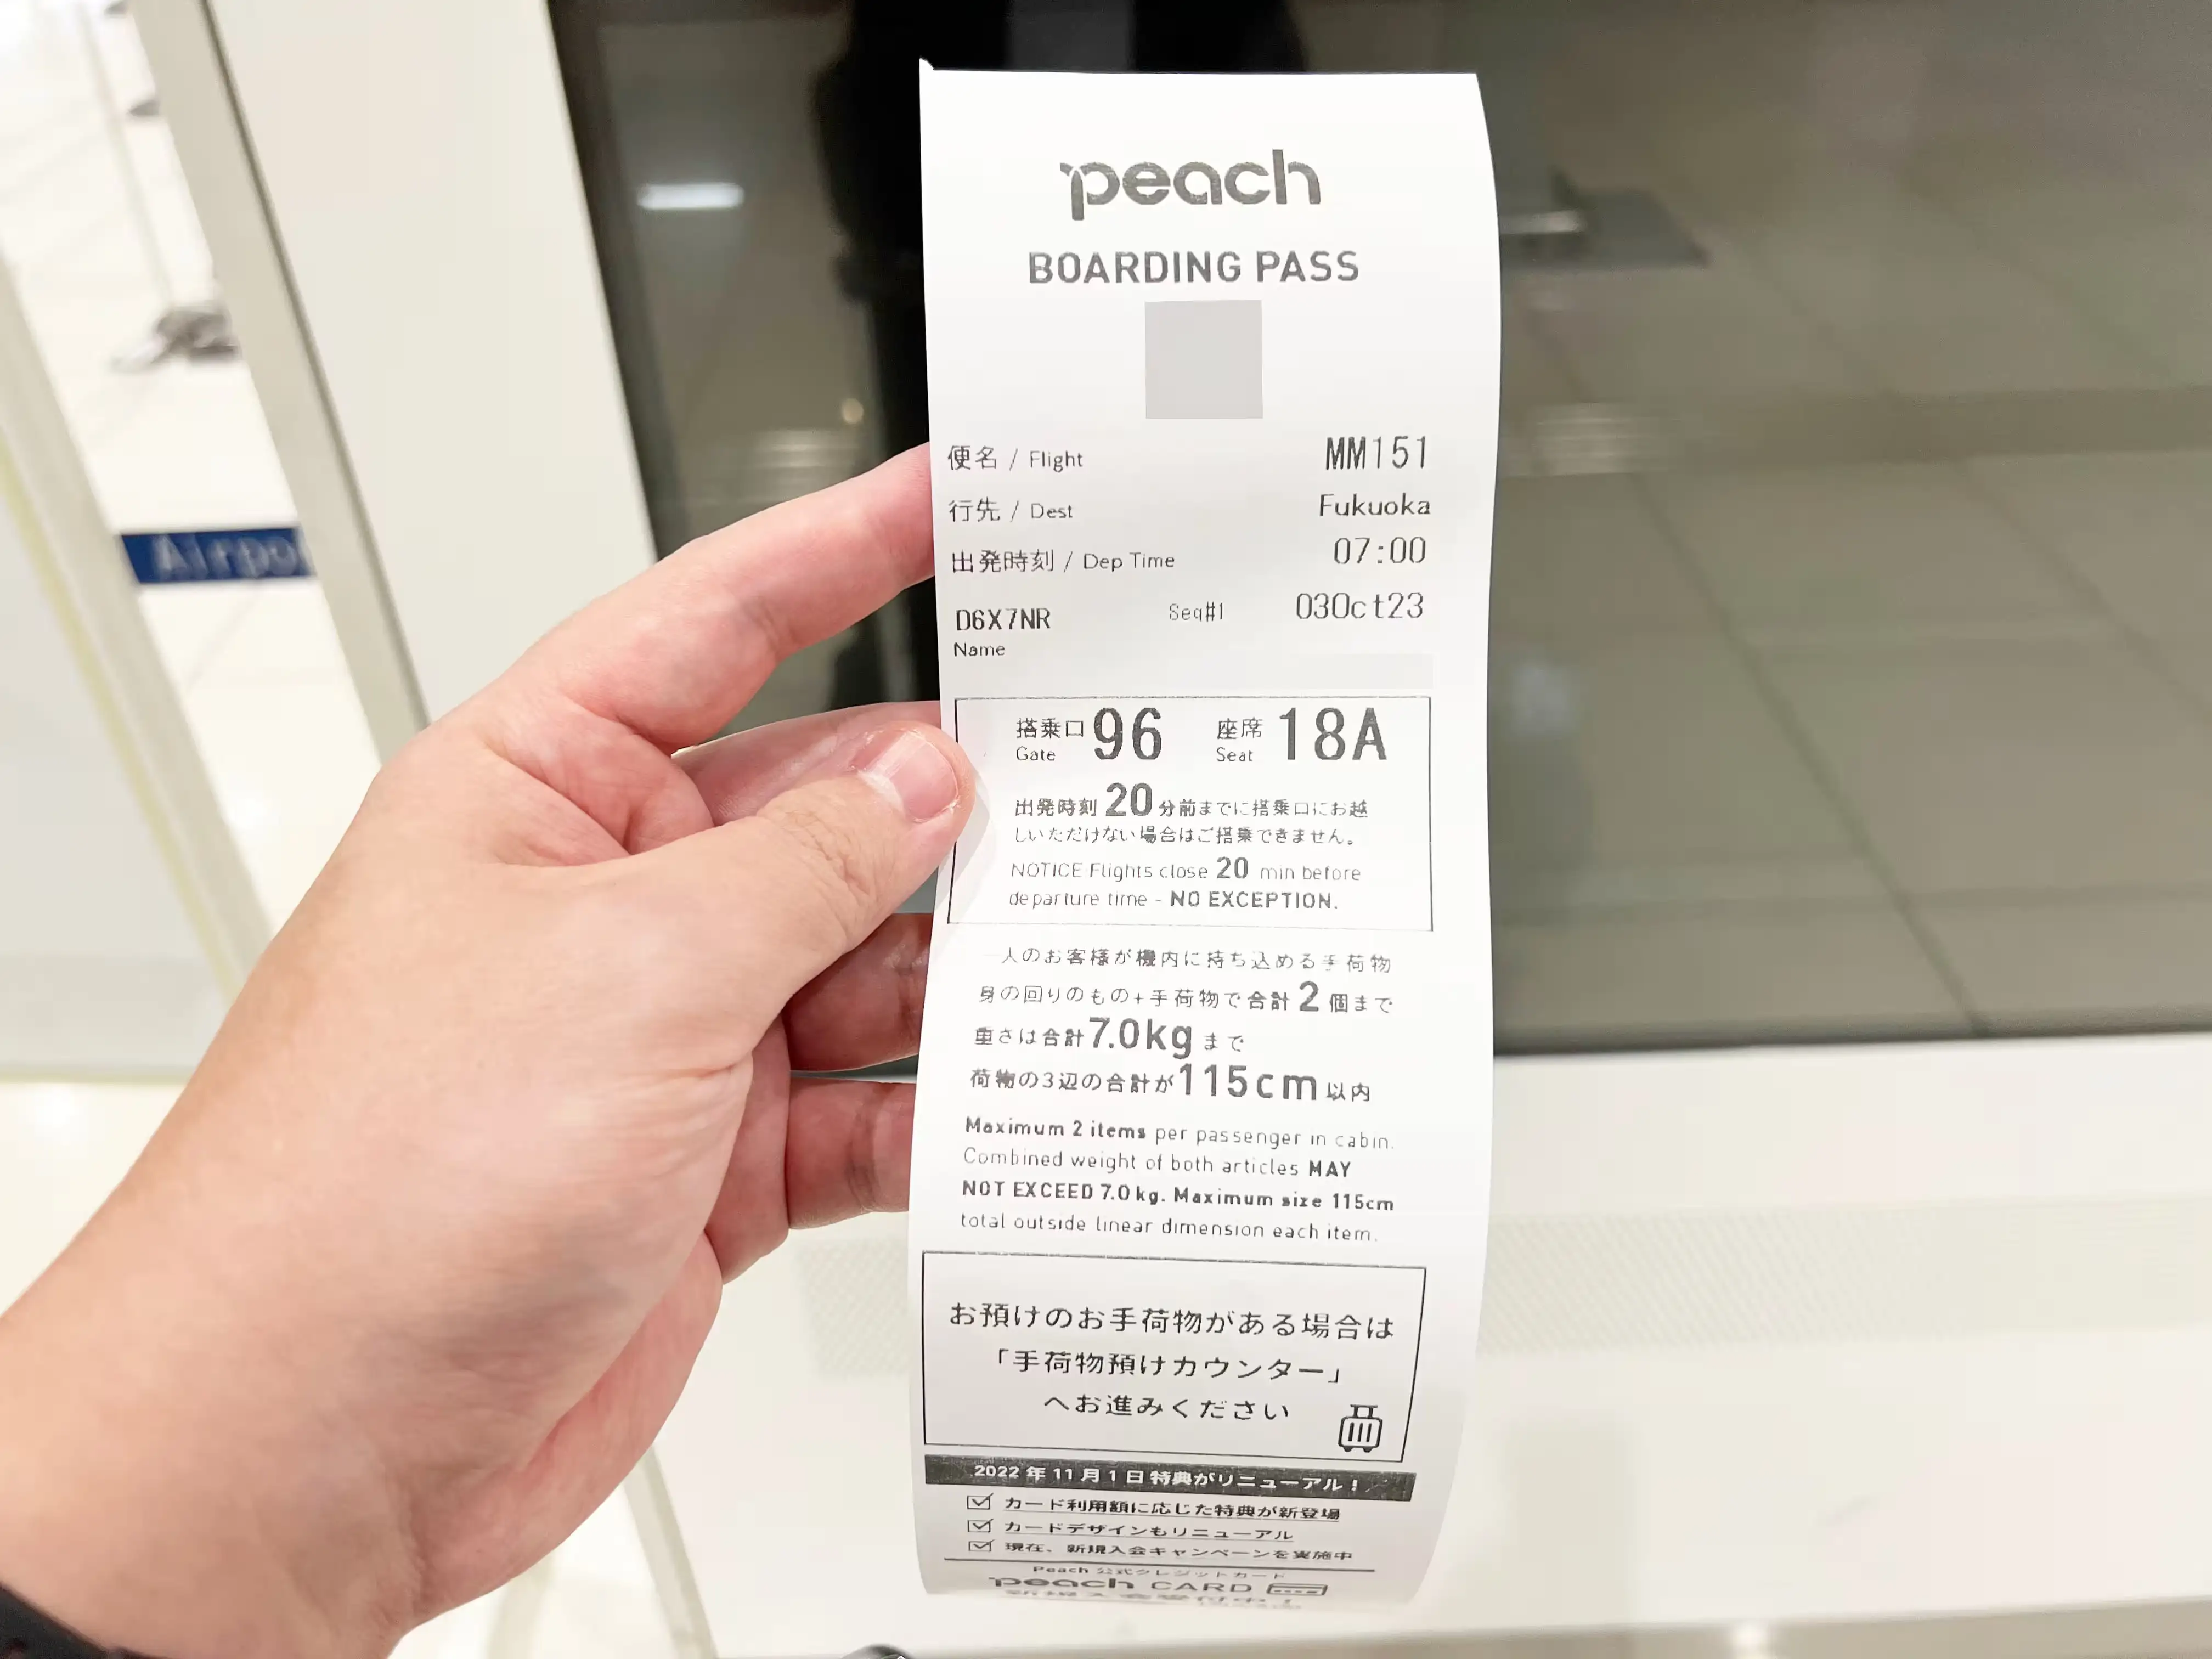
I checked the gate number on my boarding pass and looked for it.
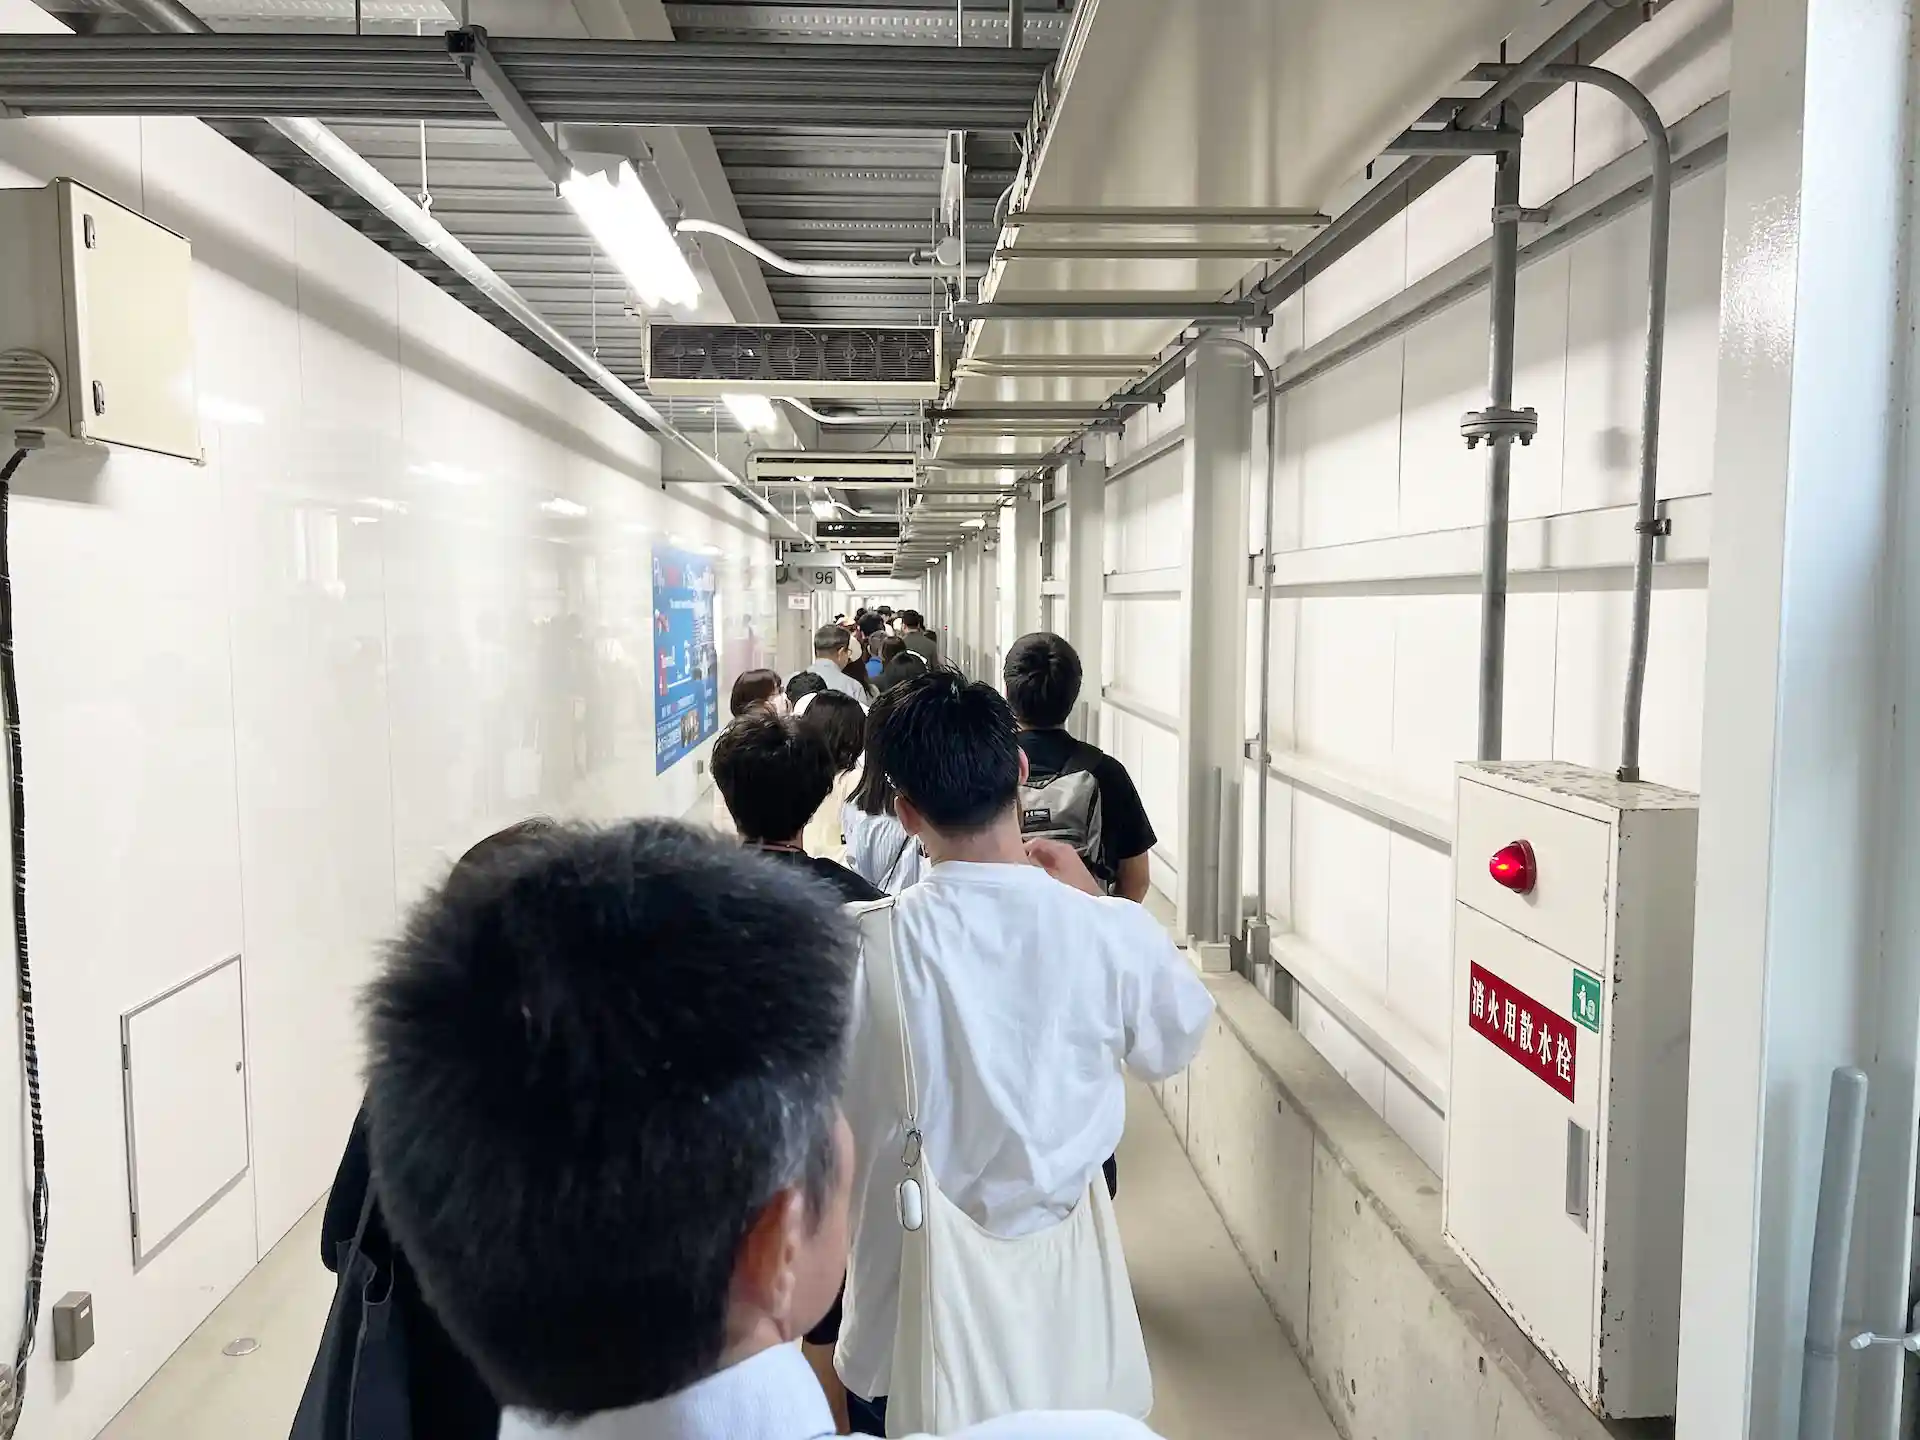
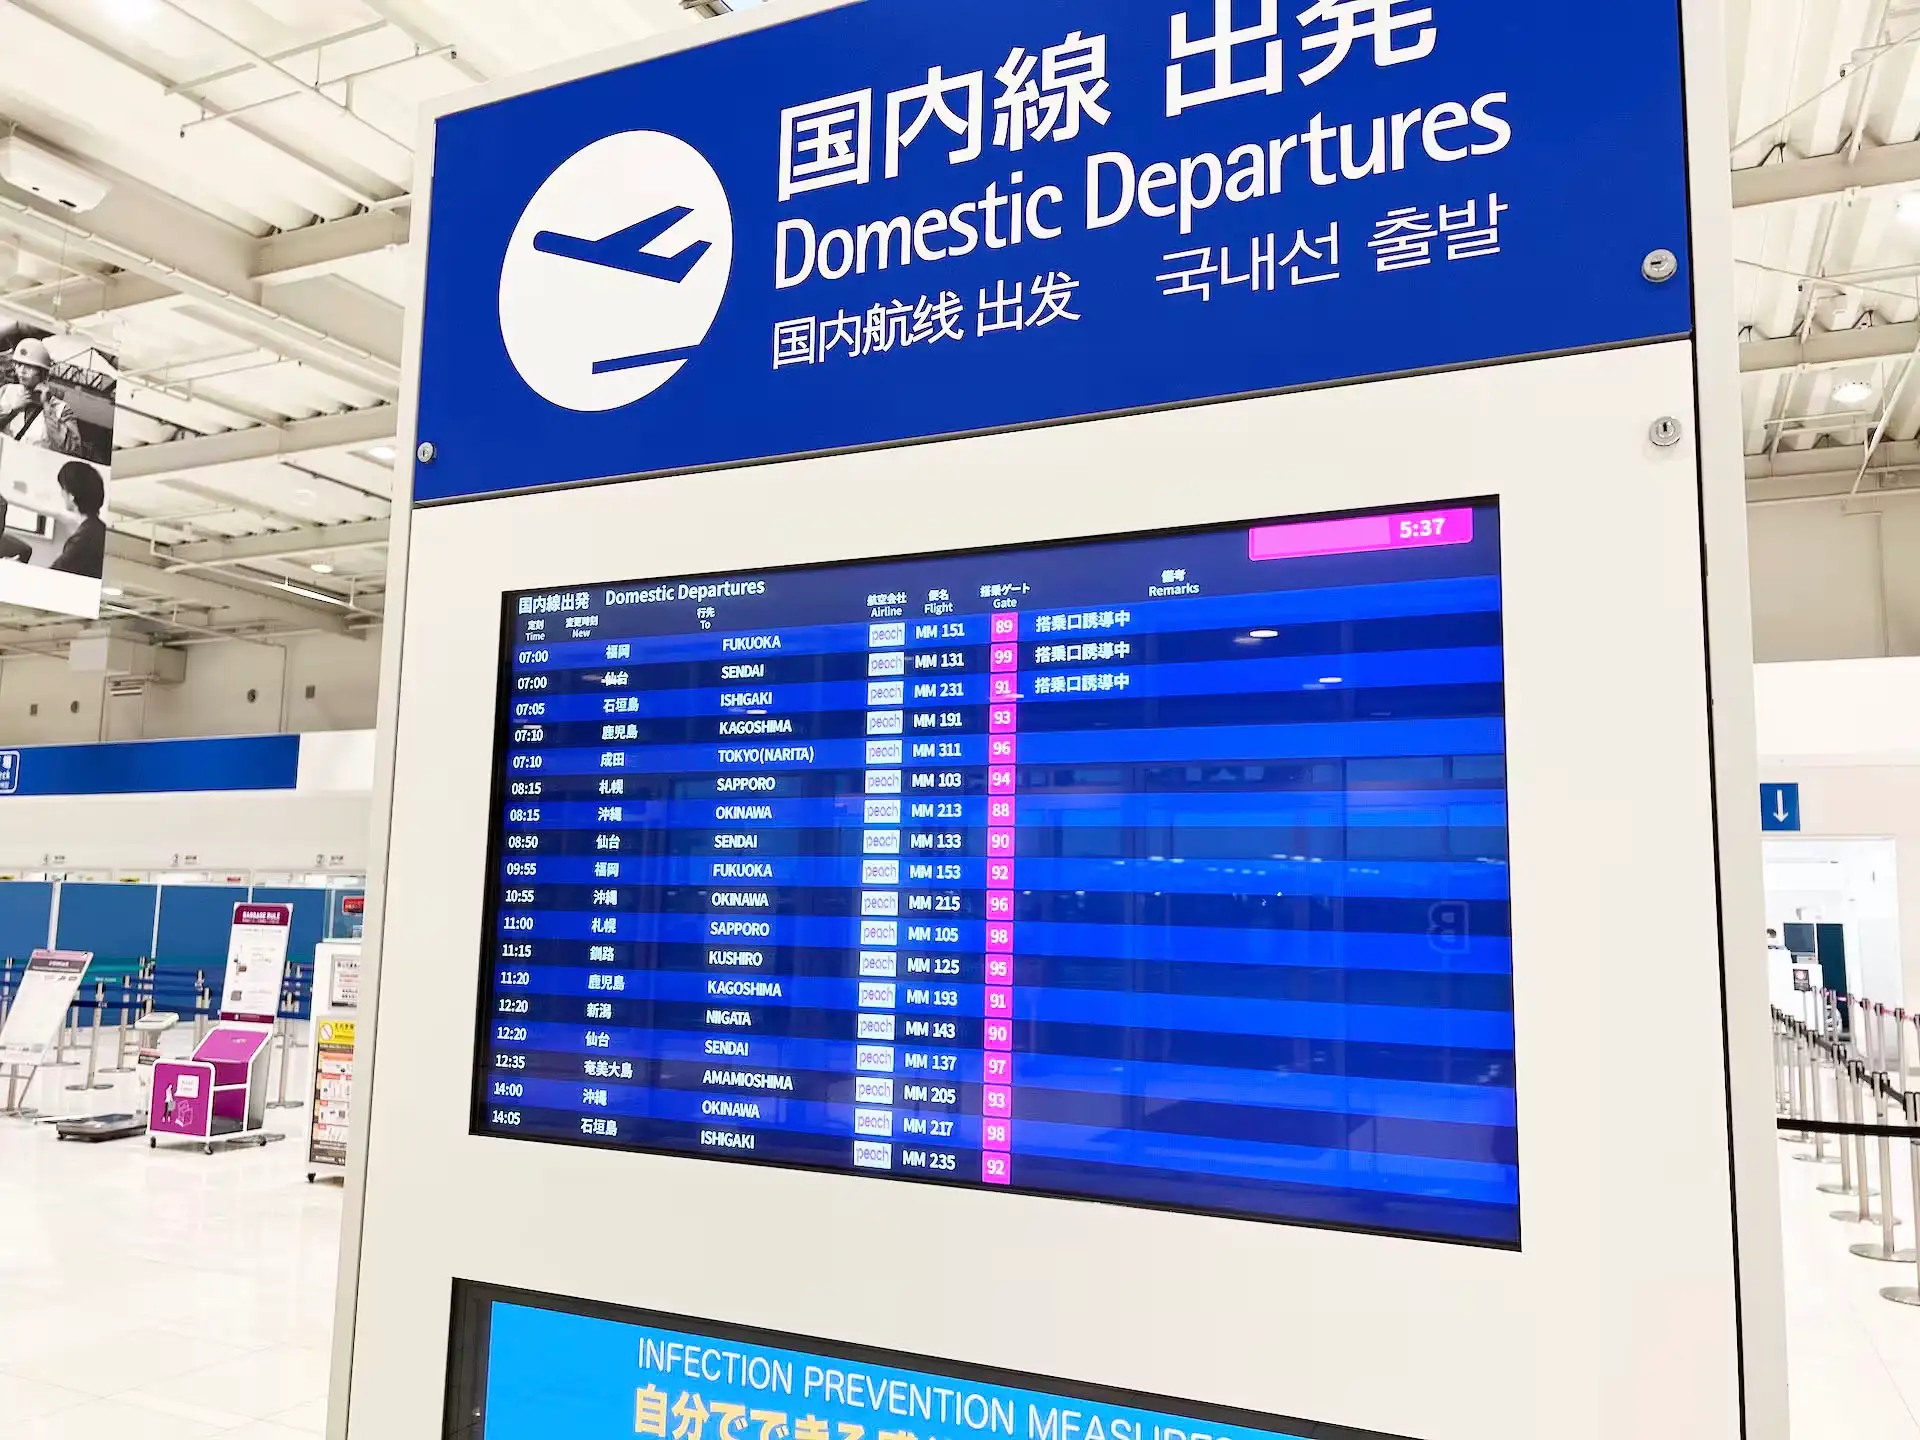
Each corridor had large, clearly visible gate numbers.This time it was Gate 96.
Following the signs, I reached the gate and sat on a bench to wait for boarding.
At 7:06 AM, the boarding announcement played:
“We’ll now begin boarding for passengers seated in window seats A and F in the rear of the aircraft, along with their companions. Please proceed to the gate.”I had a window seat in the rear section.
Following the instructions, I slowly walked down the corridor.
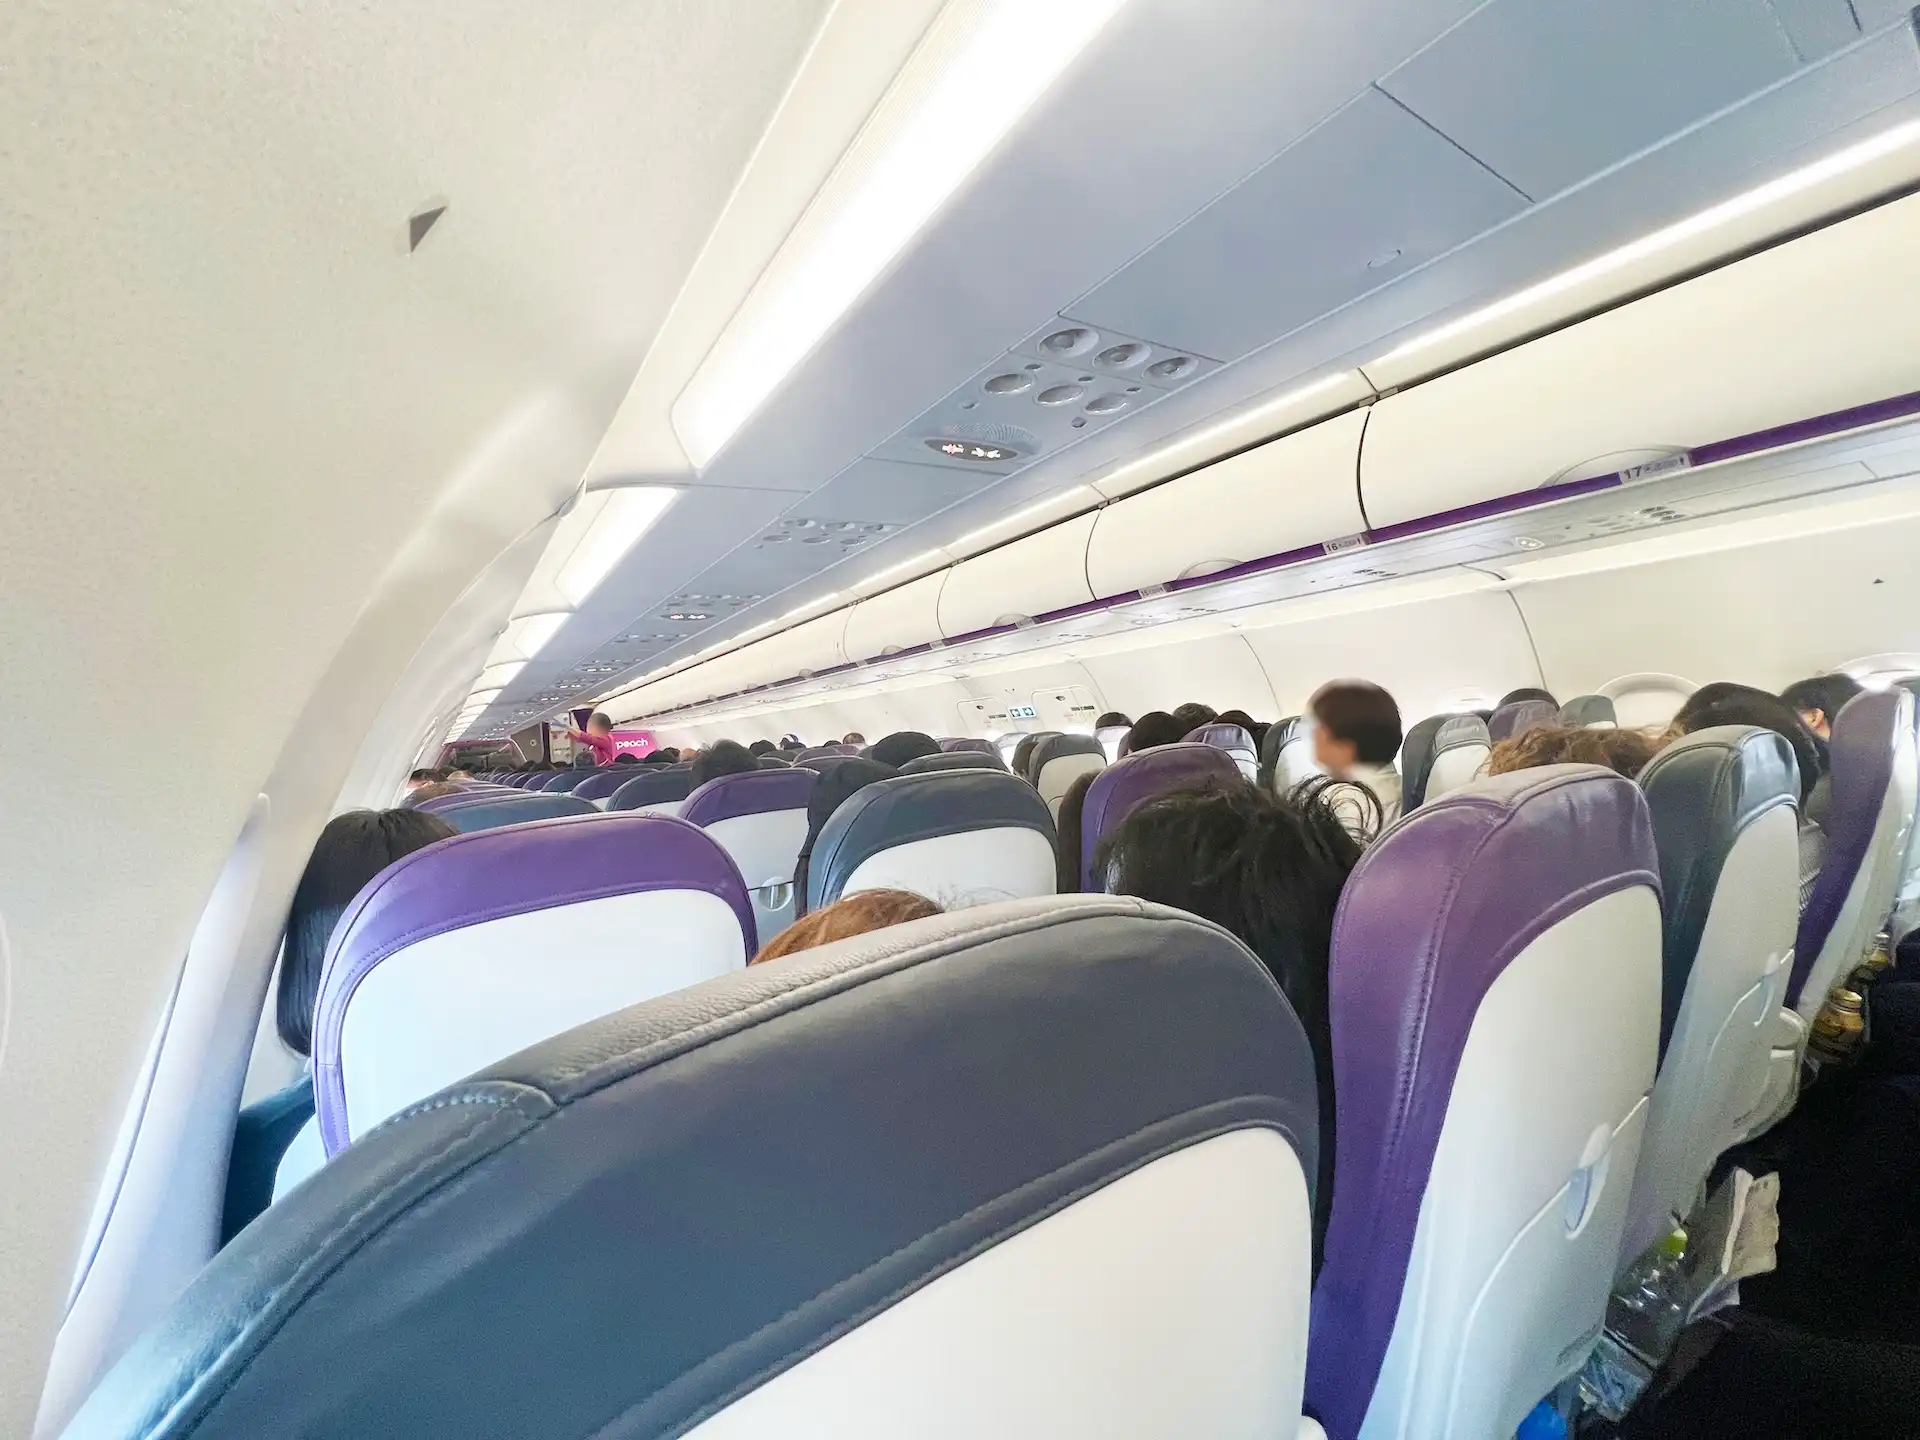
Passengers in the rear boarded first, followed by those in the front rows.Before I knew it, a long line had formed behind me.
The previously quiet area was now bustling with people.It seemed there was a delay, and we were stuck in the corridor for about five minutes.
Eventually, the line began to move, and I scanned my boarding pass at the gate.
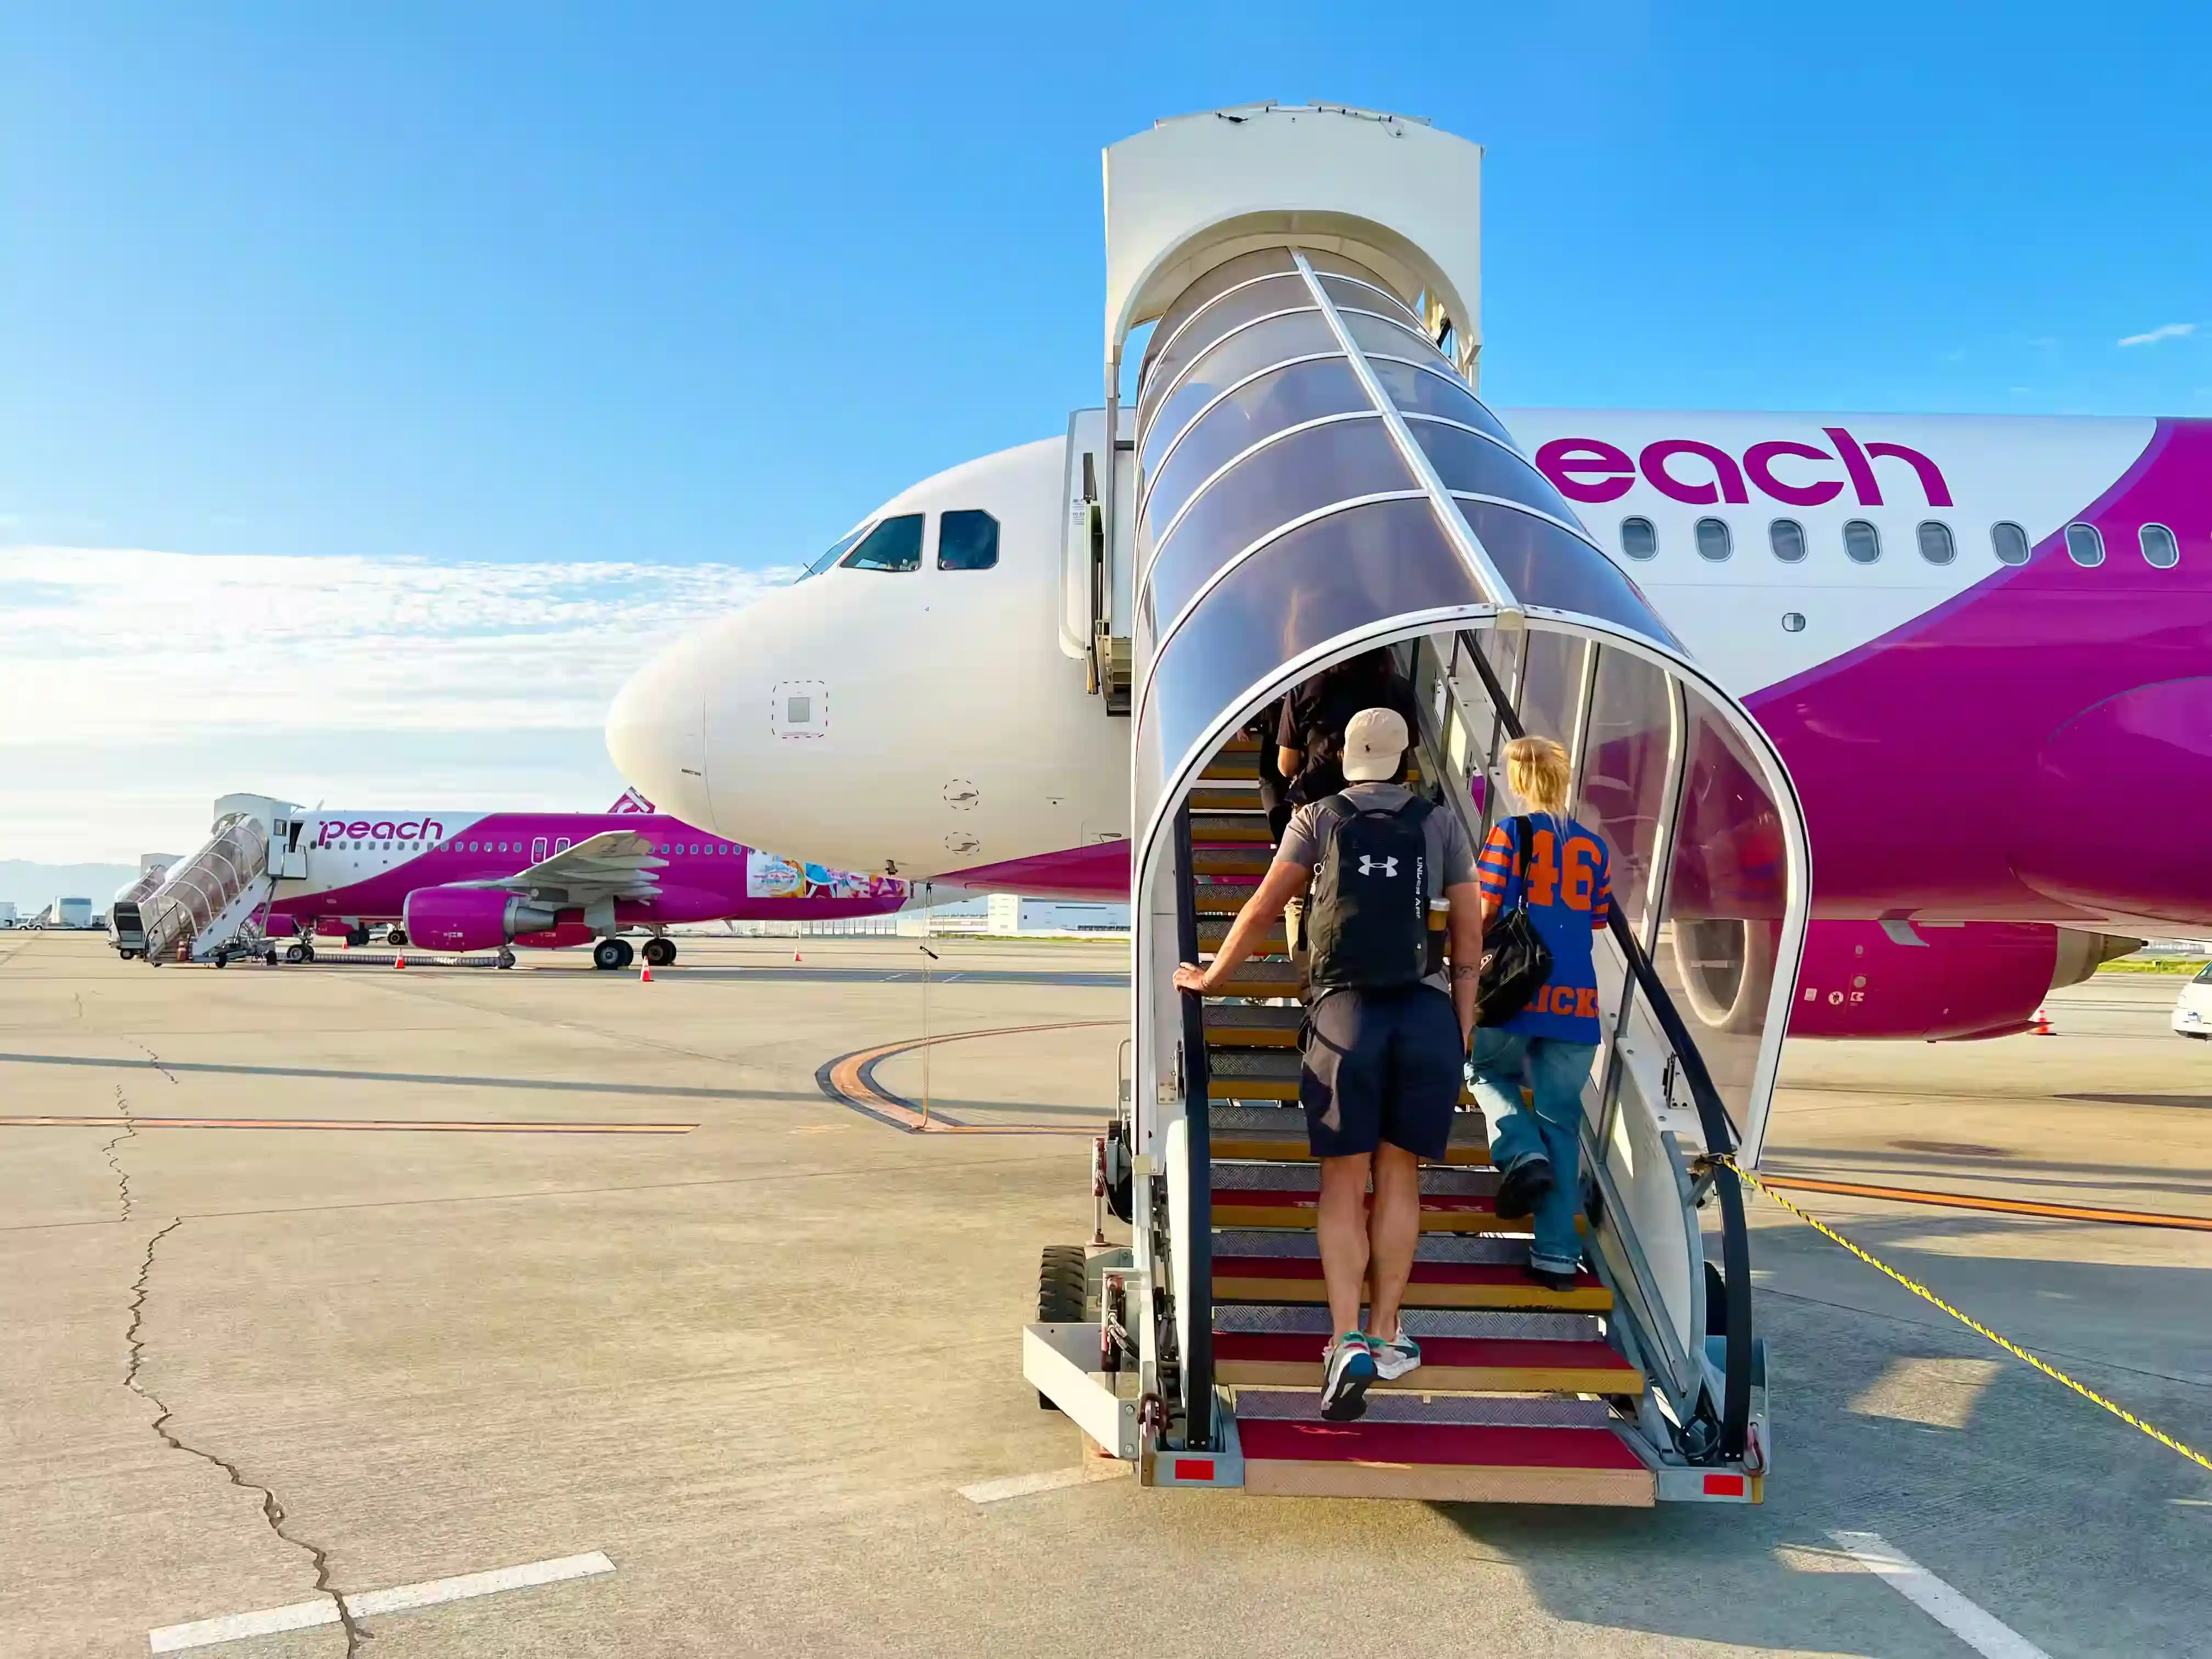
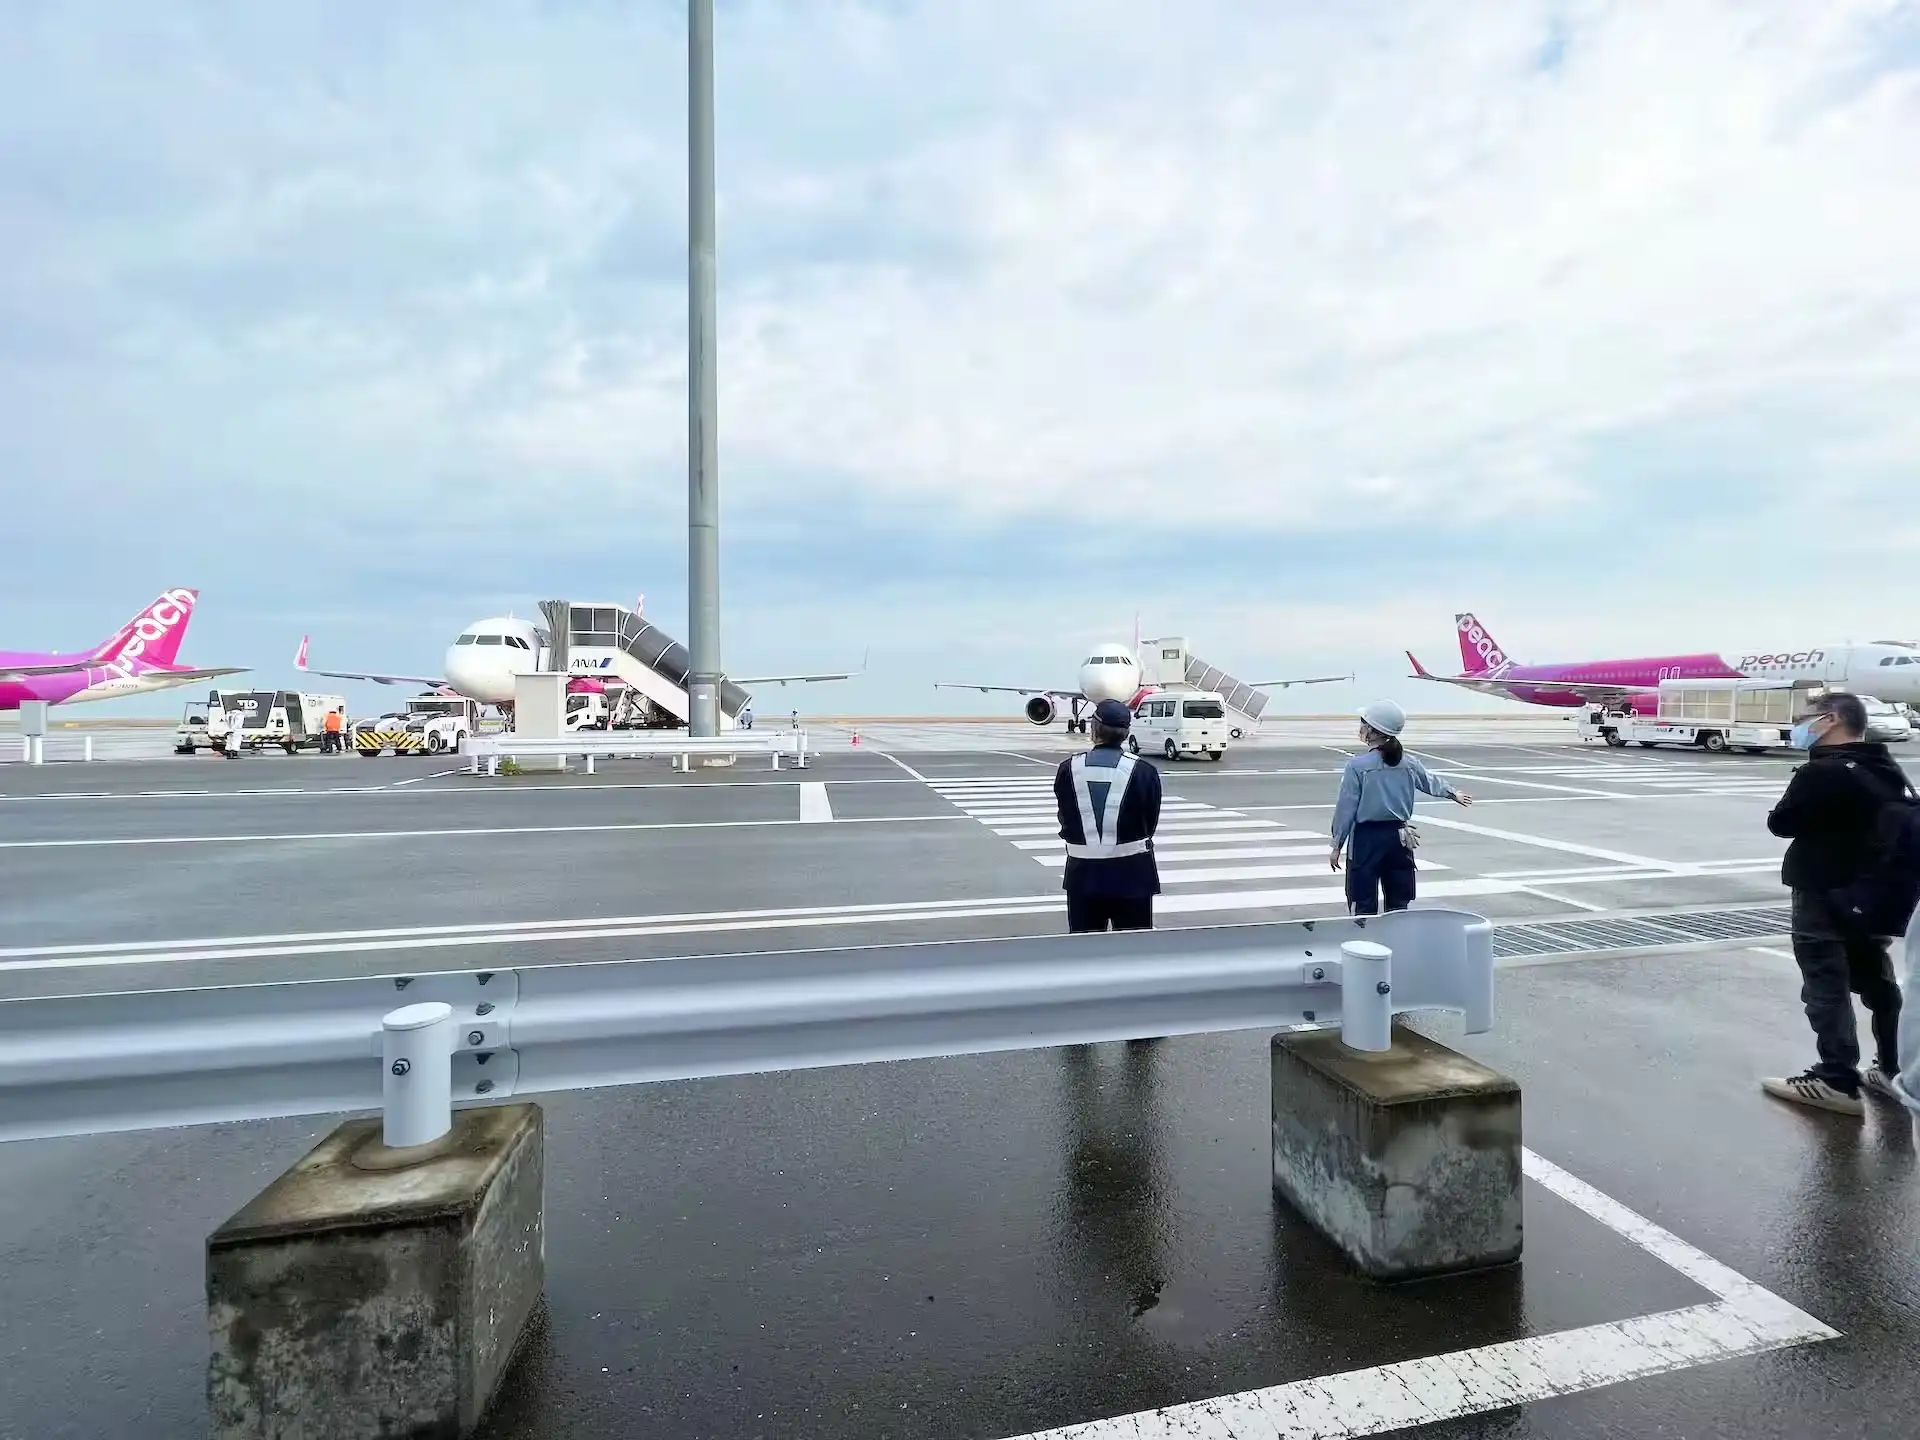
Finally, I stepped outside toward the aircraft.
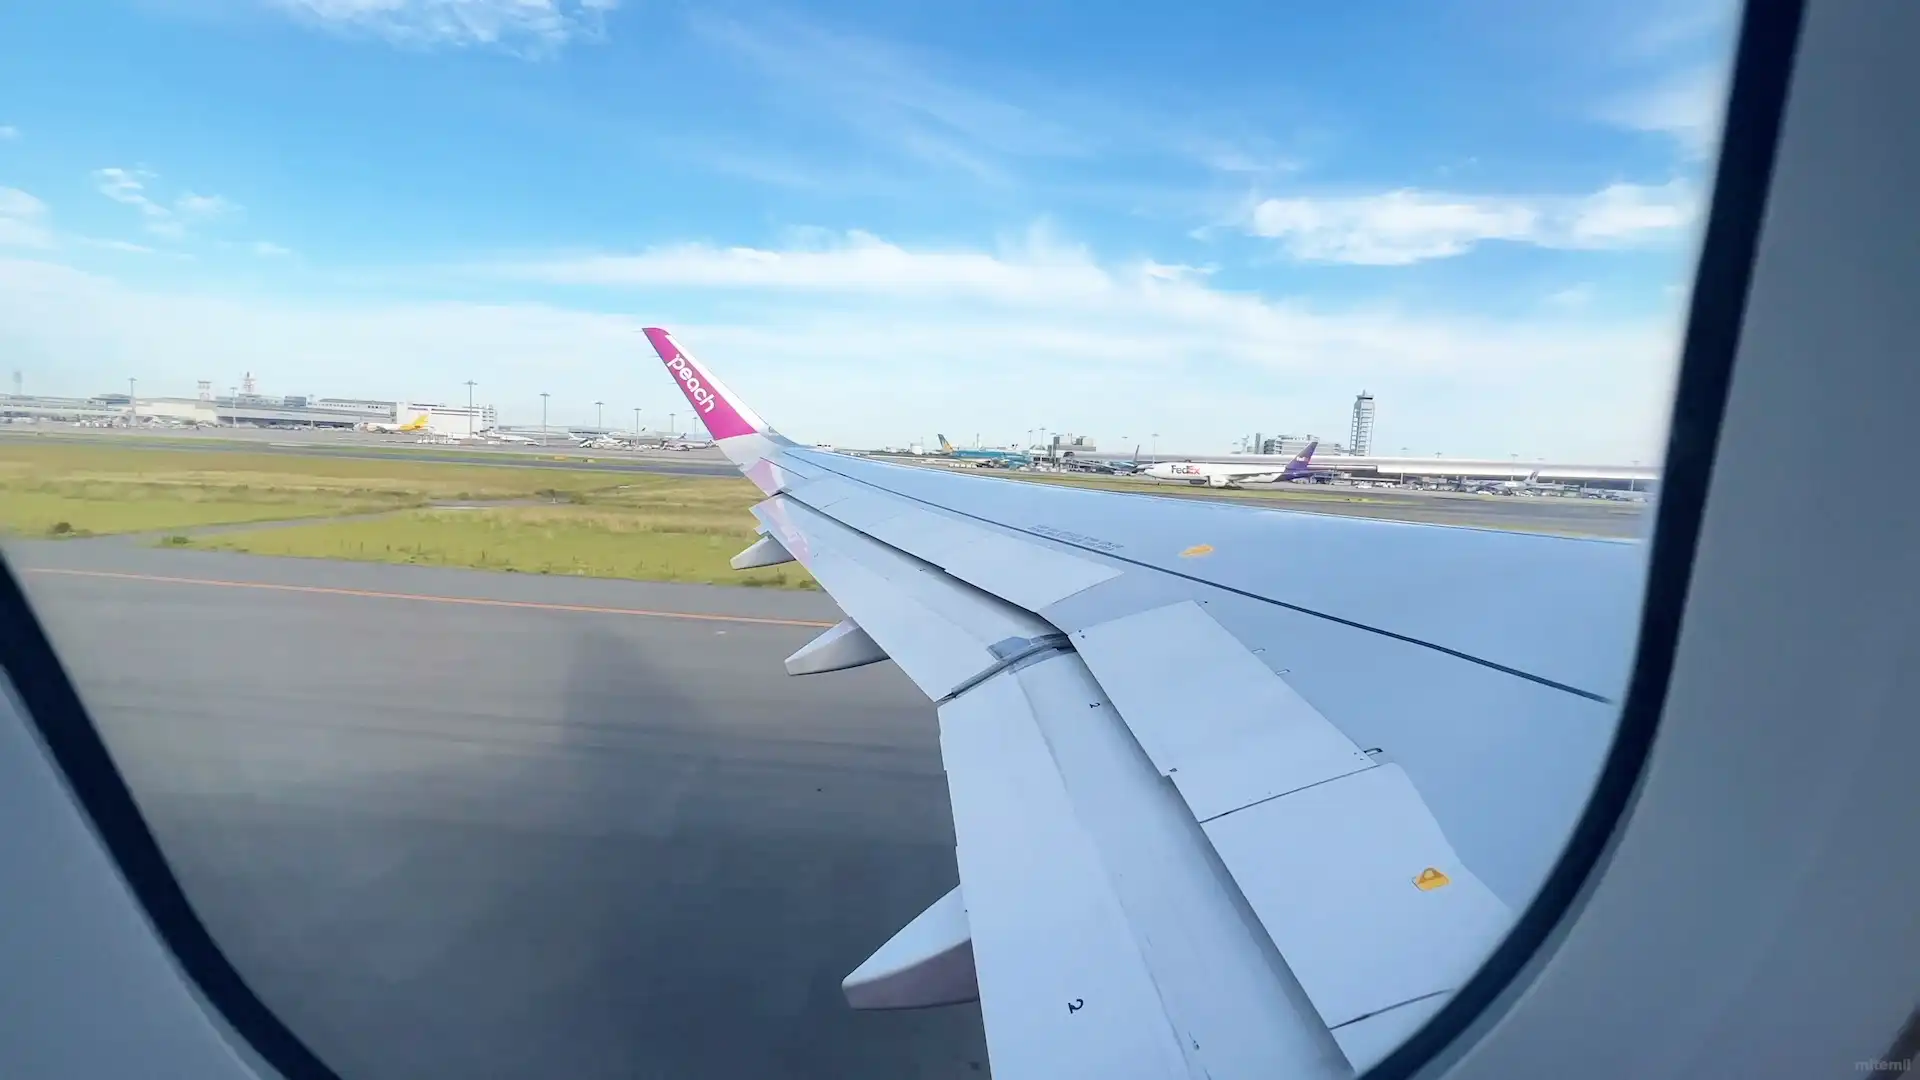
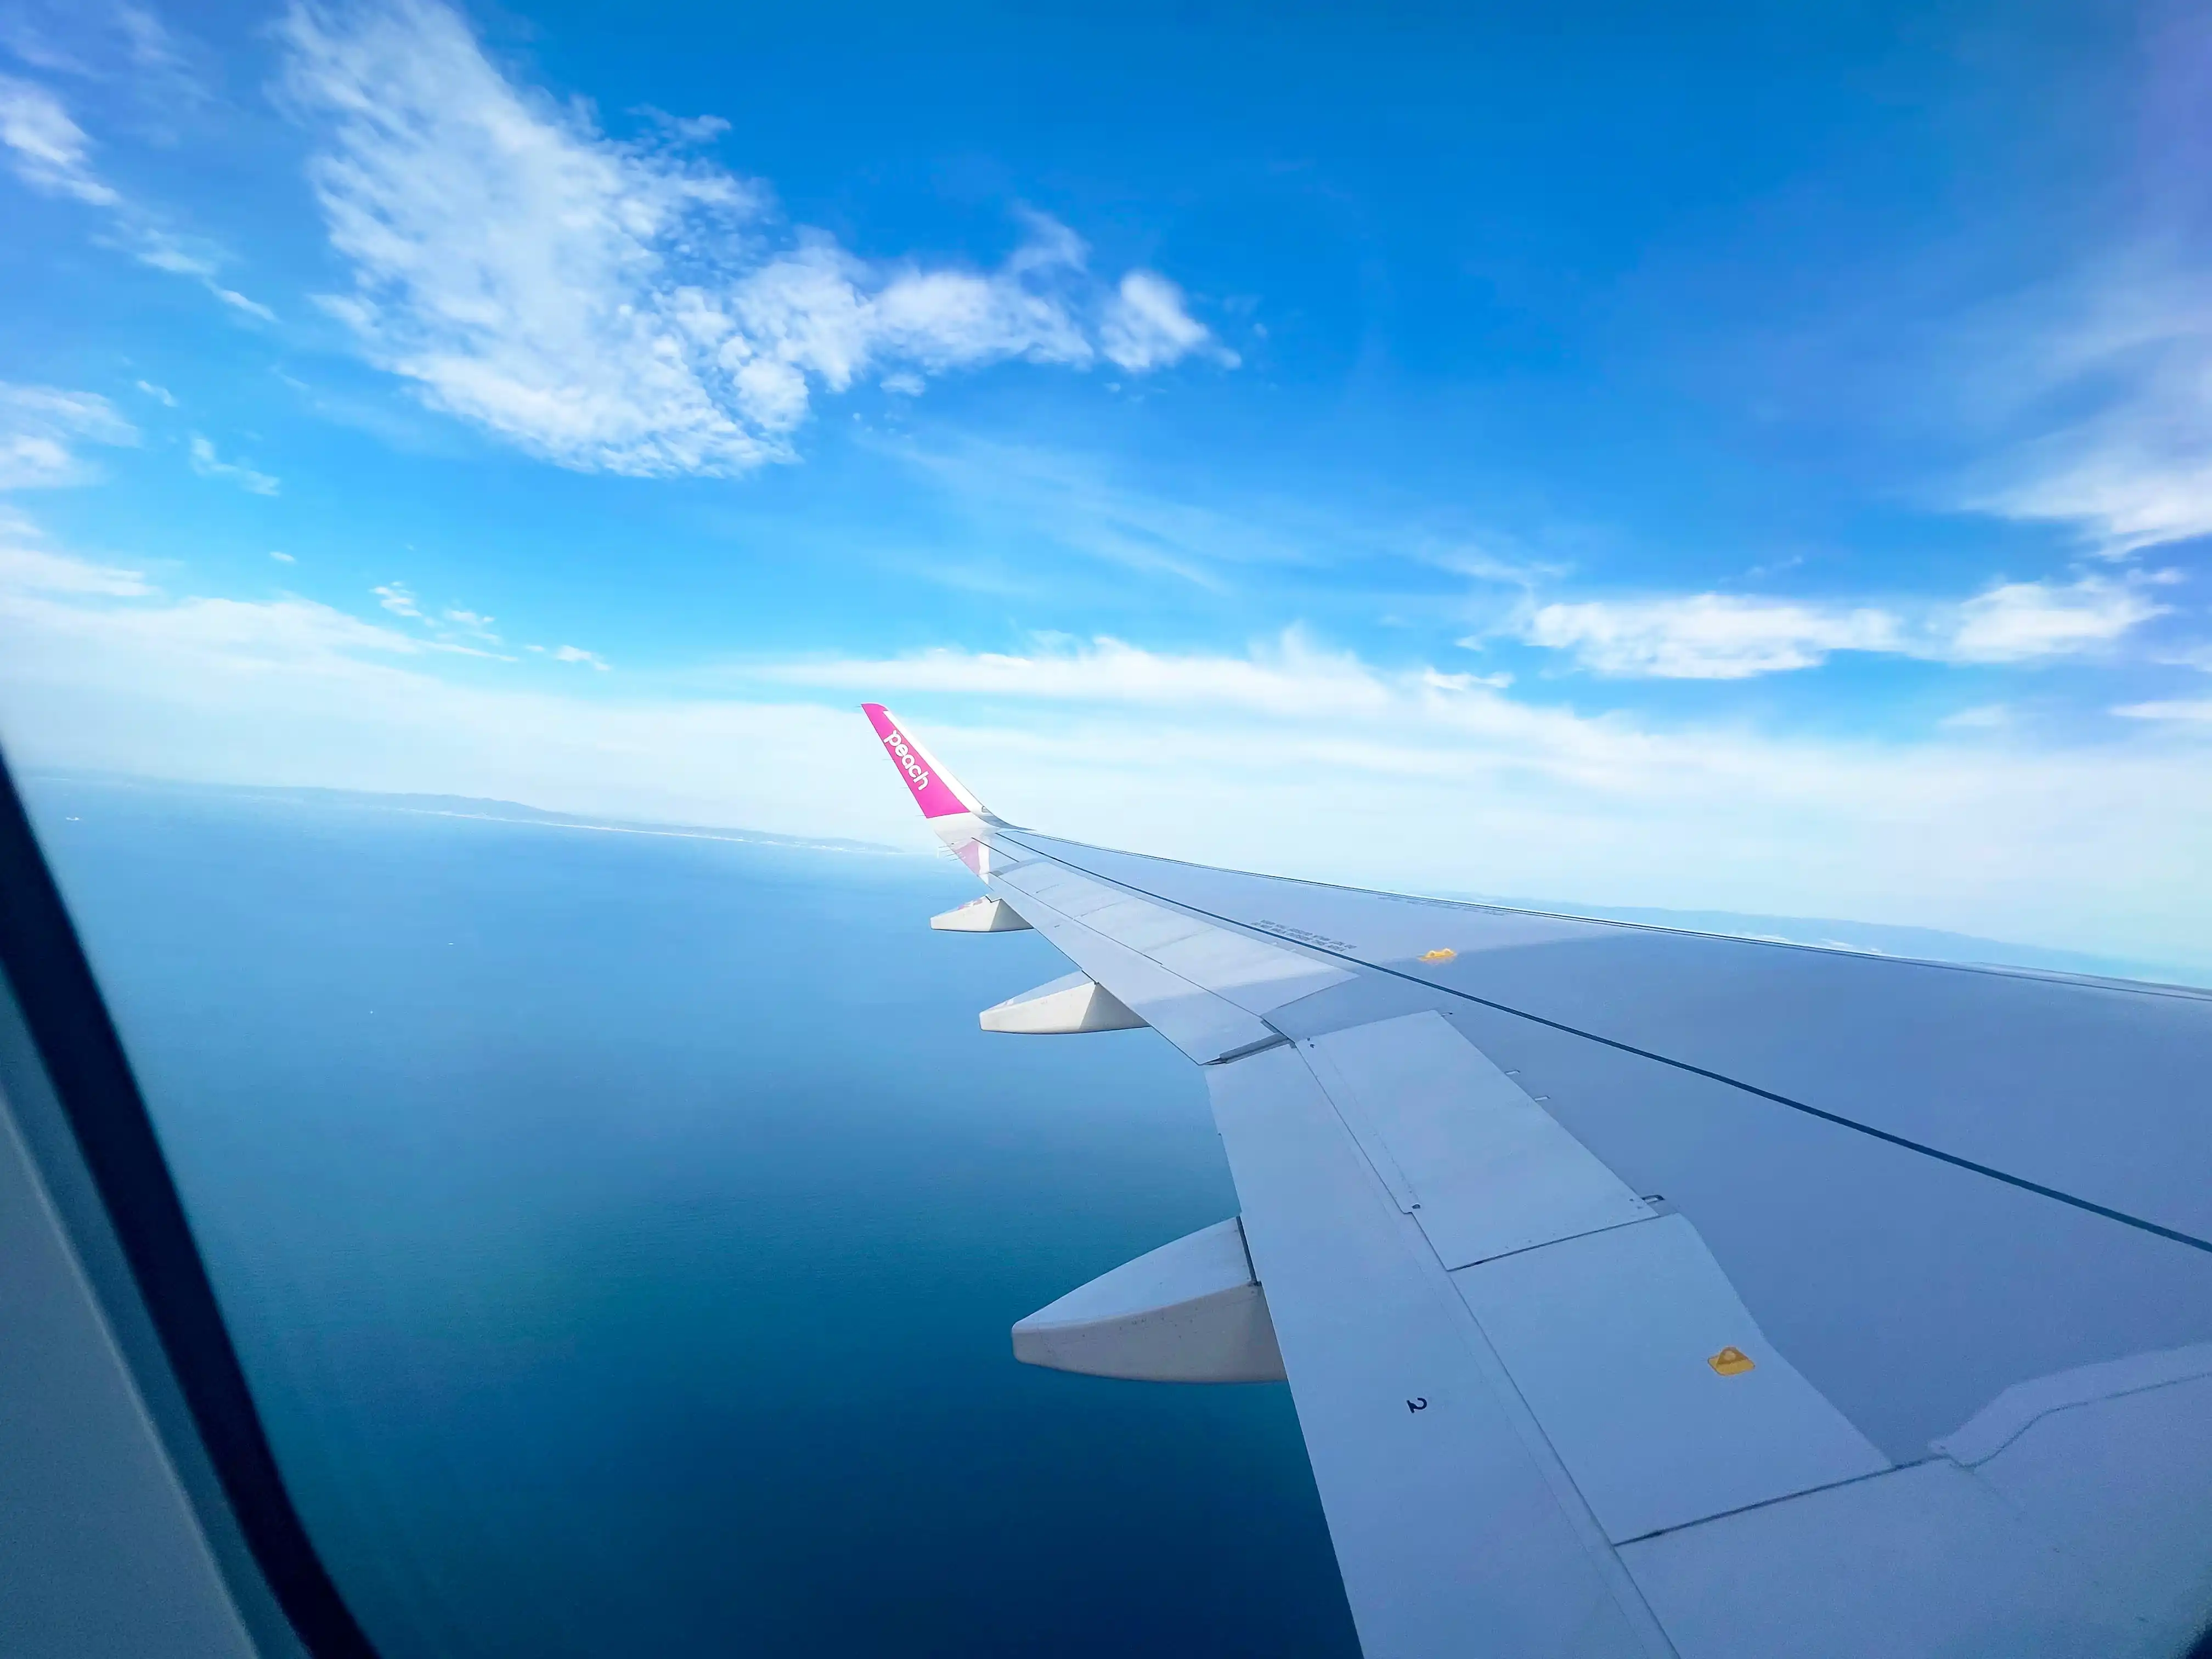
Peach’s aircraft is instantly recognizable by its fuchsia color — a unique shade between pink and purple.
It has a cute, distinctive look that sets it apart from other airlines.
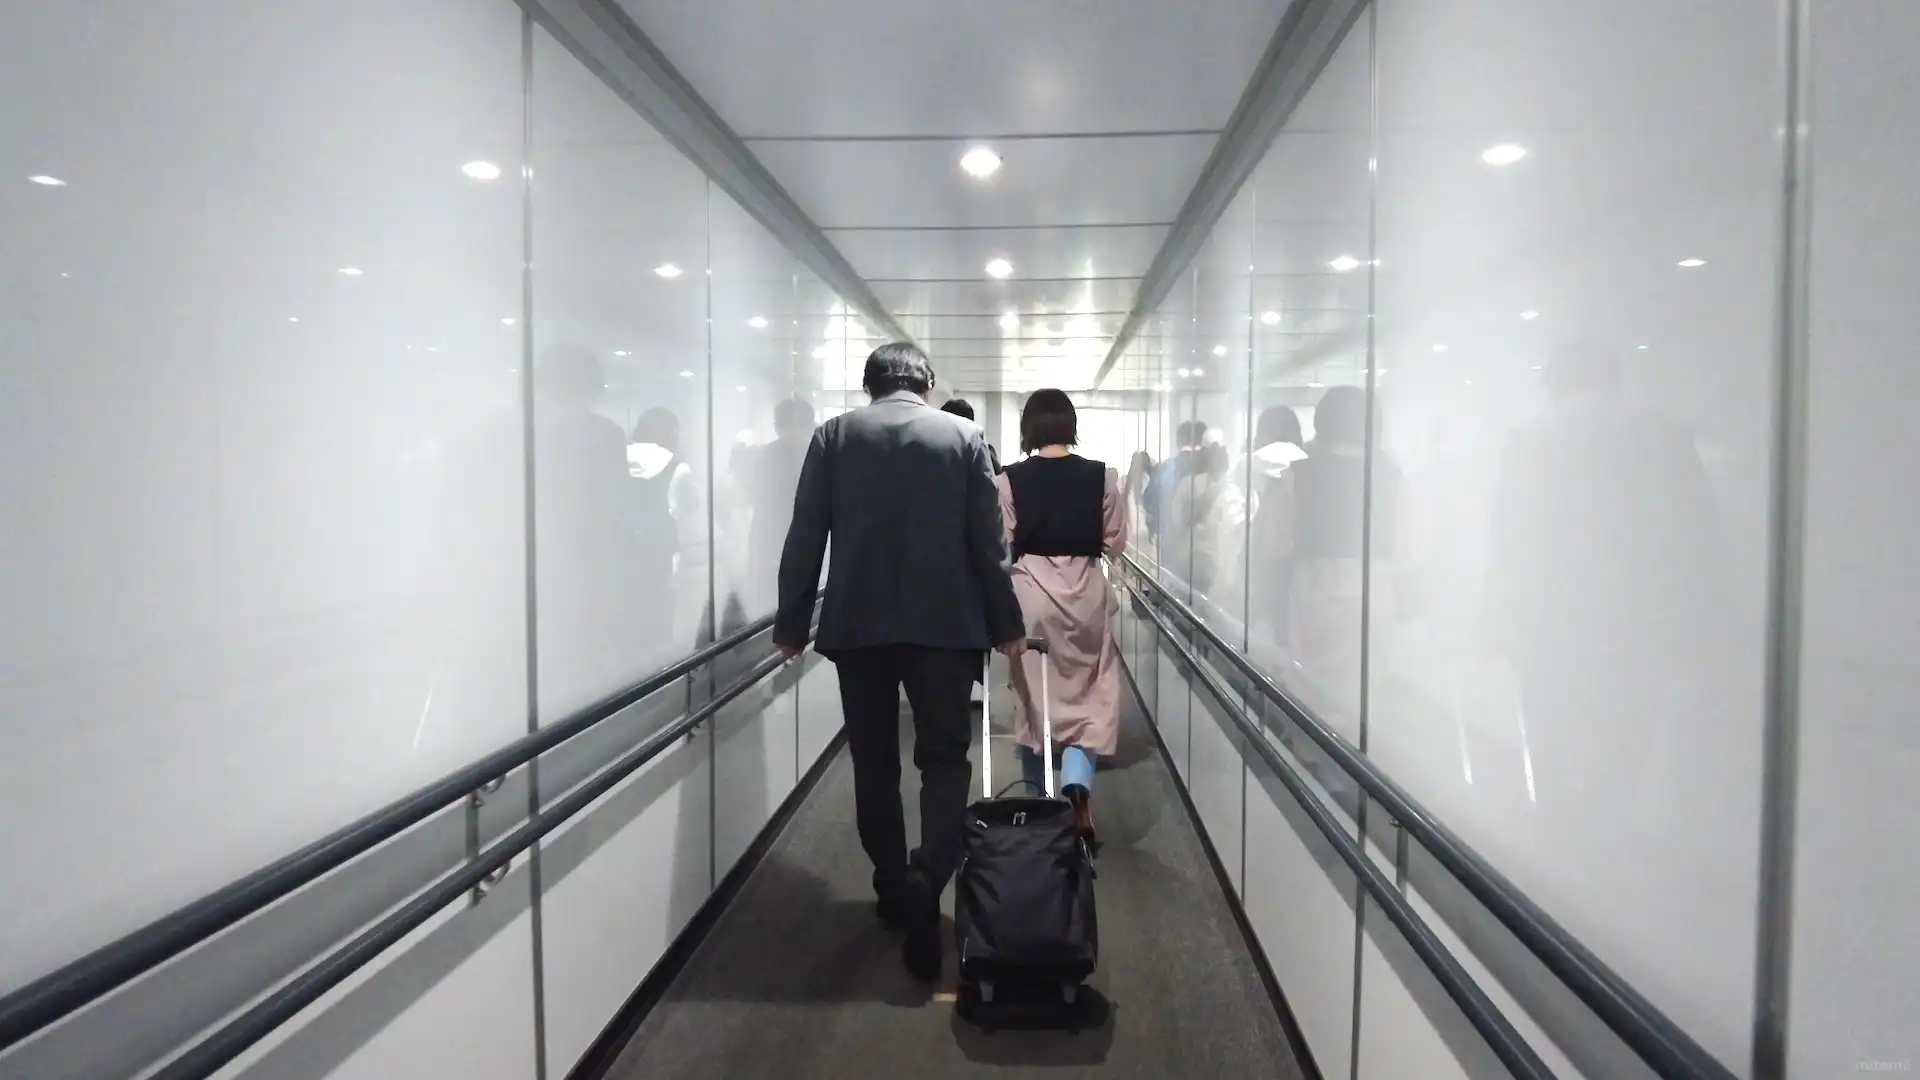
Among the rows of white planes in the distance, it really stands out.After passing through the gate, passengers walk to the aircraft on foot.
There’s a crosswalk along the way, and airport staff were present to guide us.Due to a technical issue, our departure was delayed by about 10 minutes.
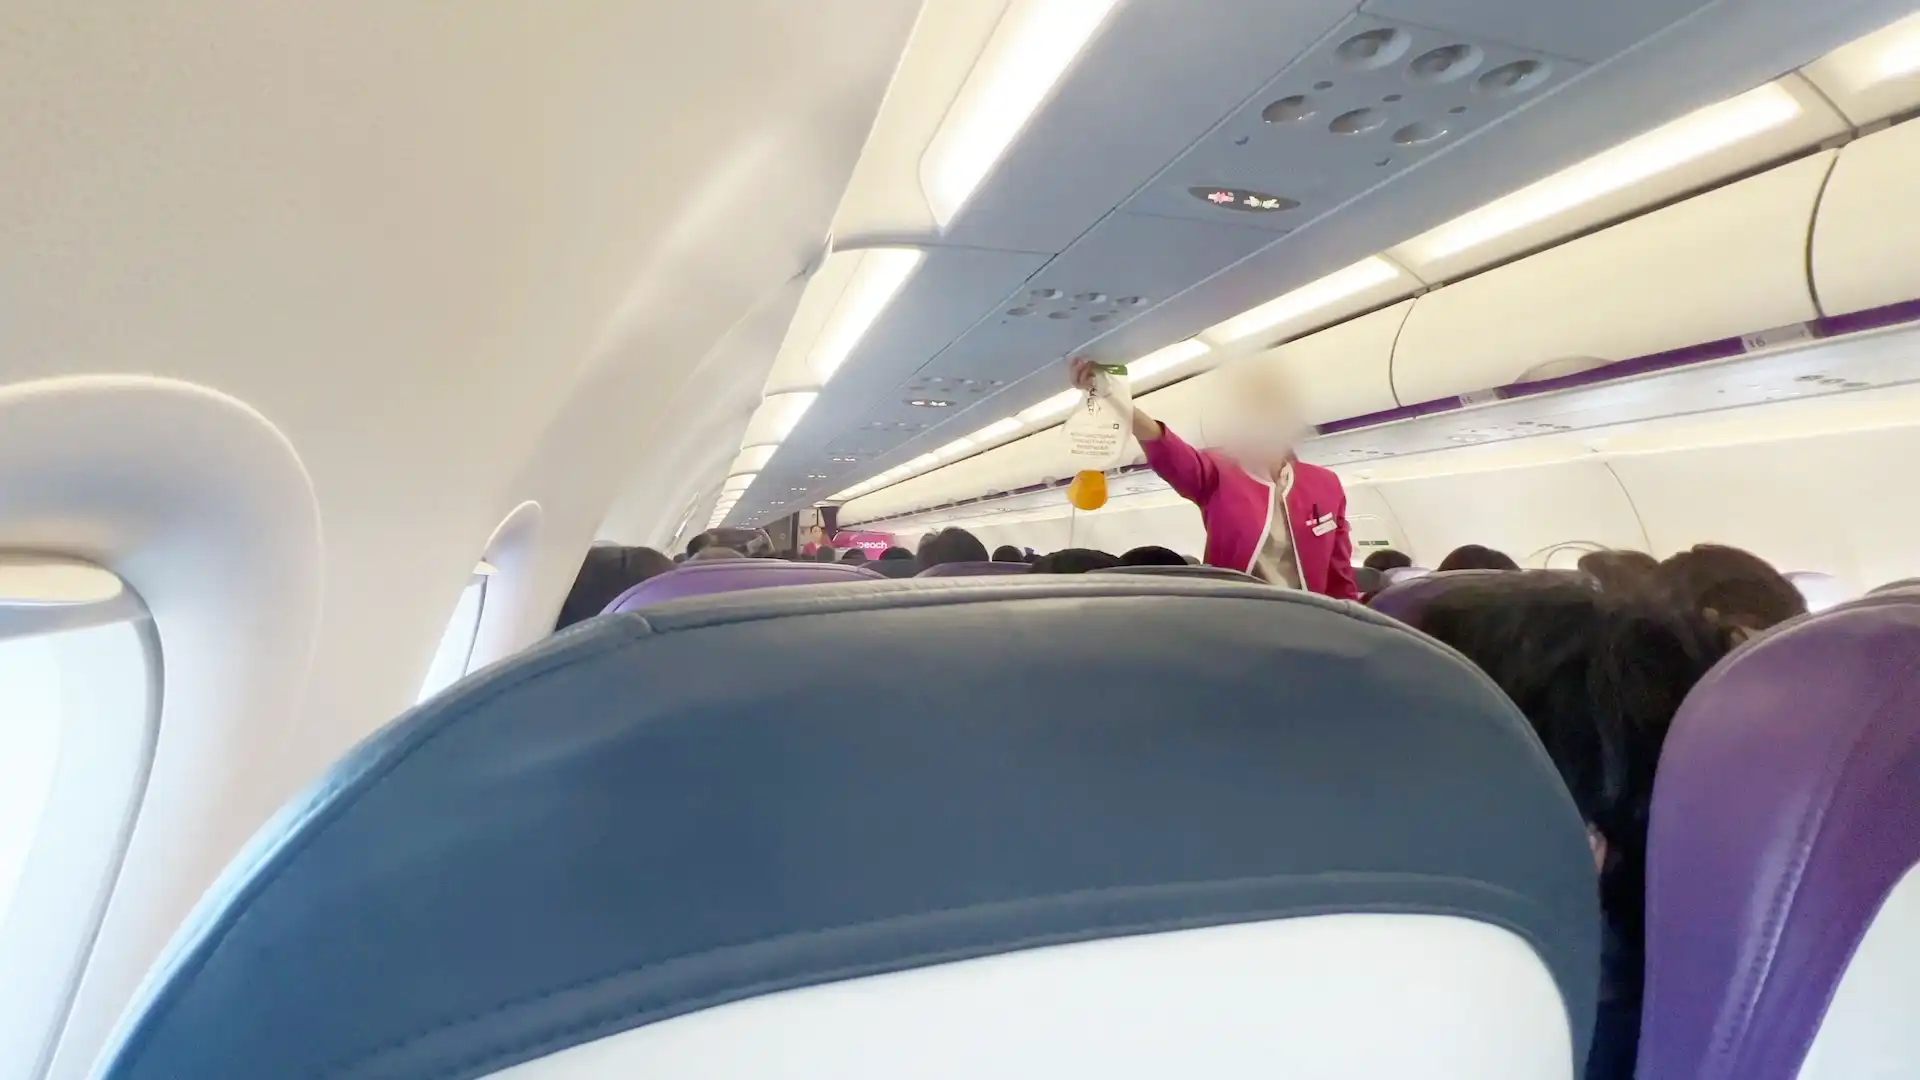
It might seem minor, but on flights, delays often result in extra paperwork and safety checks, ultimately leading to over 40 minutes of delay.After a while, the cabin attendants stood in the aisle to demonstrate the use of oxygen masks and life vests.
Once the instructions and announcements were complete, each attendant walked through the cabin to check passengers’ seat belts.With all preparations done, the aircraft slowly began taxiing toward the runway.
At 7:48 AM, we took off from Kansai Airport.
The original schedule was 7:00, so we departed 48 minutes late.
I’ve flown Peach several times before, but this was my first time experiencing such a long delay.
Given the earlier confusion and technical issues, I briefly thought the flight might be canceled — so I was relieved when we finally lifted off.
The plane quickly reached cruising altitude.
Tray tables and in-flight services became available.
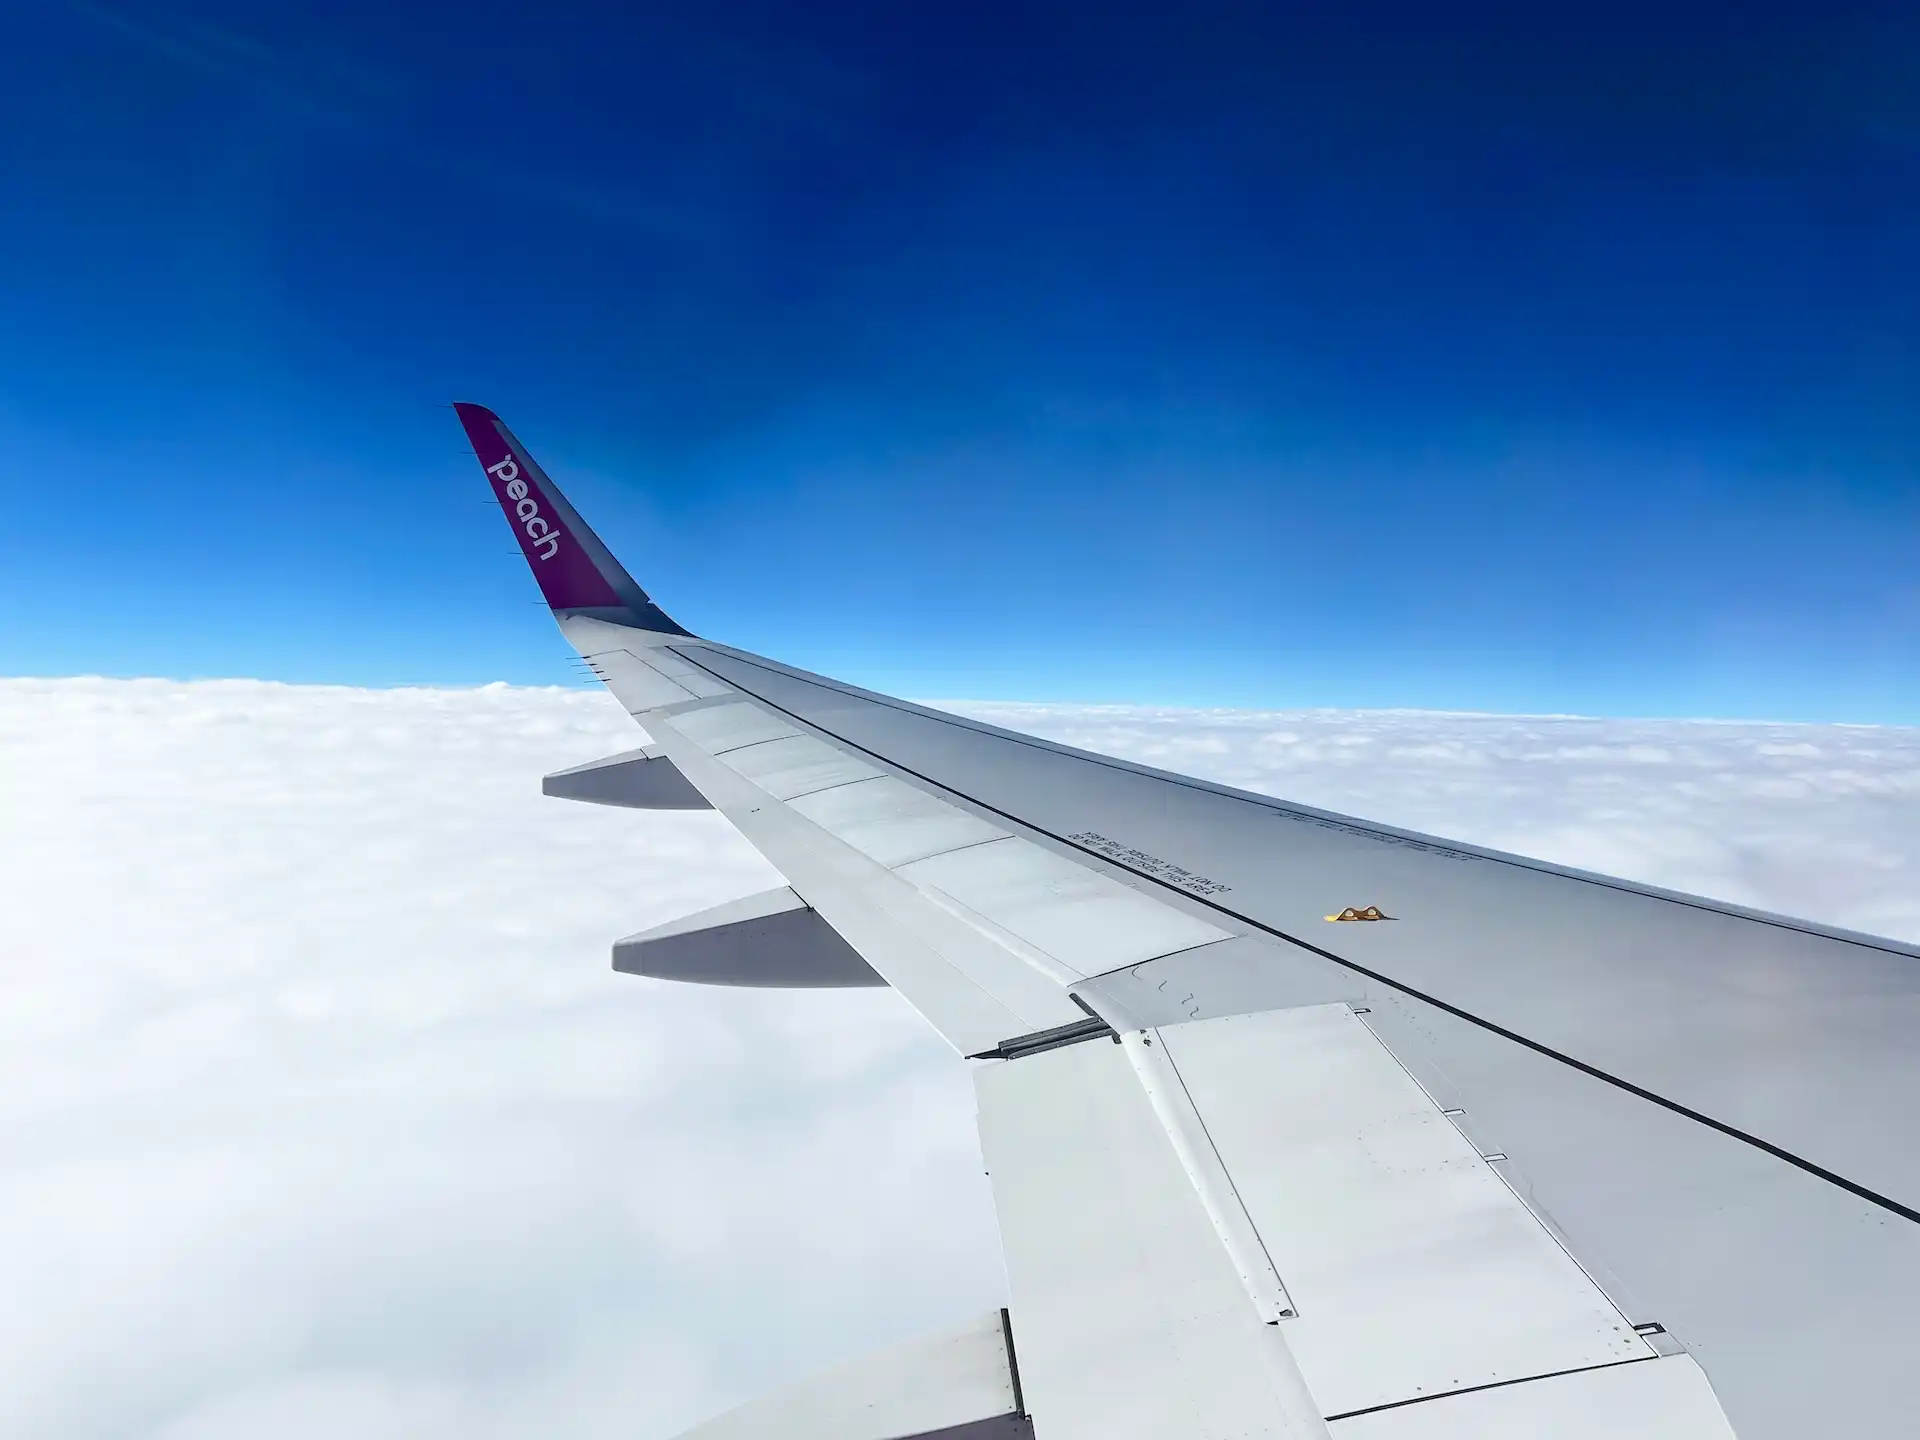
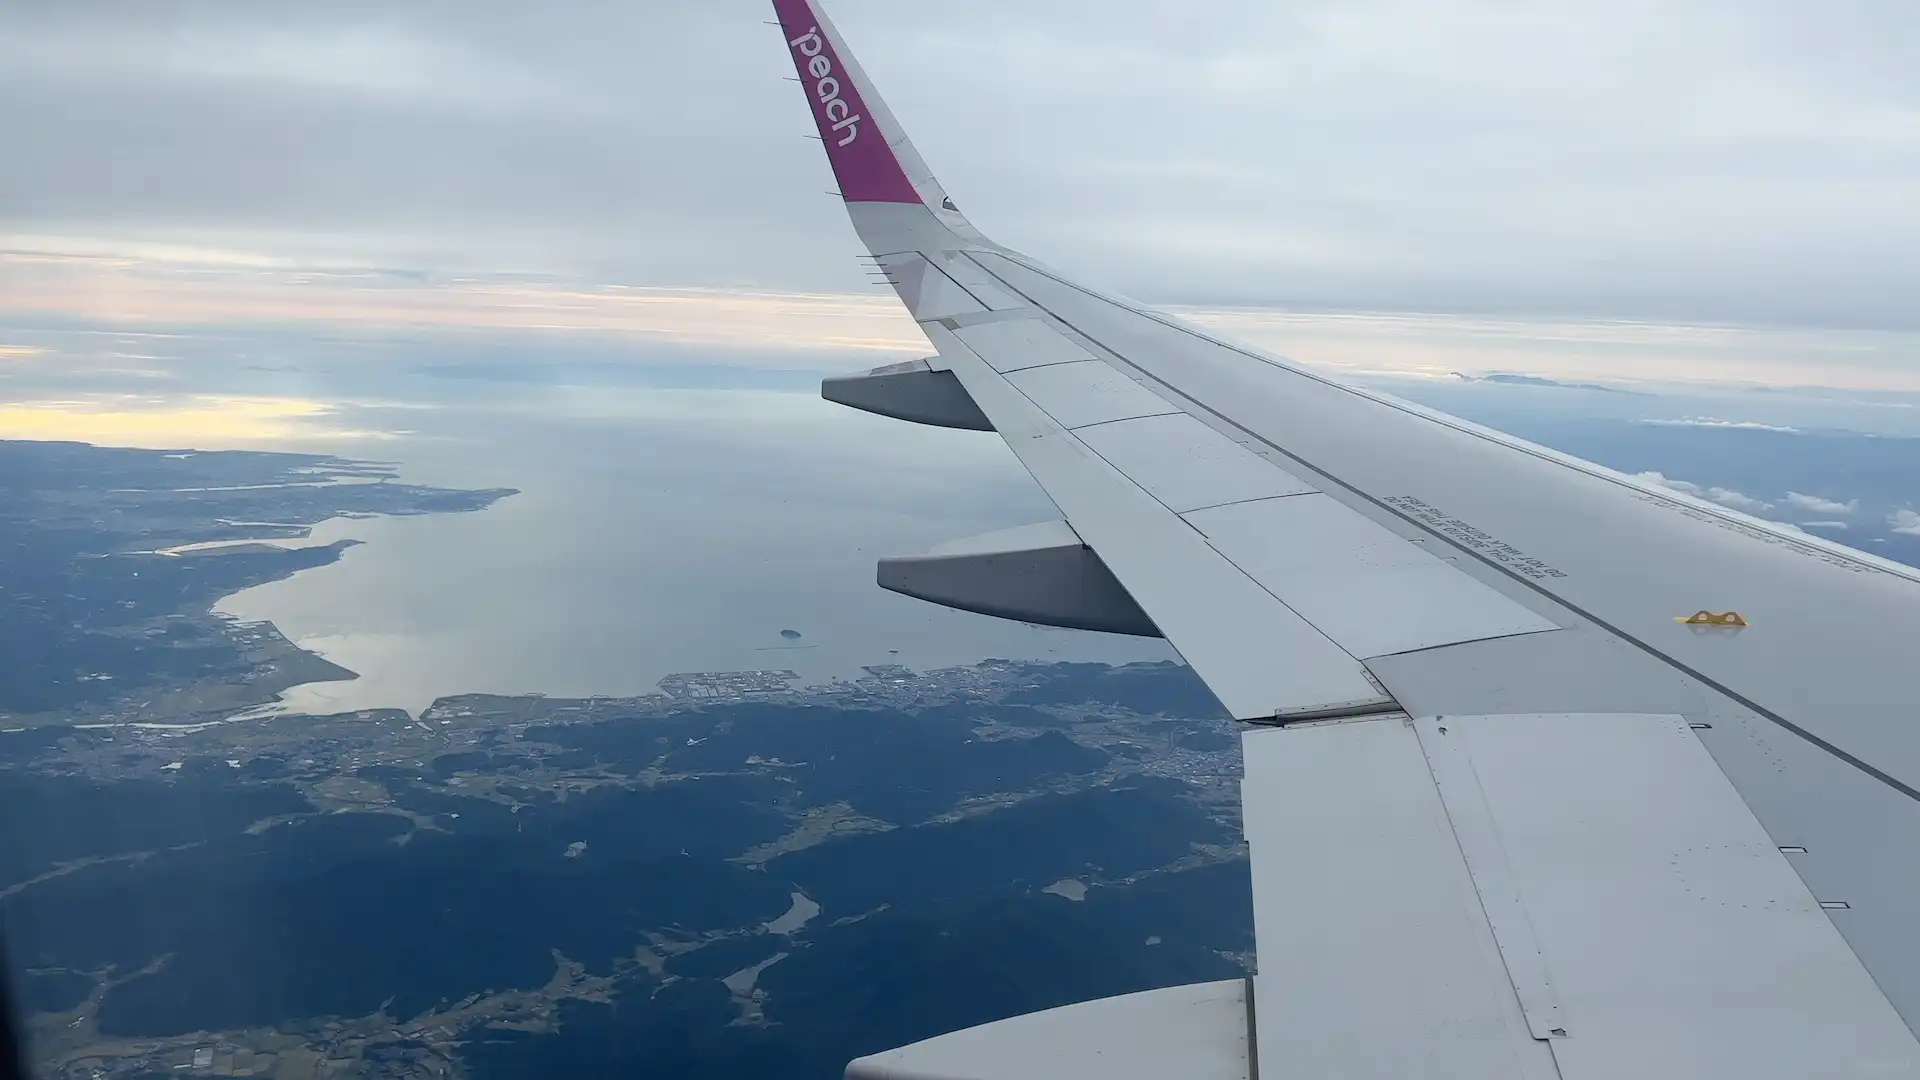
Soon, we broke through thick clouds, and the view changed dramatically.
A clear blue sky and the stratosphere stretched out beyond the window — it felt like another world.
Below was a white, glowing blanket of clouds. I enjoyed the beautiful scenery for a while.
As the landing announcement played, the cabin instantly shifted to arrival mode.
Passengers folded away tray tables and returned seatbacks to their upright positions.
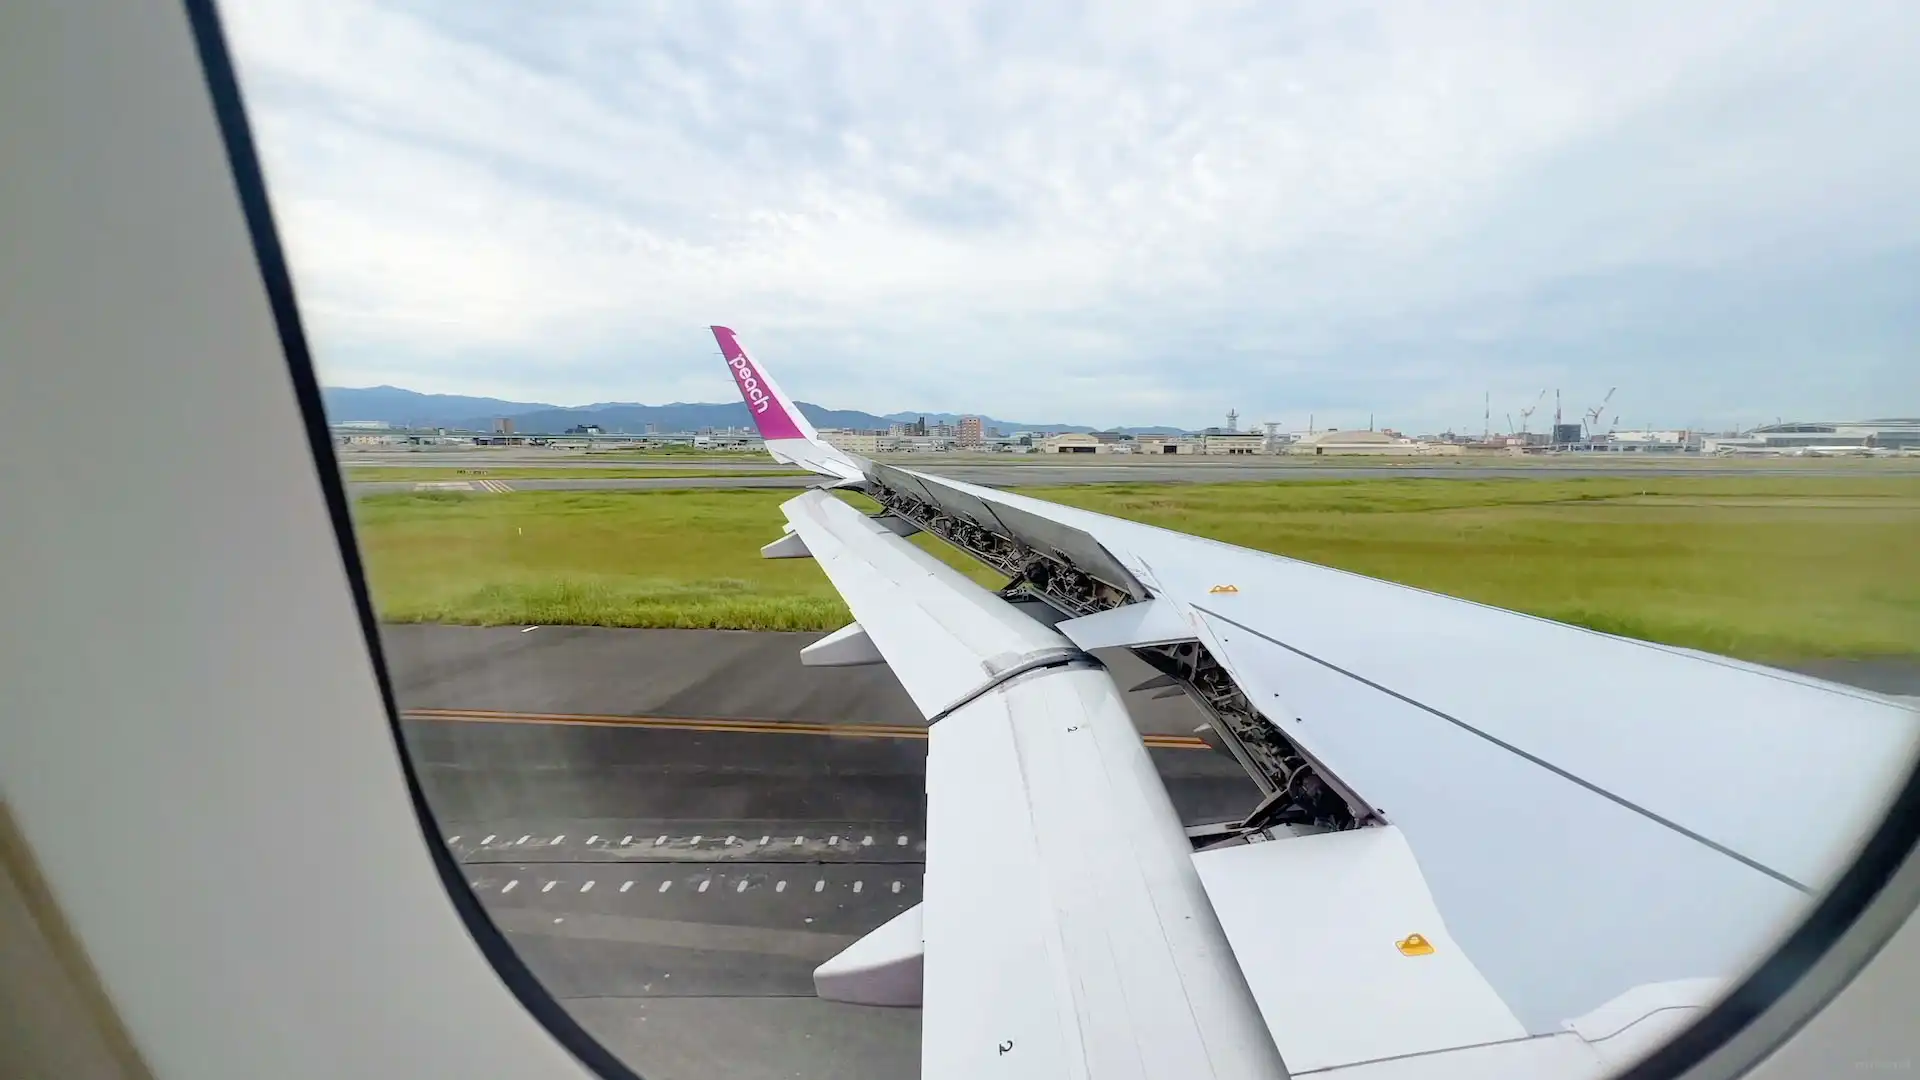
Outside the window, cityscapes and roads gradually came into view as the aircraft gently descended.At 8:47 AM, we landed at Fukuoka Airport — about 42 minutes behind schedule.
As the wheels touched down, the slats and flaps on the wings adjusted to help reduce speed.A cabin announcement followed:
“We have landed at Fukuoka Airport. Please remain seated until the seatbelt sign is turned off.”
“Our departure was delayed by 35 minutes due to maintenance and paperwork. We sincerely apologize for the inconvenience.”Although they announced a 35-minute delay, the actual arrival was 42 minutes late.
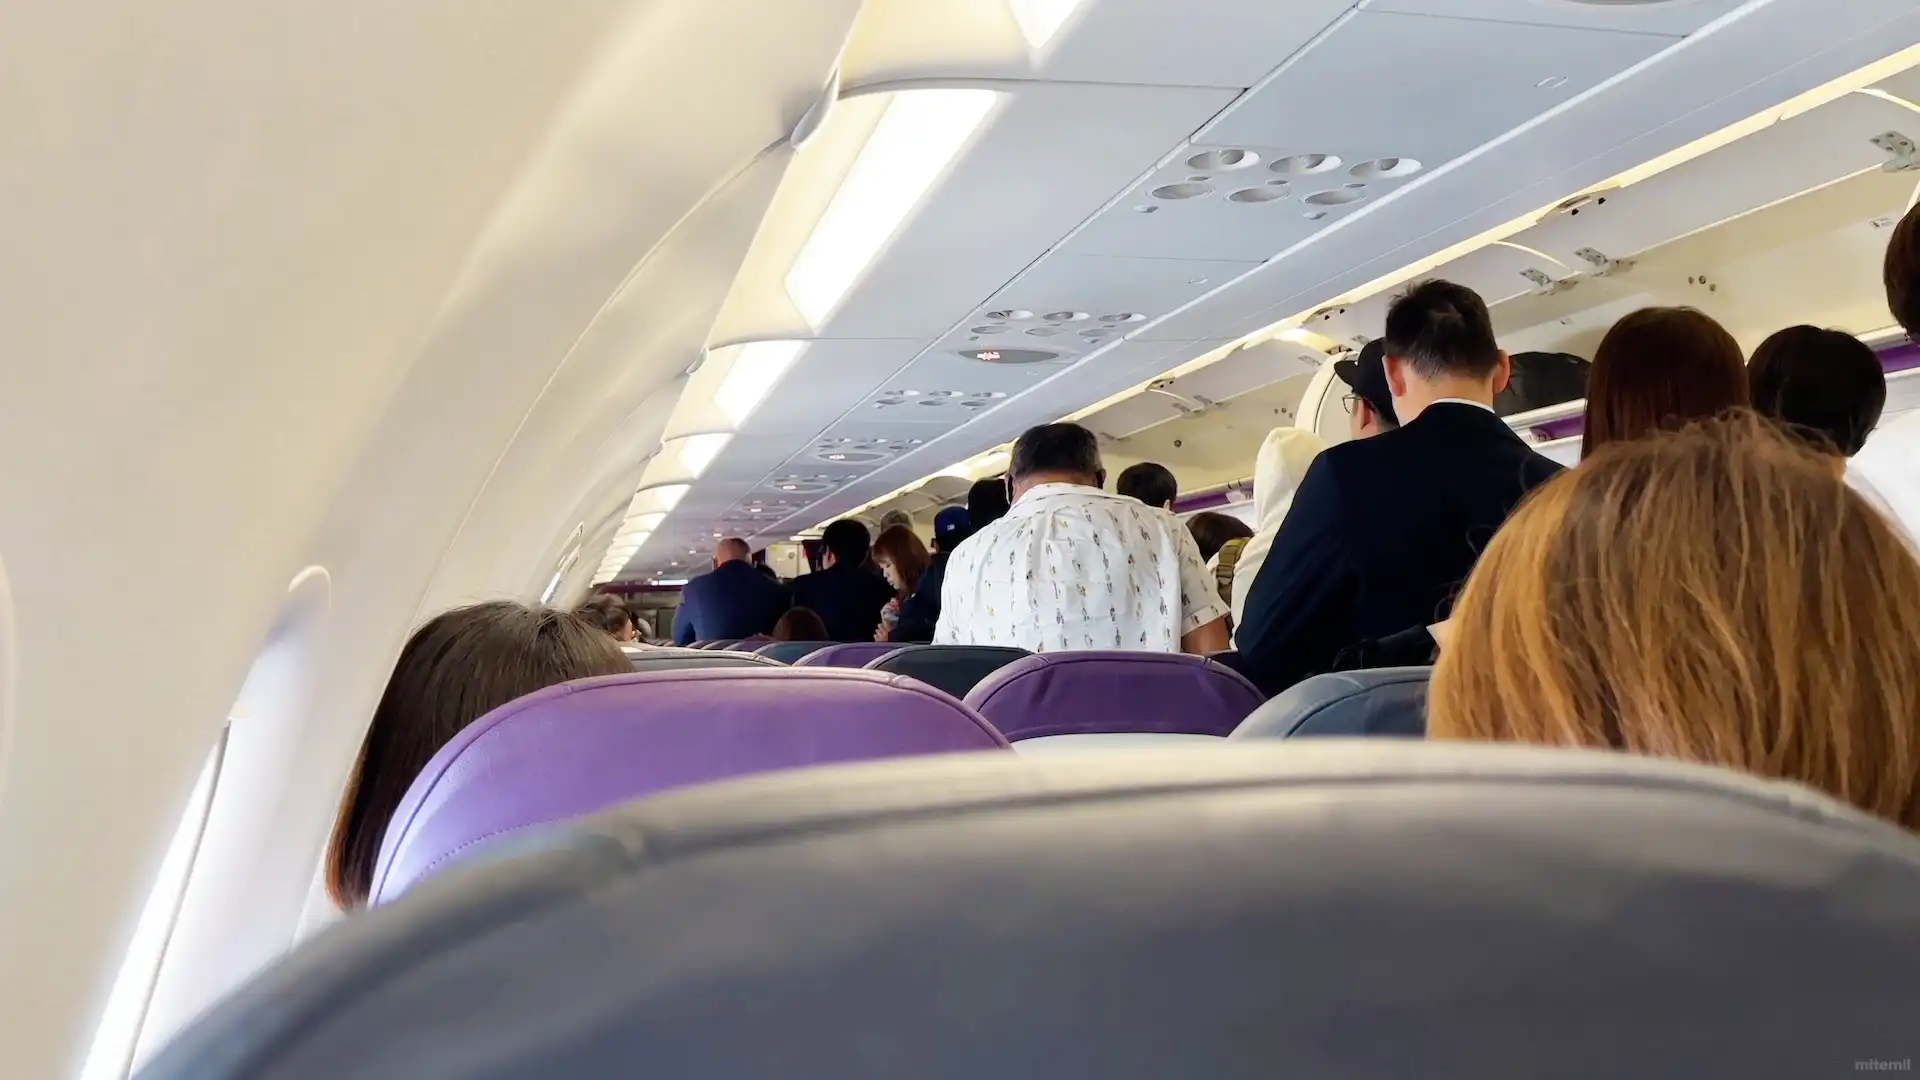
It felt a bit off, but I was just glad we arrived safely.Once the seatbelt sign turned off, everyone stood up at once and rushed into the aisle.
Everyone was eager to disembark — the aisle quickly filled with people, leaving no room to move.
The door opened, and the line began to slowly move.
But I had trouble finding a gap to merge into the flow.I tried to time it just right, but couldn’t find an opening.
I stood there wondering, “Did everyone hold it in to use the bathroom or what?”After watching passenger after passenger exit from the rear, the crowd finally thinned out.
I was able to join the line and exit the plane.After exiting the plane,
I headed to the baggage claim area.
Suitcases began appearing on the carousel one after another.I spotted mine, picked it up, and exited the airport.
This flight with Peach was meant to be a one-hour journey through the sky.
But due to a technical issue, we experienced a major 40-minute delay.
I’d heard that delays aren’t uncommon with LCCs, but experiencing one firsthand was still stressful.
If I had a tight schedule, it could have caused serious trouble.The lesson learned: **always build in extra time when planning a trip**.
Still, Peach remains a budget-friendly travel option.
I’ll likely continue flying with them in the future.This major delay was unusual — in my experience, delays are usually just around 10 minutes.
As for the seat space, it didn’t bother me as much as I expected.
It’s about the same as a 4-seat row bus.Peach makes air travel easy and accessible — a reliable travel partner.
Peach Aviation The Three Aircraft Models in Operation
Peach Aviation operates with three types of aircraft: AIRBUS A320, AIRBUS A320neo, and AIRBUS A321LR.
Seat configurations and seating capacity may slightly vary depending on the aircraft type.
AIRBUS A320
– Length: 37.57m × 34.1m × 11.76m
– Max Takeoff Weight: 78,000kg
– Cruise Speed: 840km/h
– Range: 6,200km
– Seating Capacity: 180 seats (6 Fast Seats, 36 Smart Seats, 70 Pleasure Seats, 68 Standard Seats)
CloseAIRBUS A320neo
– Length: 37.57m × 35.8m × 11.76m
– Max Takeoff Weight: 79,000kg
– Cruise Speed: 840km/h
– Range: 6,300km
– Seating Capacity: 188 seats (6 Fast Seats, 36 Smart Seats, 72 Pleasure Seats, 74 Standard Seats)
CloseAIRBUS A321LR
– Length: 44.5m × 35.8m × 11.76m
– Max Takeoff Weight: 78,000kg
– Cruise Speed: 840km/h
– Range: 7,400km
– Seating Capacity: 218 seats (6 Fast Seats, 36 Smart Seats, 82 Pleasure Seats, 94 Standard Seats)
ClosePeach Aviation Cabin Overview
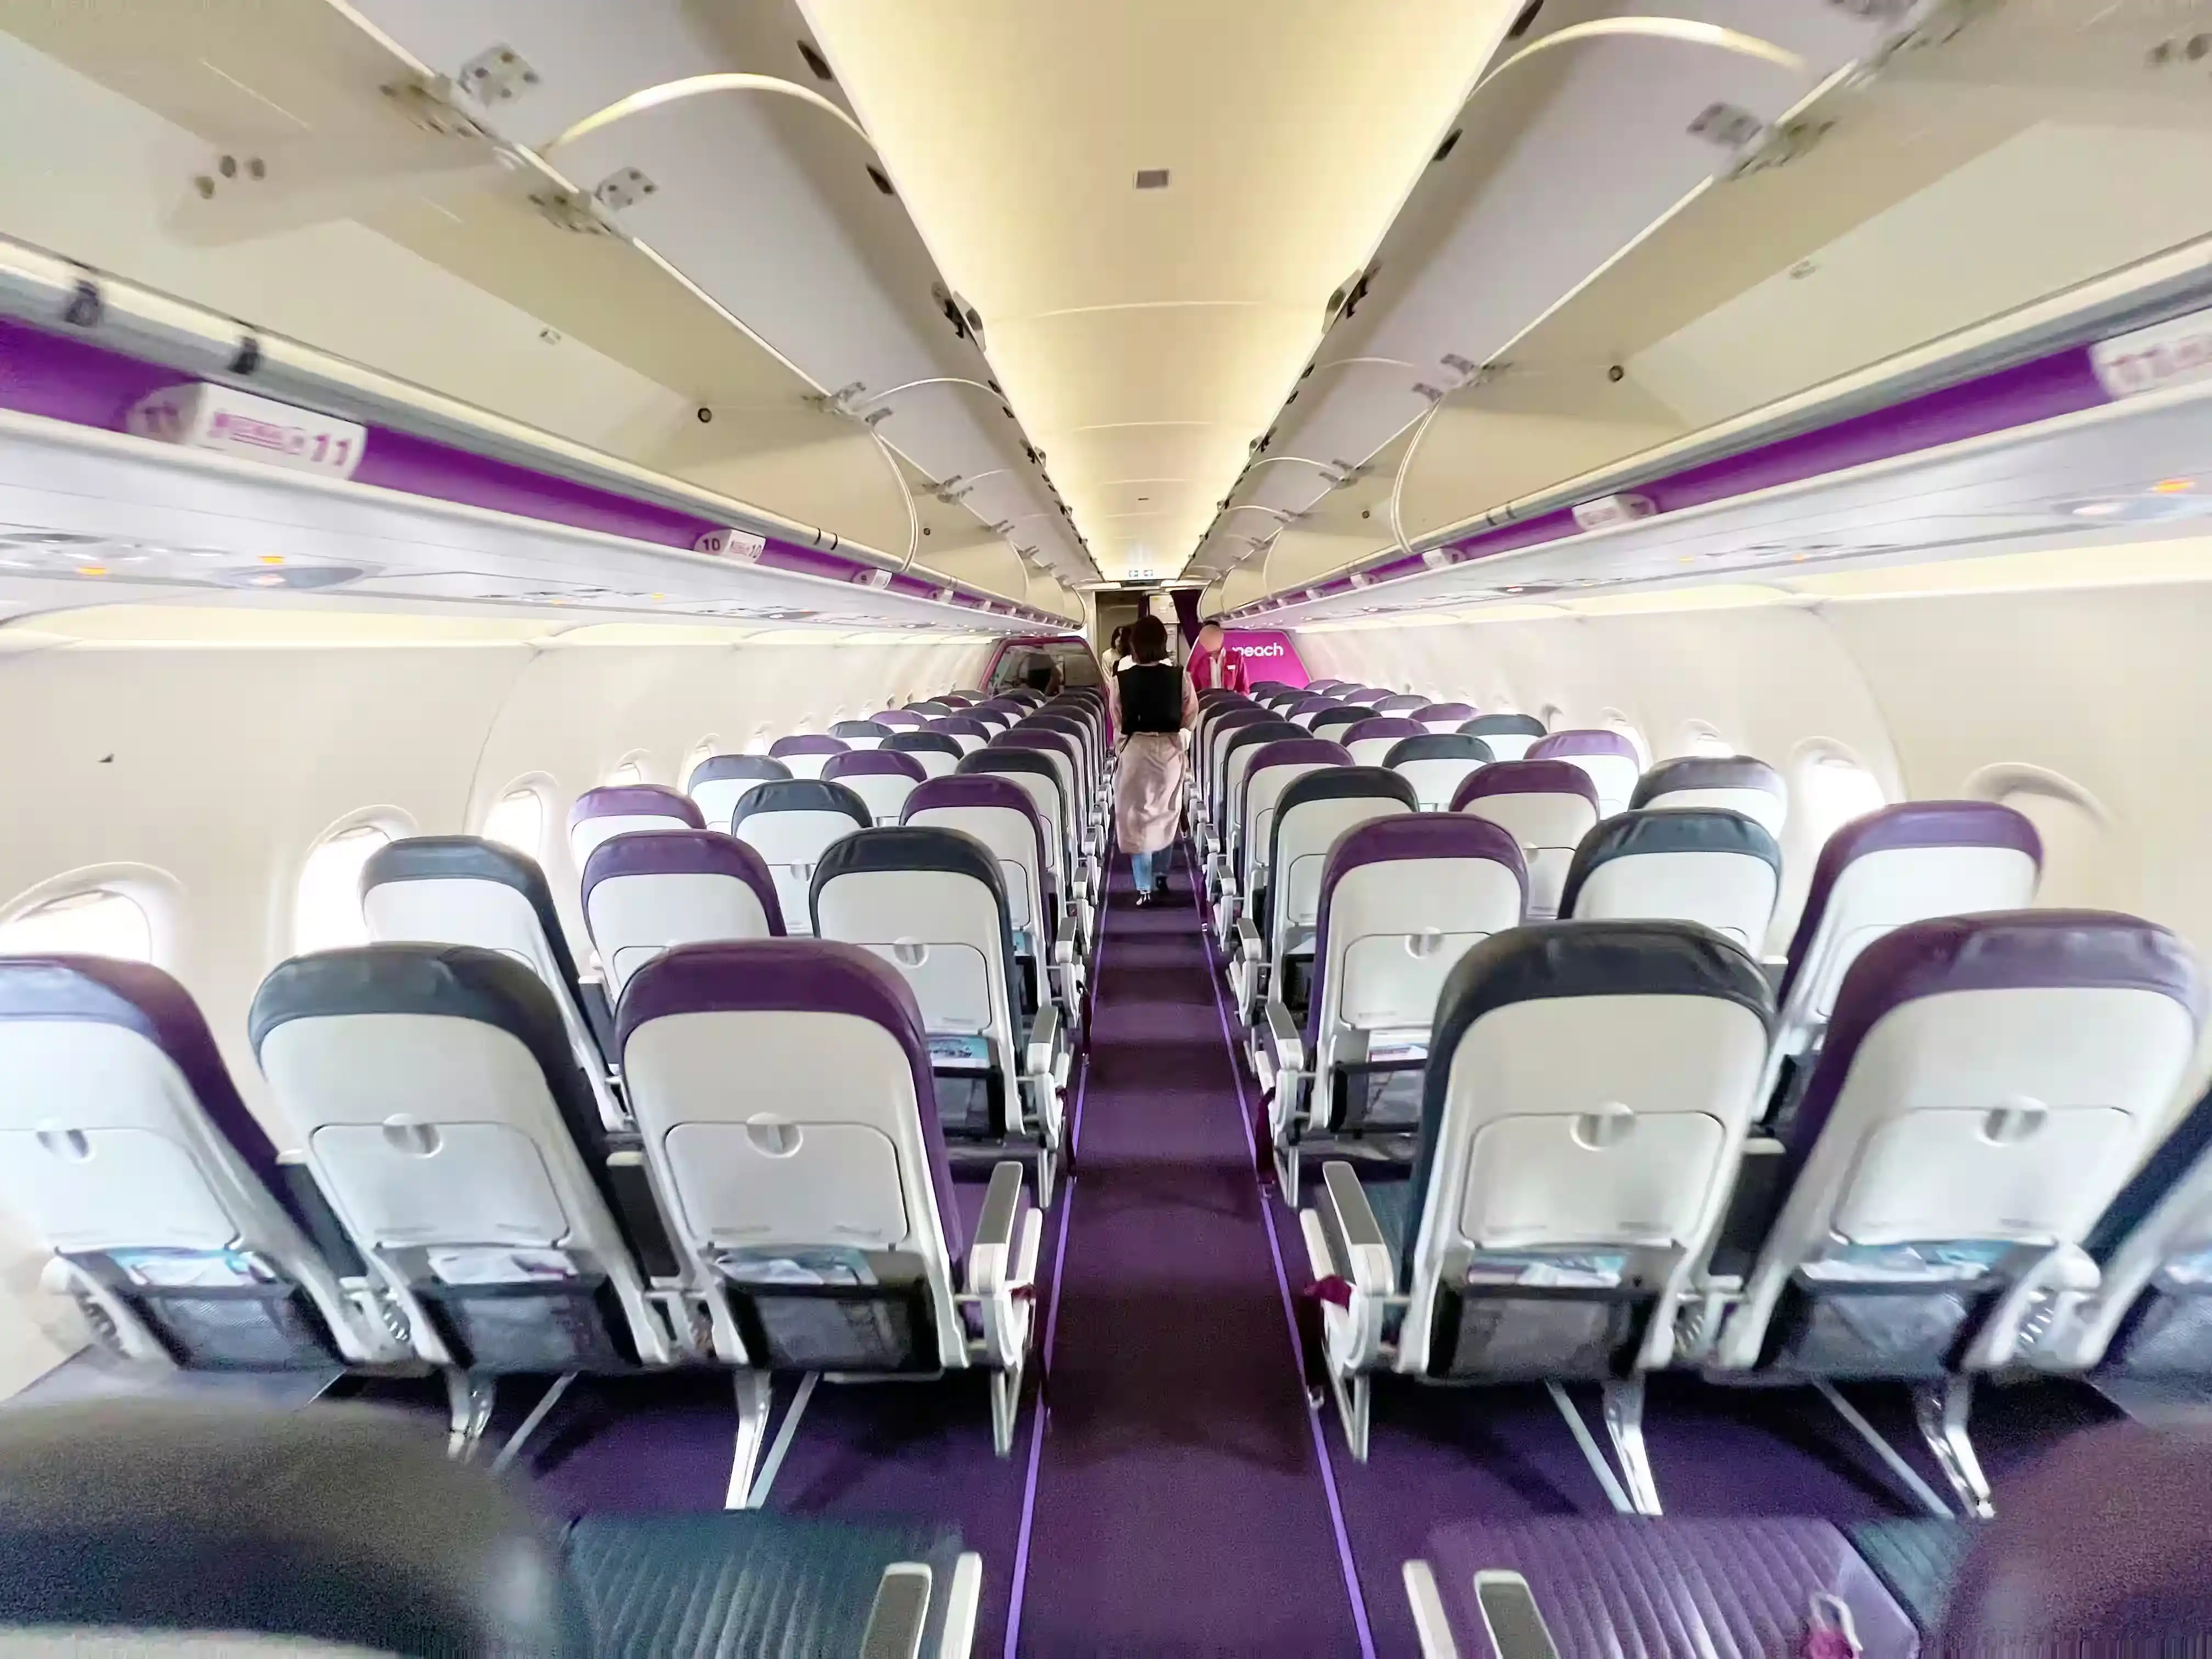
The aircraft I boarded was the “AIRBUS A320neo”.
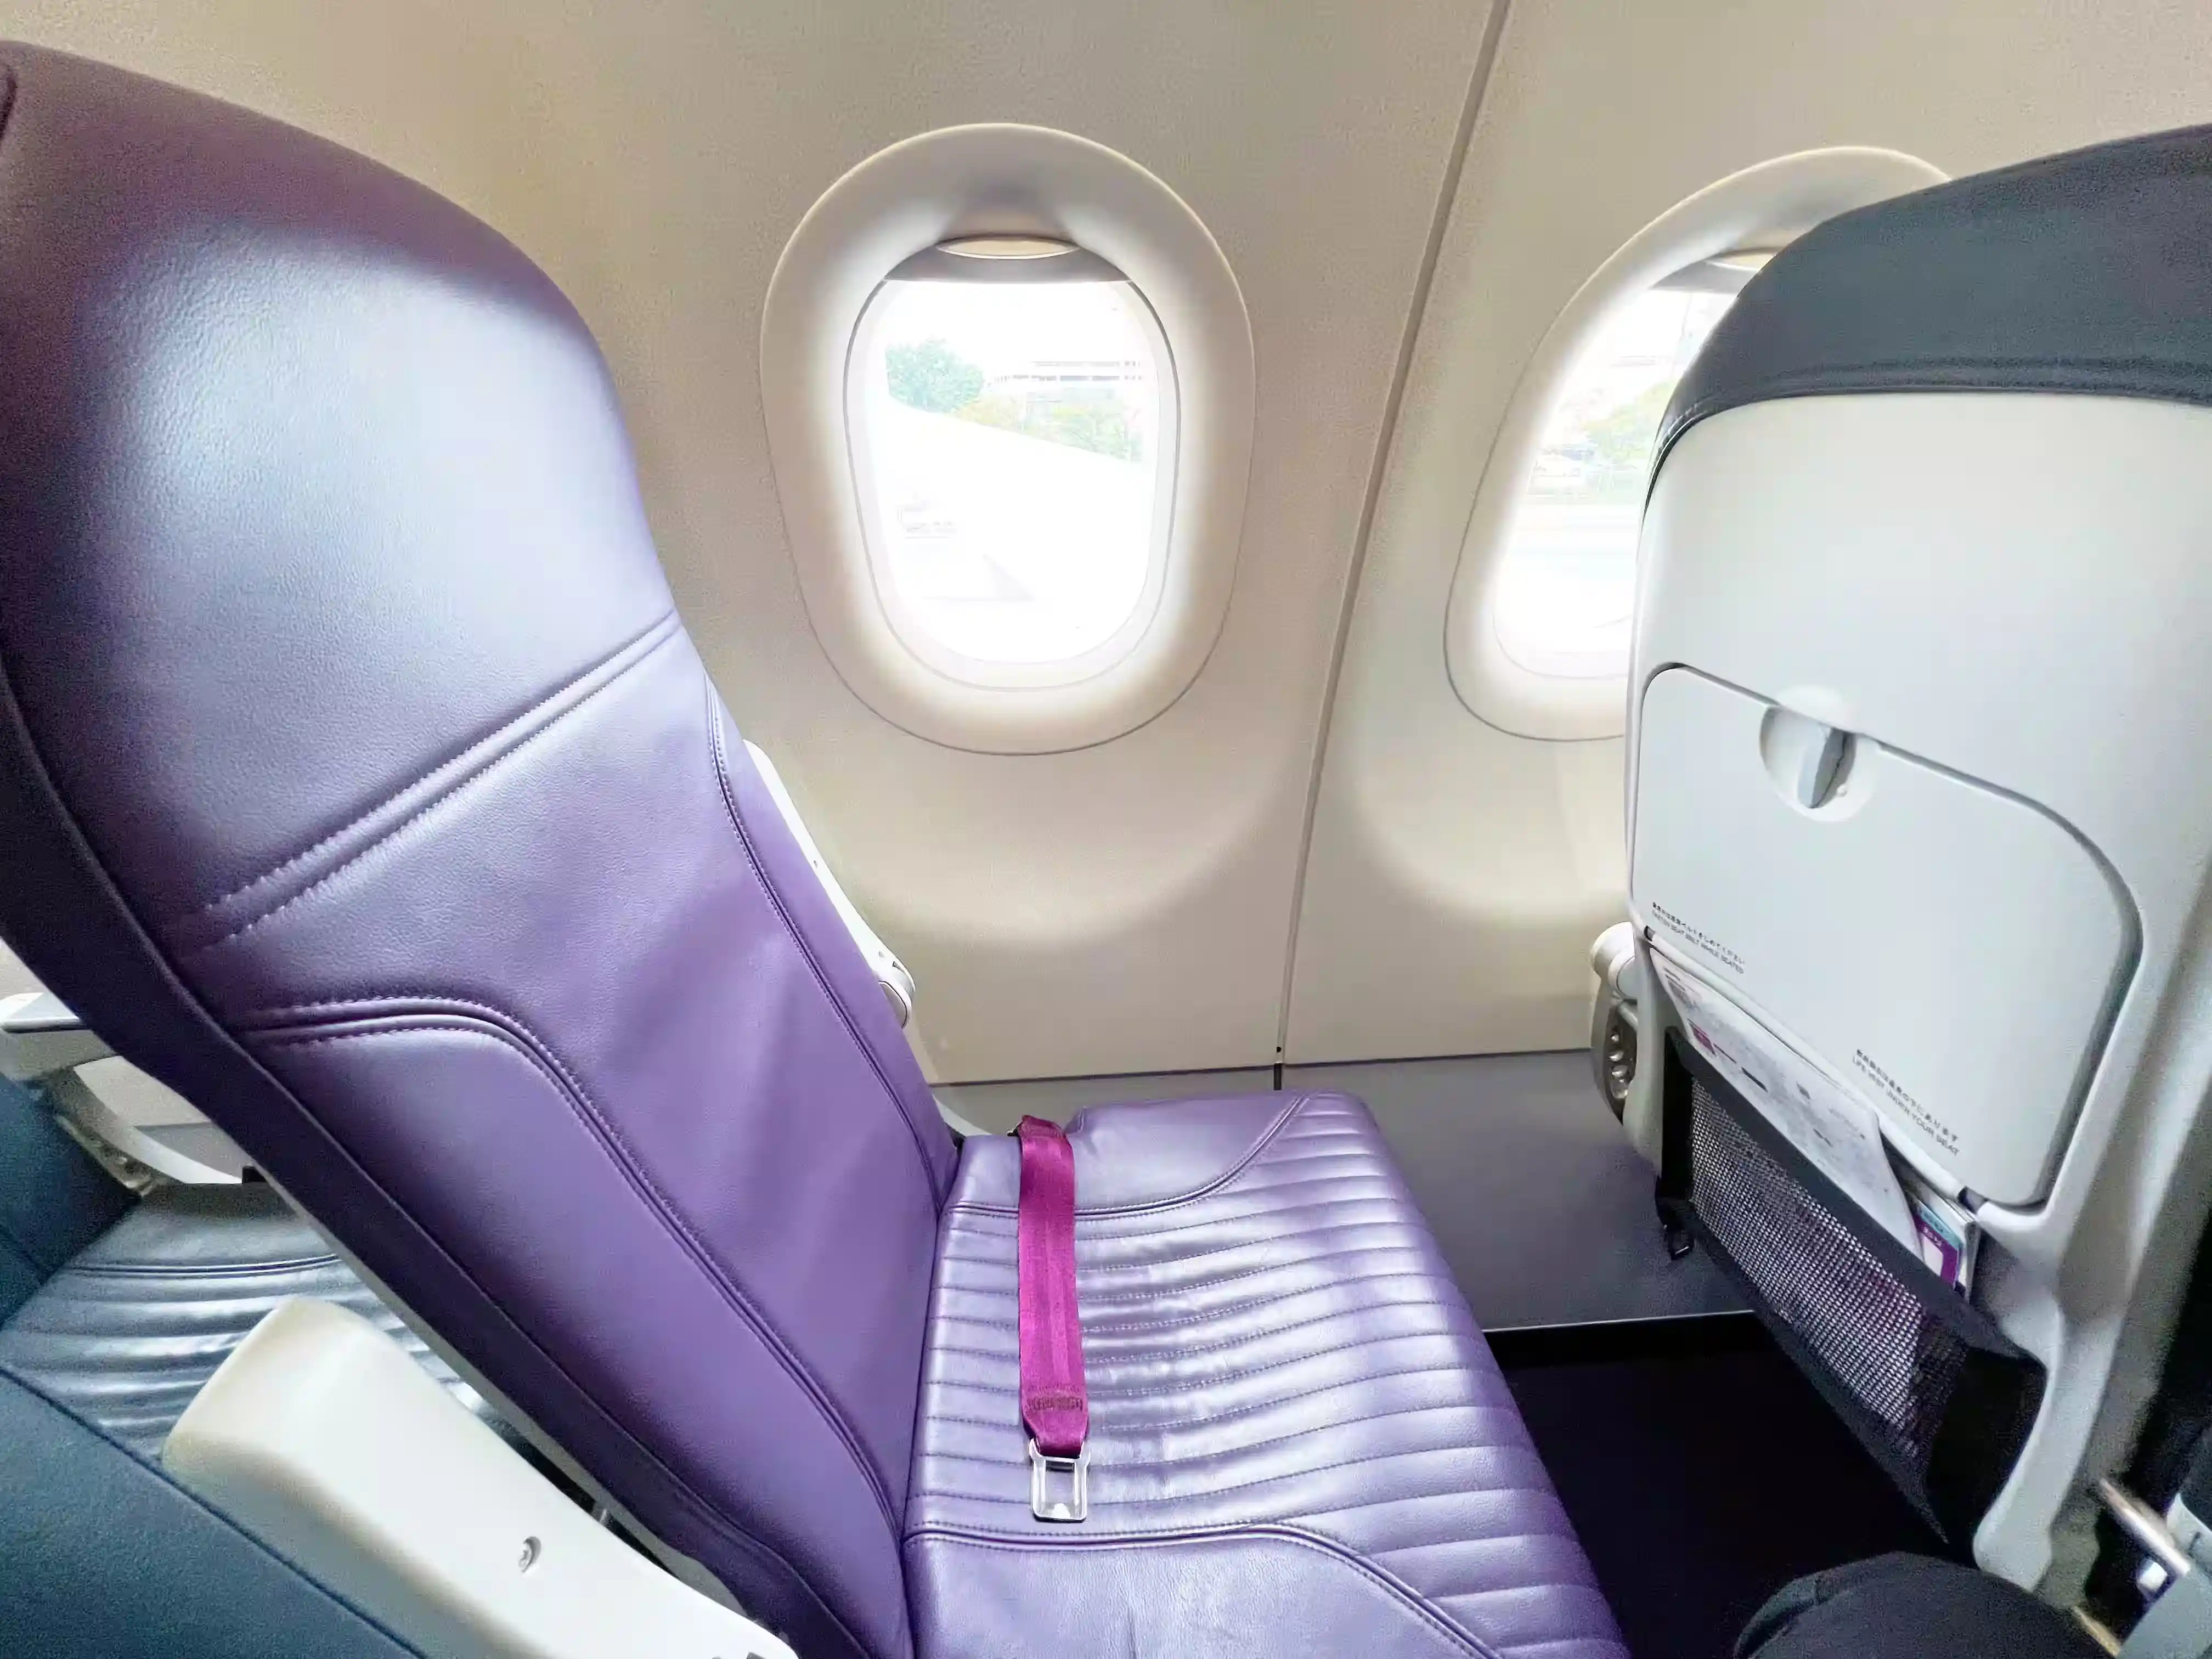
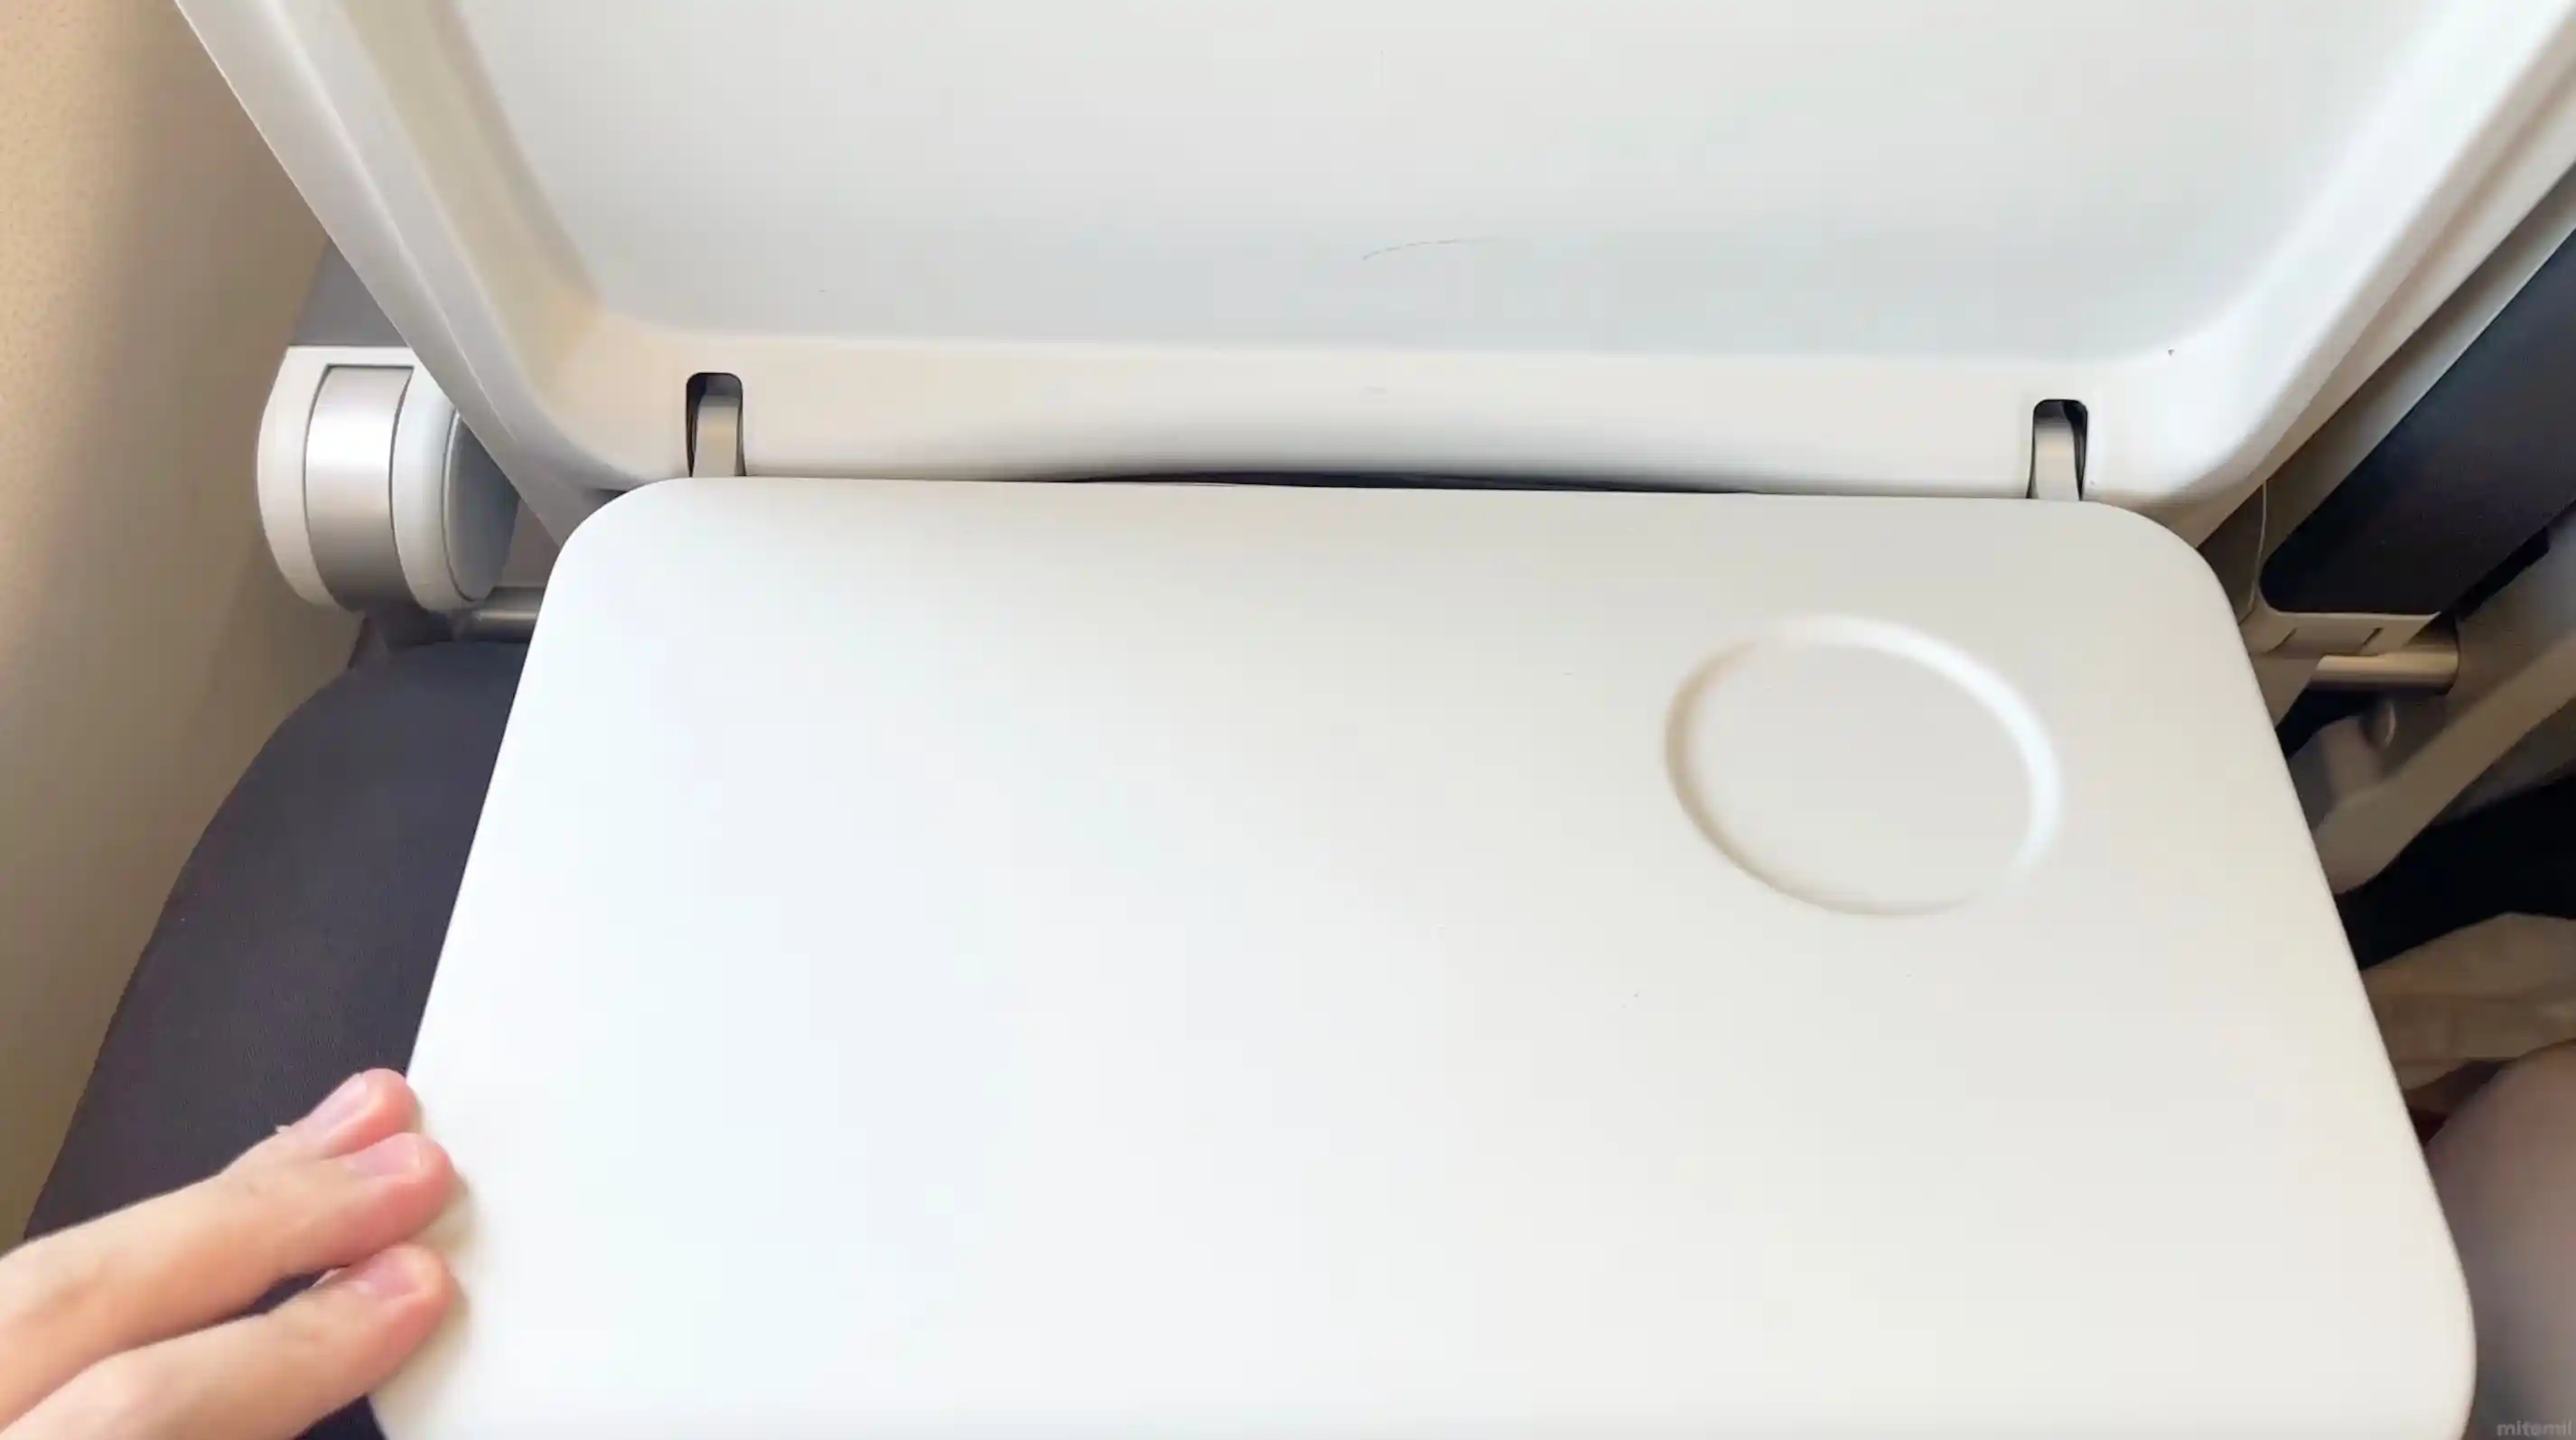
The seats are covered with a light purple leather-like material. Seat numbers are arranged as follows: from the left side of the window seat, A, B, C, and across the aisle, D, E, F.
During takeoff, you must place your hand luggage either in the overhead compartment or under the seat in front of you. Make sure to use one of these options.
If you are seated near an emergency exit, you cannot place luggage at your feet, so it must be stored in the overhead compartment.
Seats
Peach Aviation seat perspective from window seat view from window seat Peach Aviation seatFacilities
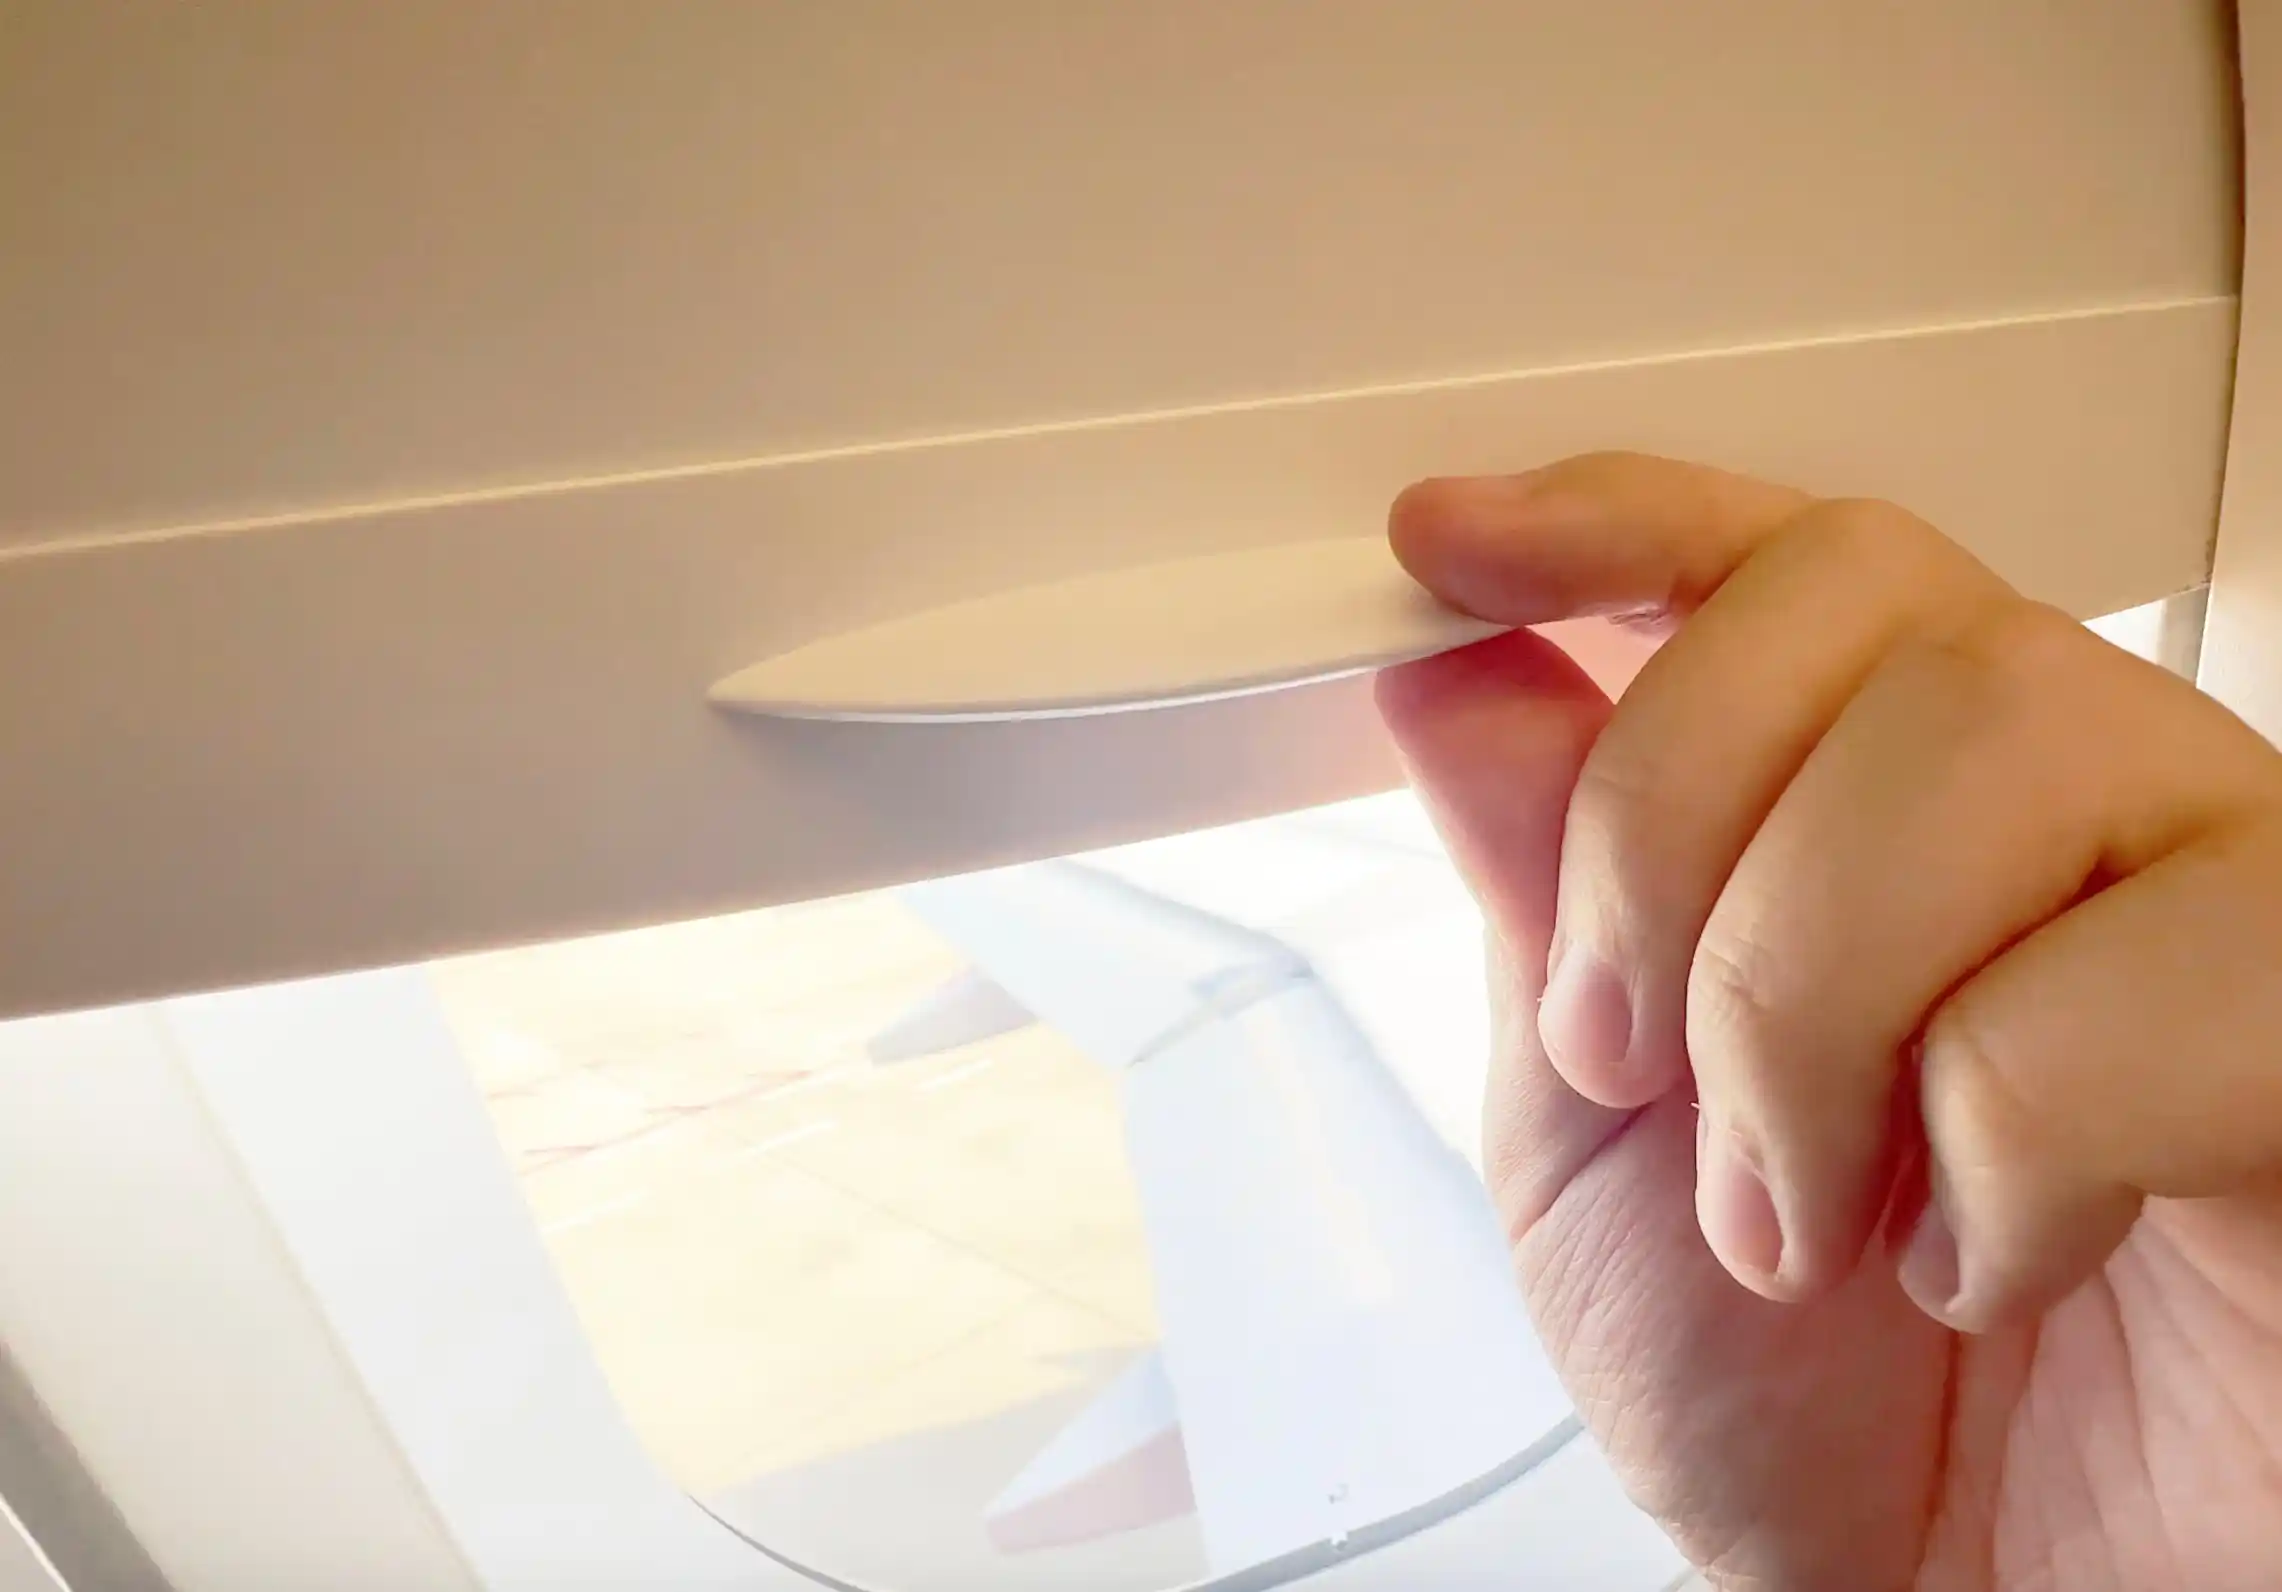
Peach Aviation window seat blind Peach Aviation folding desk Peach Aviation window seat blindAmenities
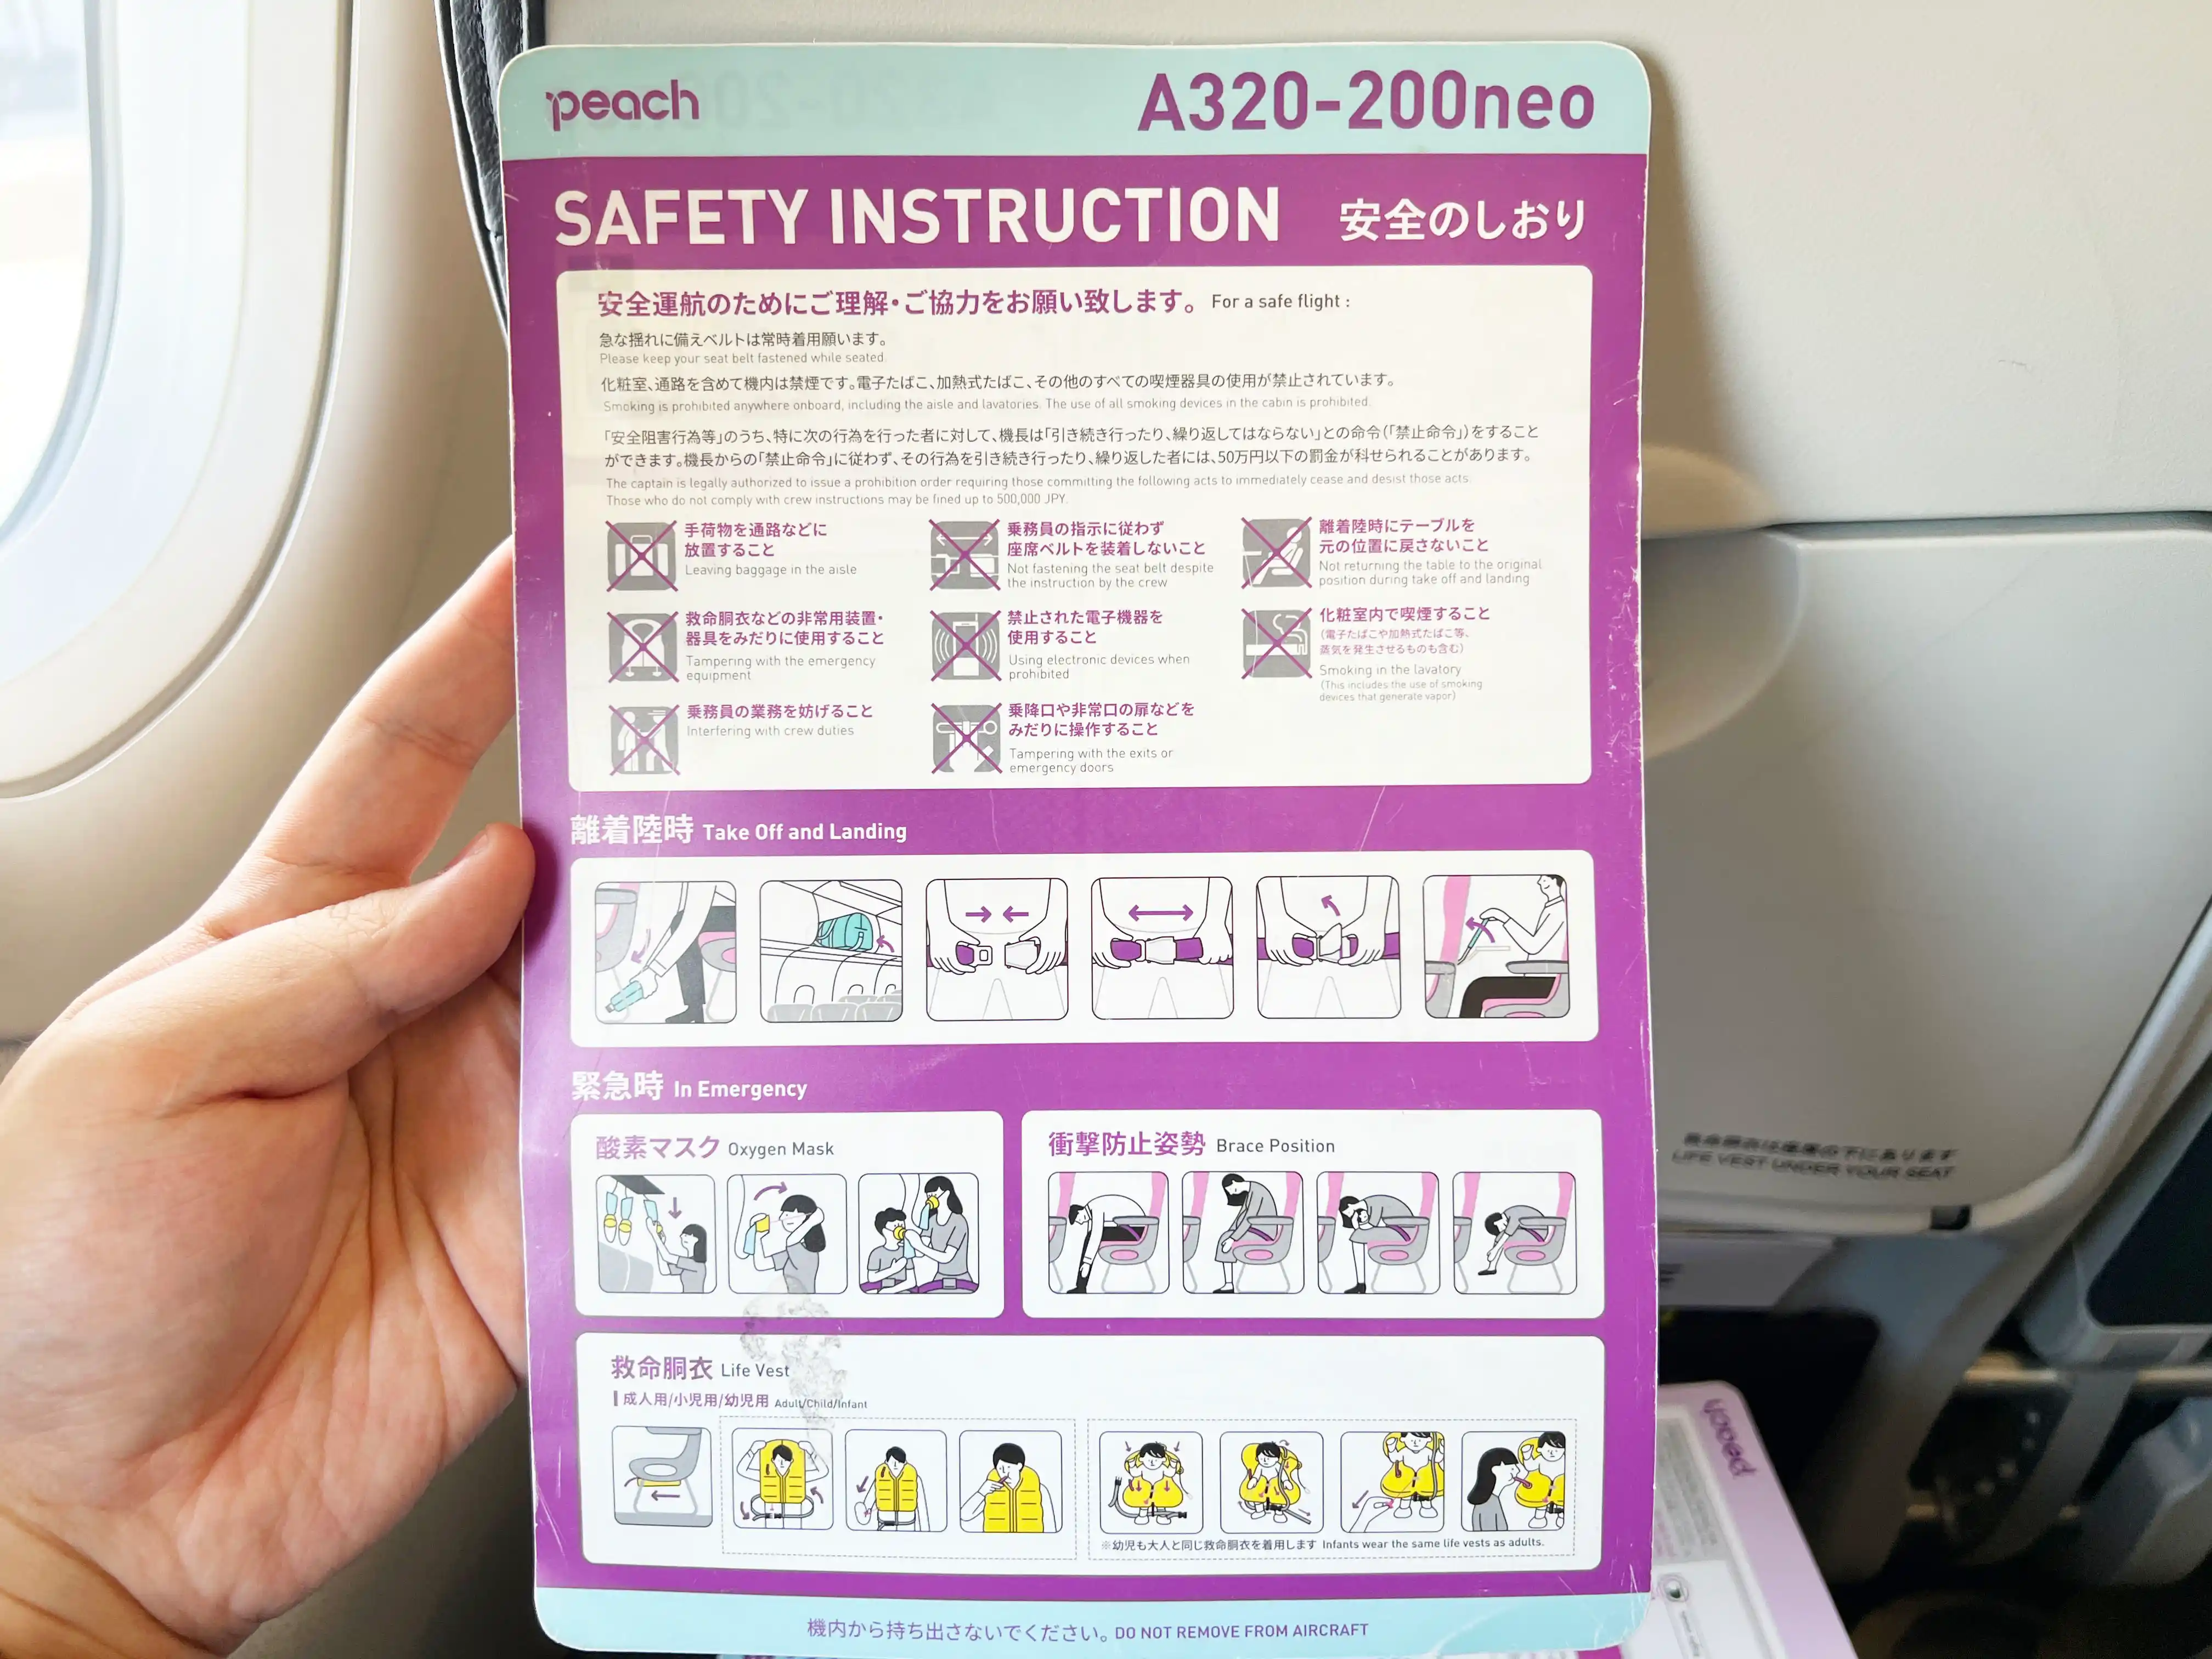
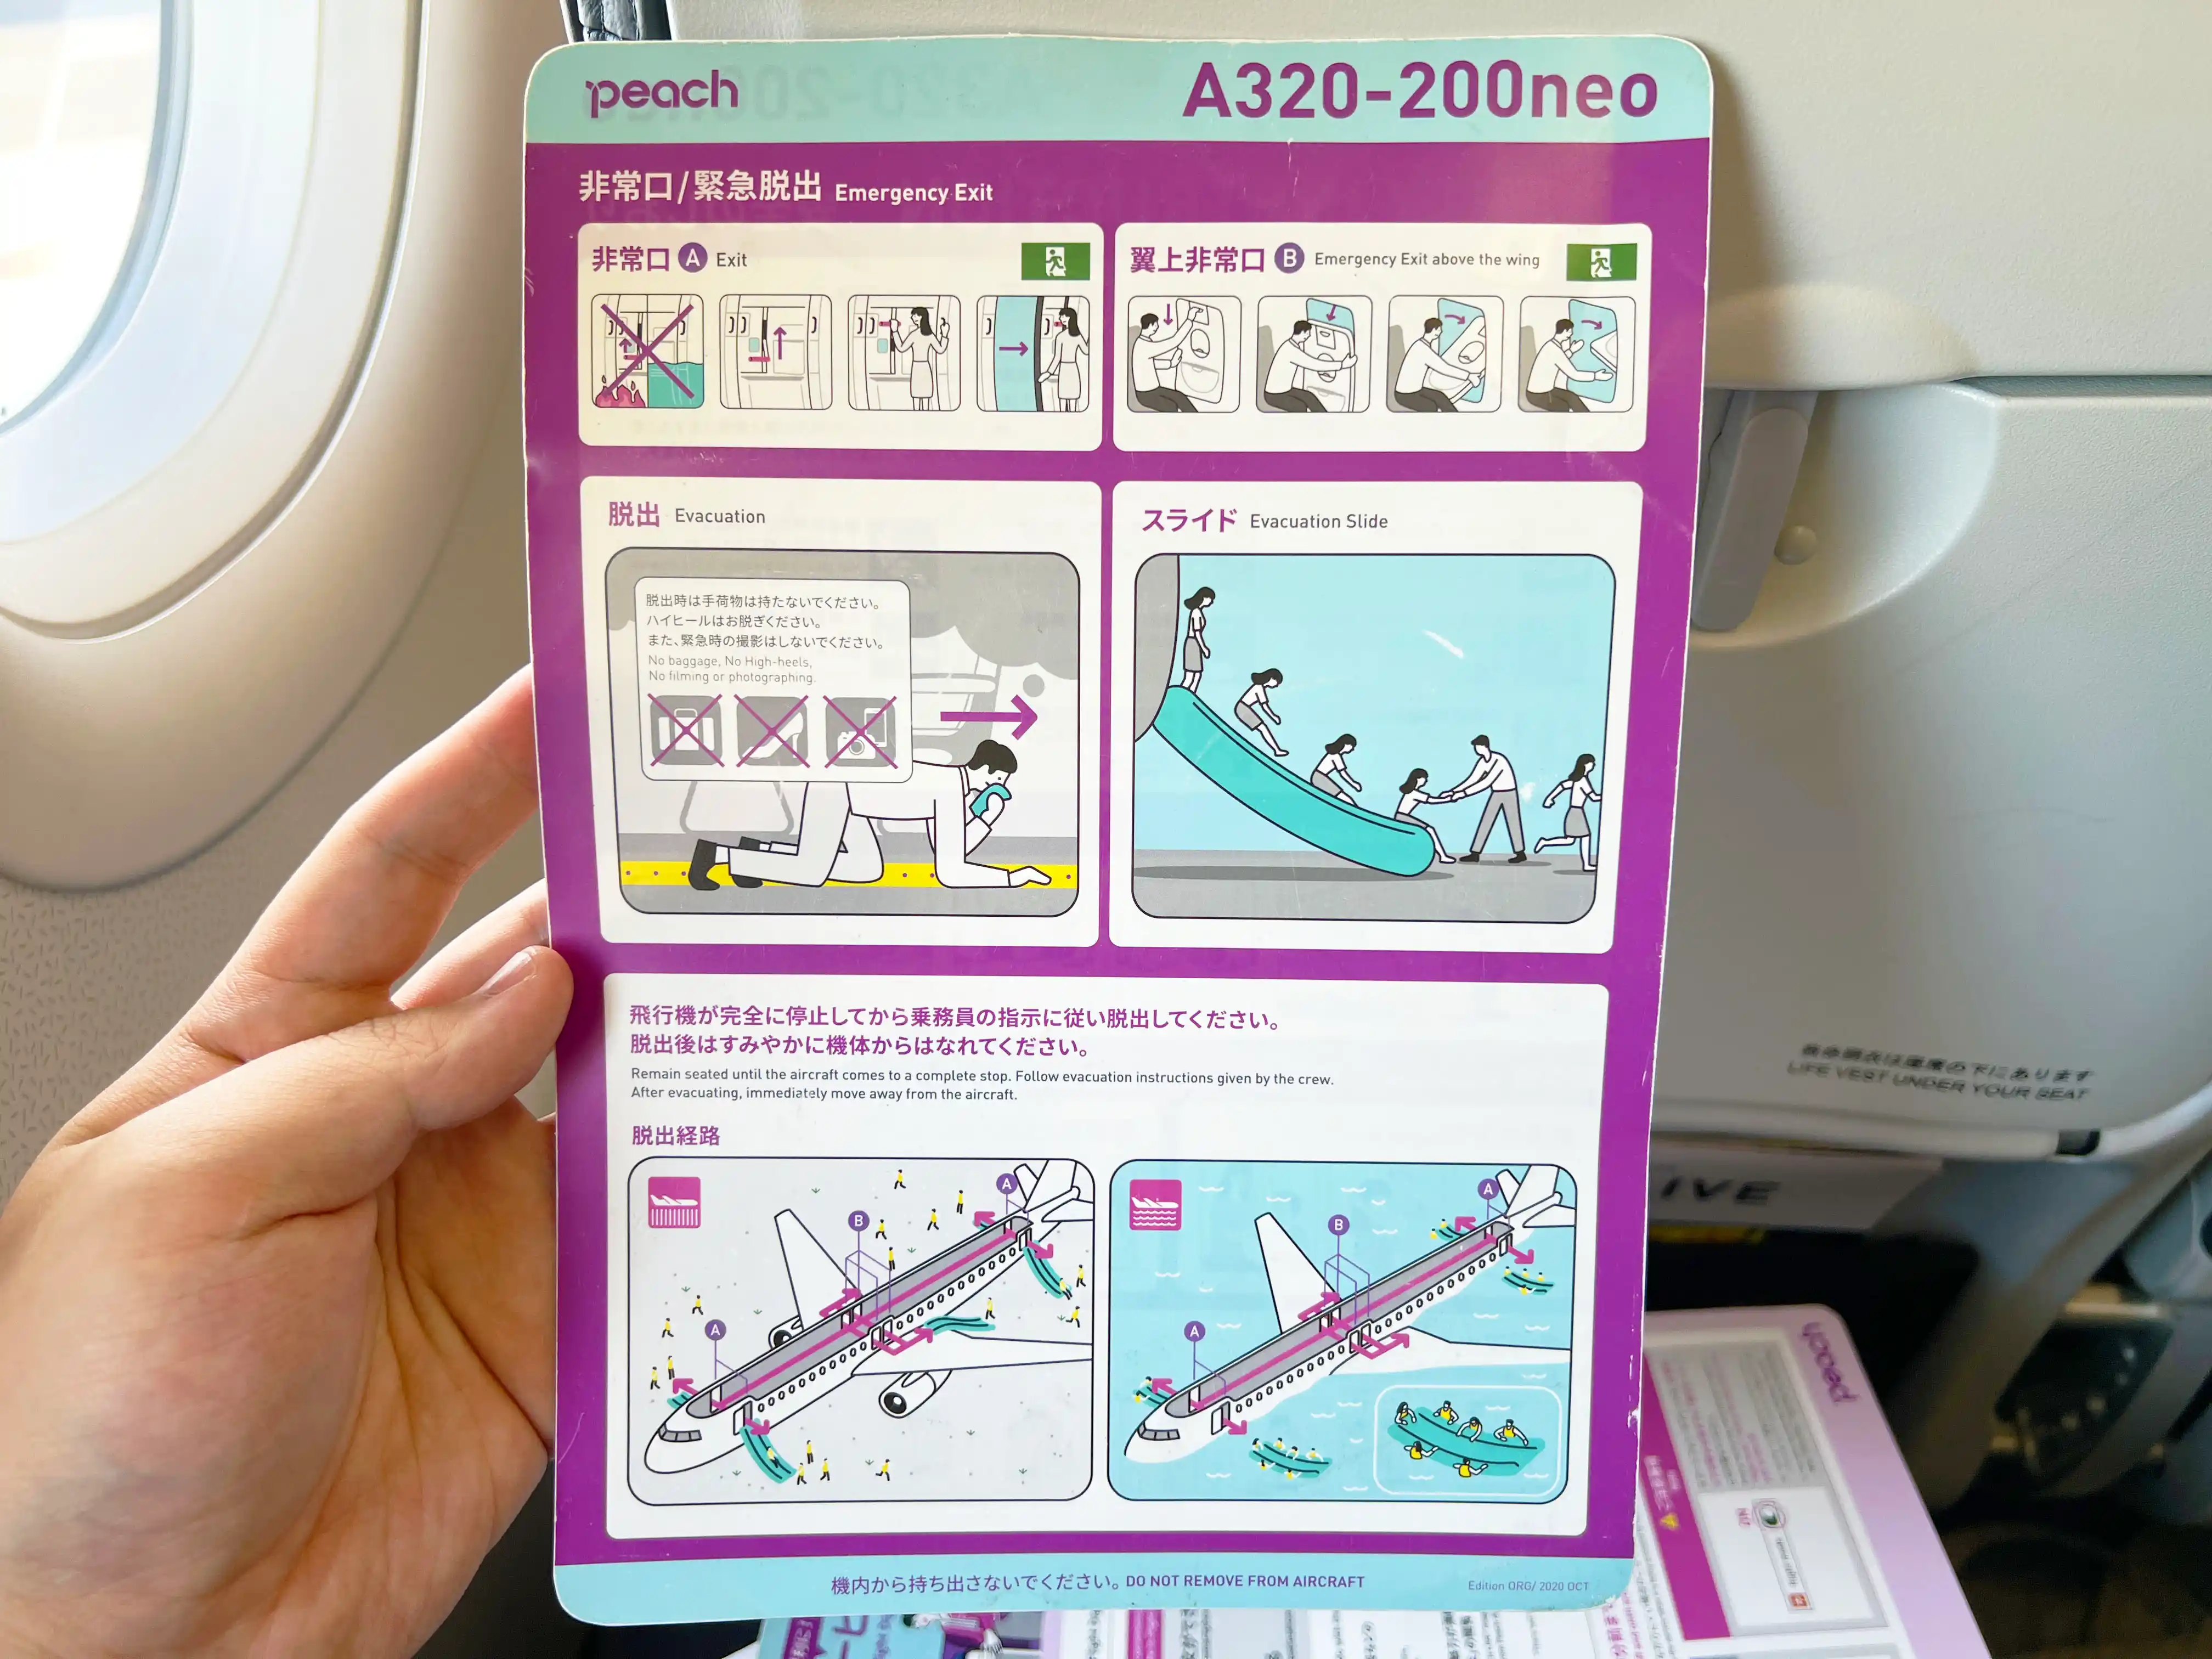
Peach Aviation safety instruction front side back side air sickness bag Peach Aviation safety instruction front sidePeach Aviation 2025 Latest Sale Information
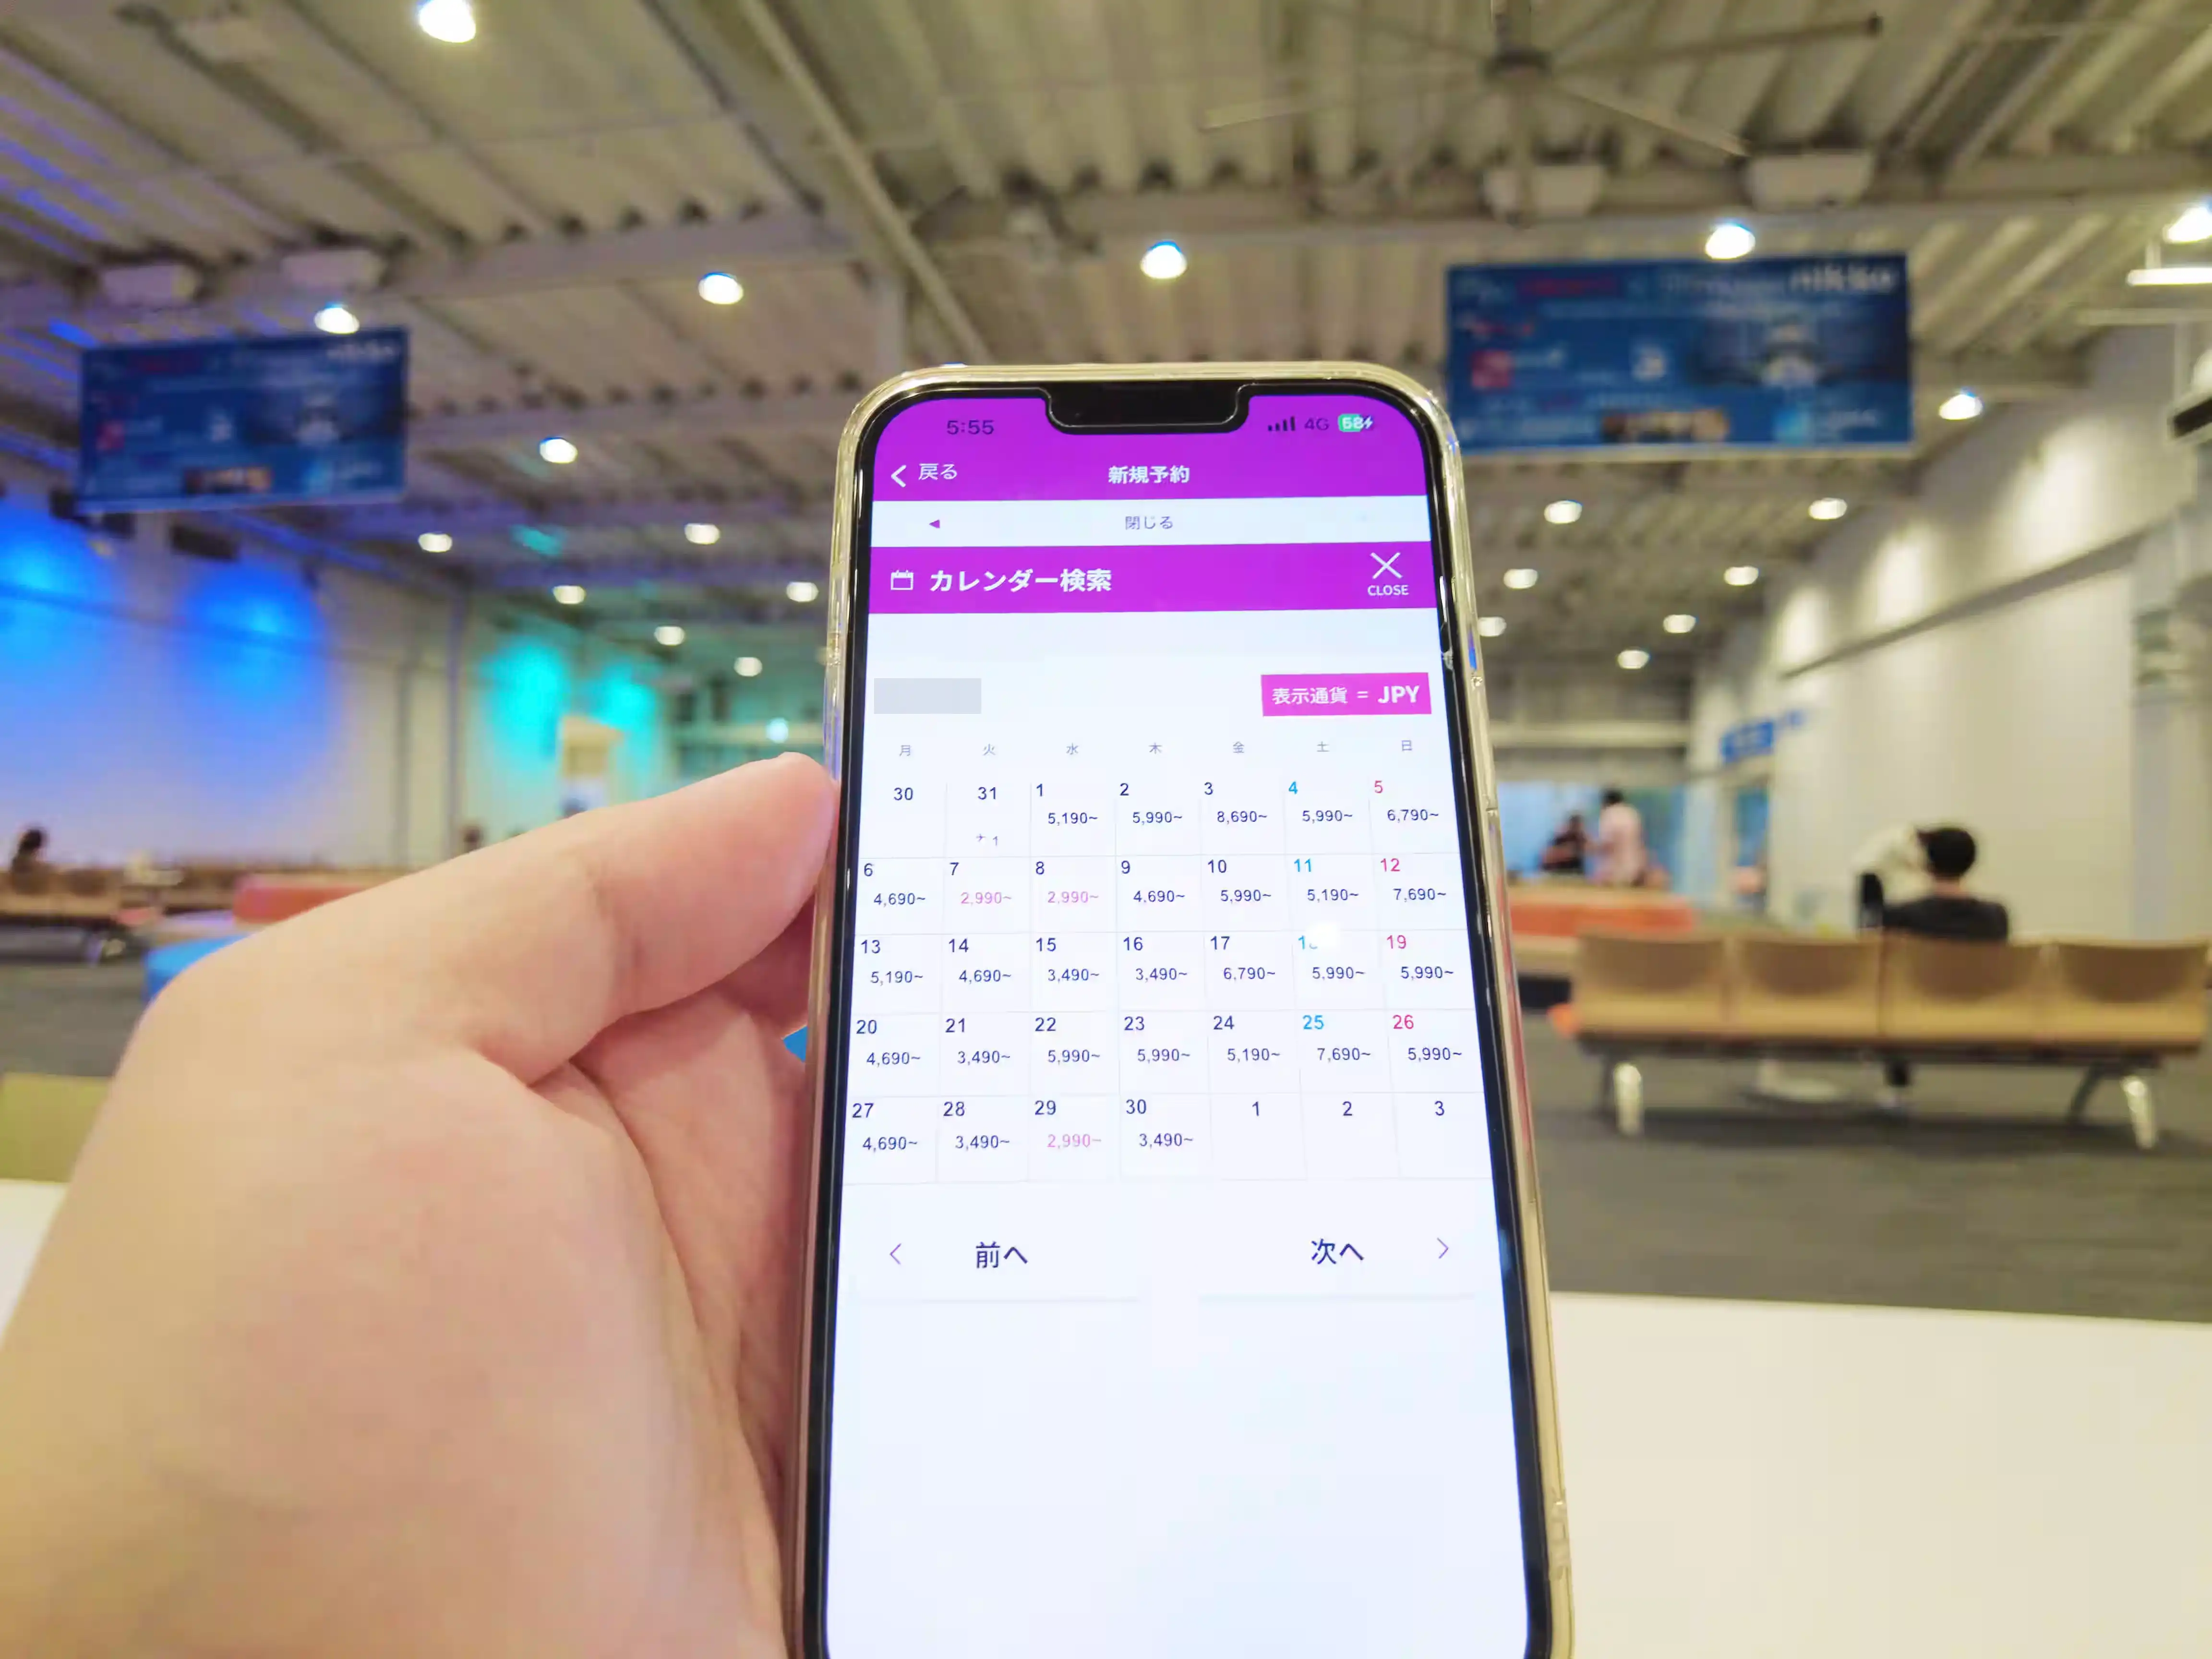
Peach Aviation holds sales every year.
For the latest discount information, please visit the official Peach Aviation website.
▼Peach Aviation Official Website Sale & Campaign Updates
https://www.flypeach.com/otherbnrPeach Aviation How to Book
Peach offers three ways to make a reservation.
- Website reservation
- Contact center reservation
- Airport counter reservation
 Please note that a new reservation fee applies when making a reservation at the contact center or airport counter.Booking on a Computer
Visit the official Peach Aviation website.
Use the reservation search bar at the top of the page to select your desired conditions and search for available flights on the day. Once selected, click the search button.▼Peach Aviation Official Reservation Page
https://www.flypeach.comCloseBooking on Smartphone or Tablet
You can select your desired conditions and search for available flights on the Peach Aviation official website.
Additionally, reservations can be made through the official apps for iOS and Android, where you can easily check flight details, make changes, and view operational status.For future use, your name and address will be automatically saved, making the booking process smoother. Please complete your reservation within 30 minutes after searching.
▼Peach Aviation Official iOS App (for iPhone users)
https://apps.apple.com/jp/app/peach/id1235958304▼Peach Aviation Official Android App (for Android users)
https://play.google.com/store/apps/details?id=com.flypeach.flypeachCloseReservation Process
- Search
- Select Flight
- Enter Customer Information
- Seat & Baggage
- Additional Options
- Final Confirmation
If 30 minutes have passed since you started the process, you will have to start over, so be careful.
▼Peach Aviation Official Reservation Page
https://www.flypeach.comYou Can Board with a Reservation Number
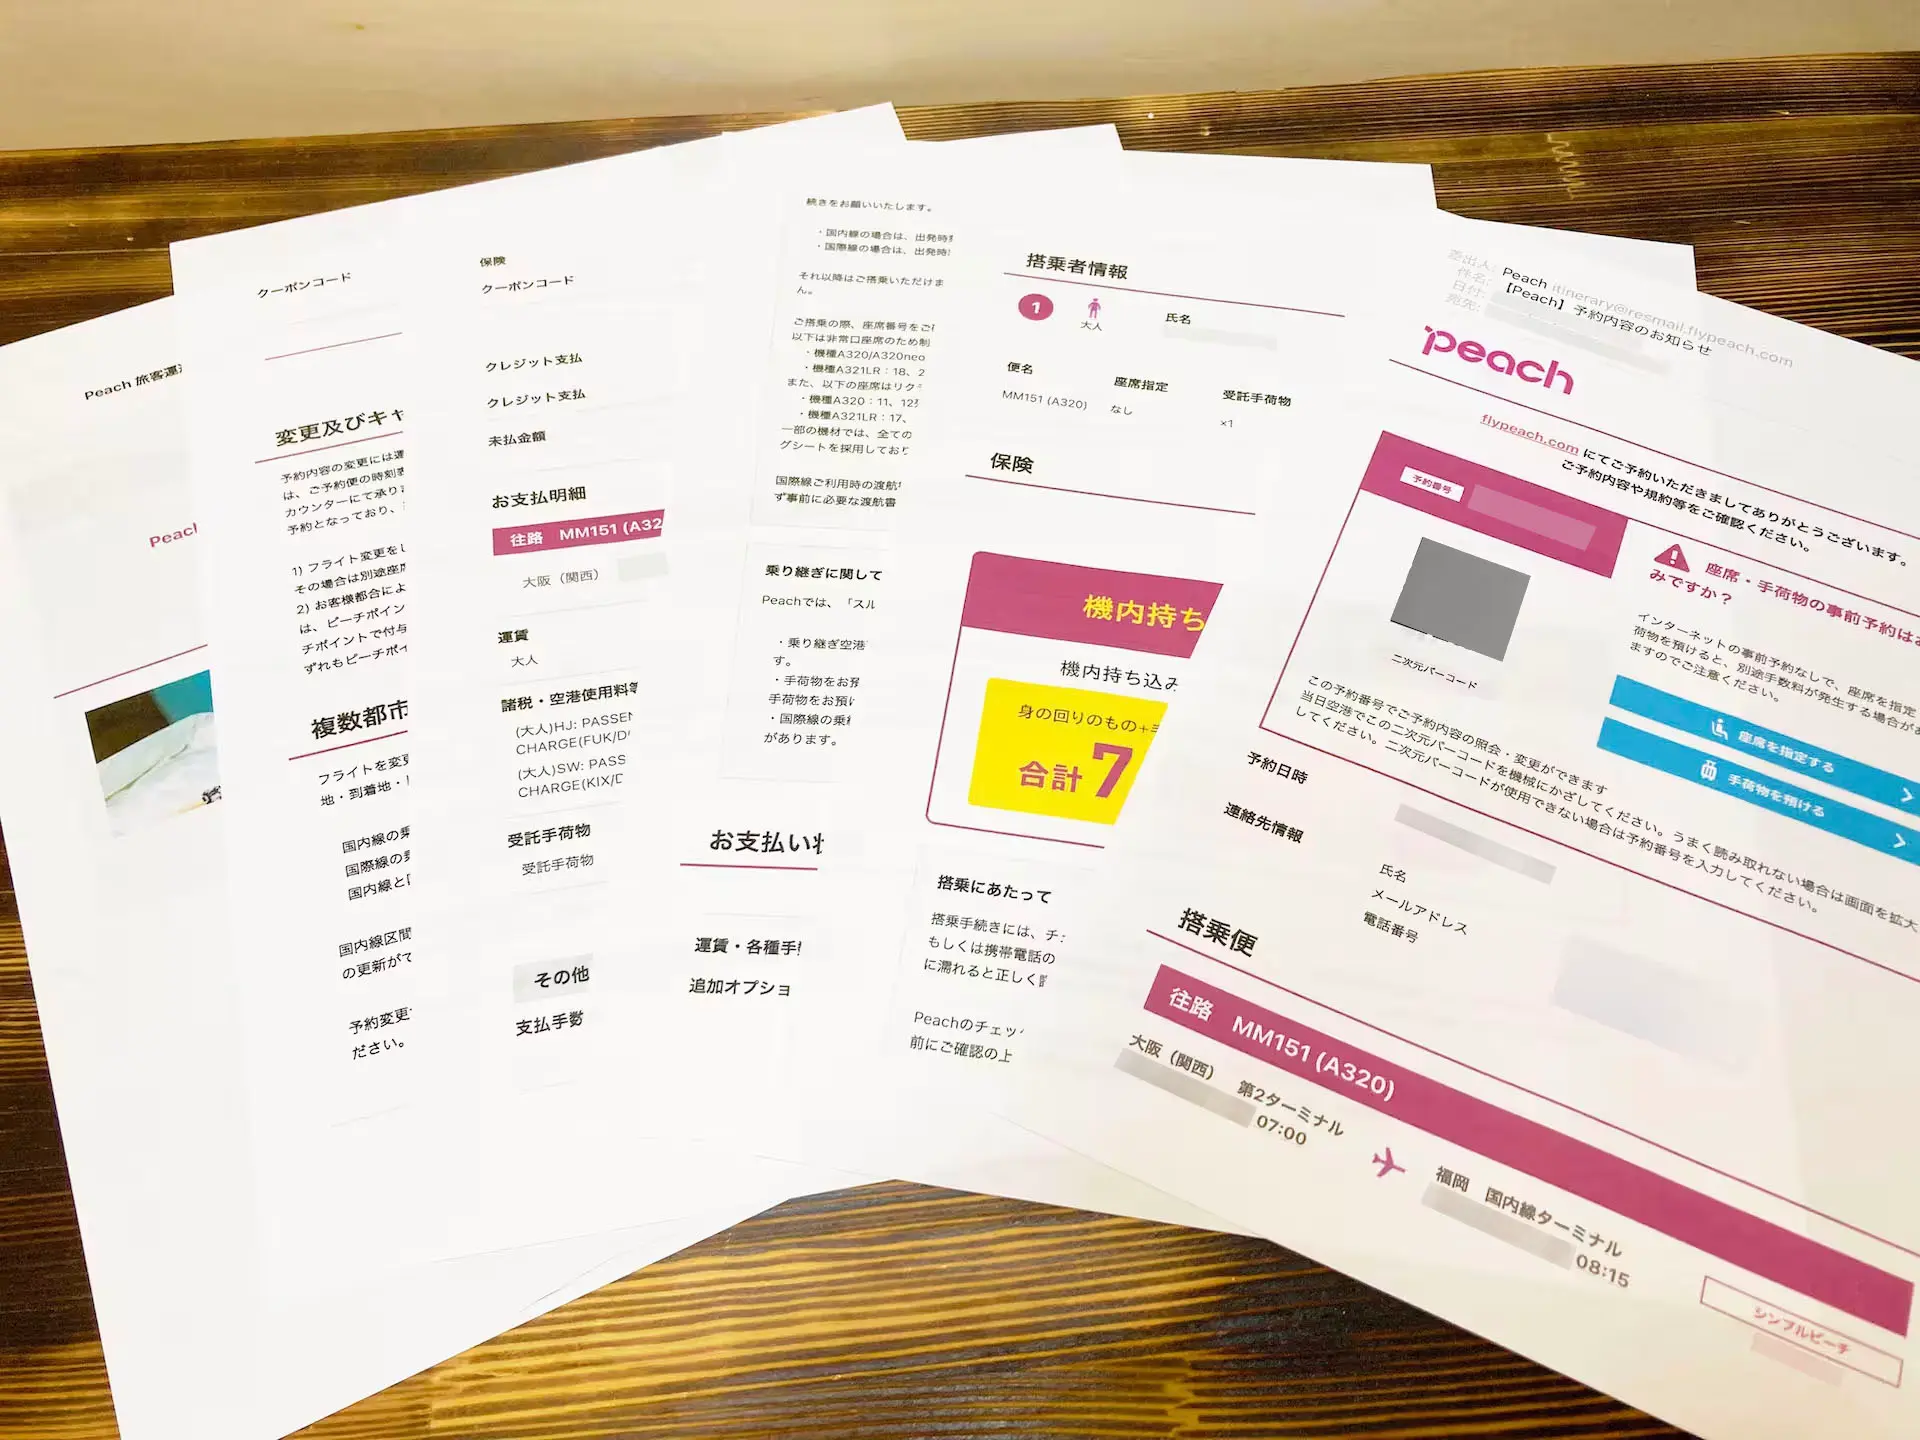
If you have a QR code or reservation number, boarding will be smooth.
For Smartphone Users
• Screenshot the QR code in the reservation confirmation email (“[Peach] Reservation Details”) and save it
• You can also view it on the official appFor Those Who Want to Print It
• Printing the reservation confirmation document attached to the reservation confirmation email will make check-in smoother
If You Don’t Have a Printer
• Save the barcode by taking a screenshot
• View the reservation confirmation page on your smartphone or tabletIf None of the Above Works
• Just write down your reservation number, and you will be able to board
Peach Aviation Fare Type Features
Simple Peach
• Want to keep travel costs at the lowest
• Frequent traveler
• Solo travelerThis is the simplest and most affordable fare type that does not include seat selection or checked baggage options. You can add options as needed, such as seat selection or baggage check.
CloseValue Peach
• If your schedule may change
• Beginners with LCC
• Group trips with family or friendsThis fare type includes basic options like seat selection, checked baggage, and the ability to make changes or refunds. It’s a great option for those who haven’t used low-cost carriers much.
ClosePrime Peach
• If there’s a possibility of canceling plans
• If you plan to check in more than two bags
• If you are particular about your seatThis fare type offers even more comprehensive options, such as two free checked bags and full refunds in case of cancellation, providing peace of mind compared to Value Peach.
ClosePeach Aviation Super Easy! How to Use Automatic Check-In
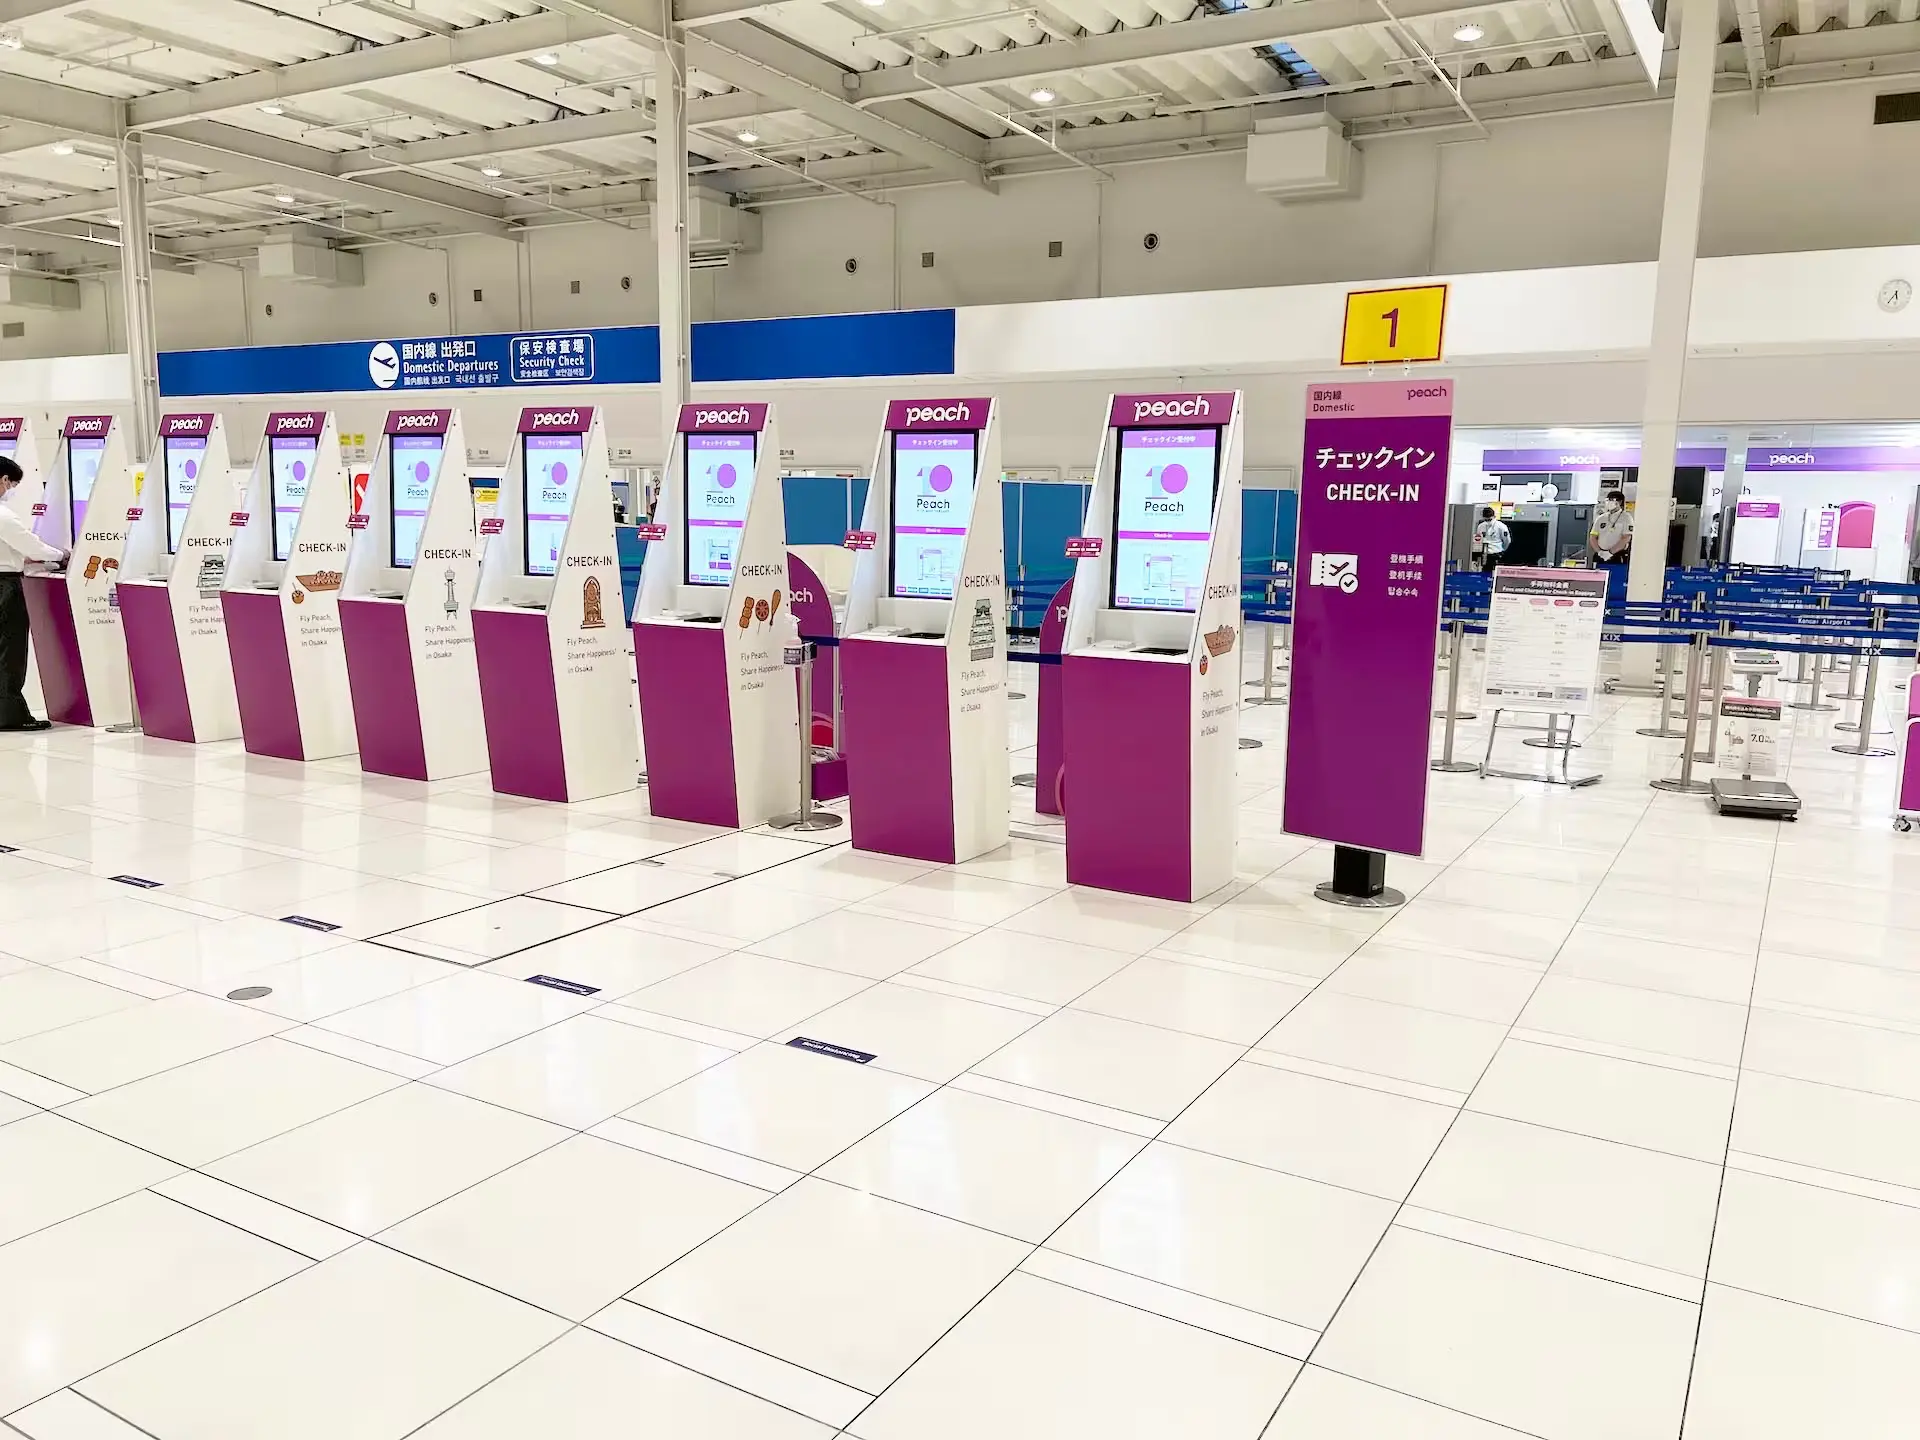
Peach has self-check-in machines at airports where it operates. These purple-red machines are lined up, and you can use your reservation number or QR code to complete the check-in process.
Features of the Check-in Machine
• The touch screen is vertical, and you can easily operate it with your finger
• The operation method is simple and easy to understandHow to Check In
① If Entering the Reservation Number
Press the “Enter Reservation Number” button at the bottom right of the monitor and enter the reservation number issued at the time of booking.② If Using the QR Code
Hold your smartphone screen with the QR code up to the transparent glass part of the black frame at the bottom of the monitor.Either method will issue a boarding pass.
It was really easy when I tried issuing the ticket!
When you scan the QR code, a screen will appear confirming your carry-on items, and you just press the “OK” button to complete the issuance.
The issued ticket clearly displayed the boarding time and seat number.
Issuance Time
For domestic flights, ticket issuance is available from 90 minutes to 30 minutes before departure (for Kansai and Naha airports, it’s 25 minutes before). For international flights, it’s available from 120 minutes to 50 minutes before departure.
I arrived at the airport early and tried to issue the ticket first, but there is a time restriction, and ticket issuance is only available from 90 minutes before departure.
When I tried to check in 91 minutes before departure, I got an error message.
When doing the ticket issuance process, be sure to check whether it falls within the 90-30 minute window, and if needed, consult with a Peach staff member for reassurance.
Peach Aviation Baggage Allowance and Weight Limits
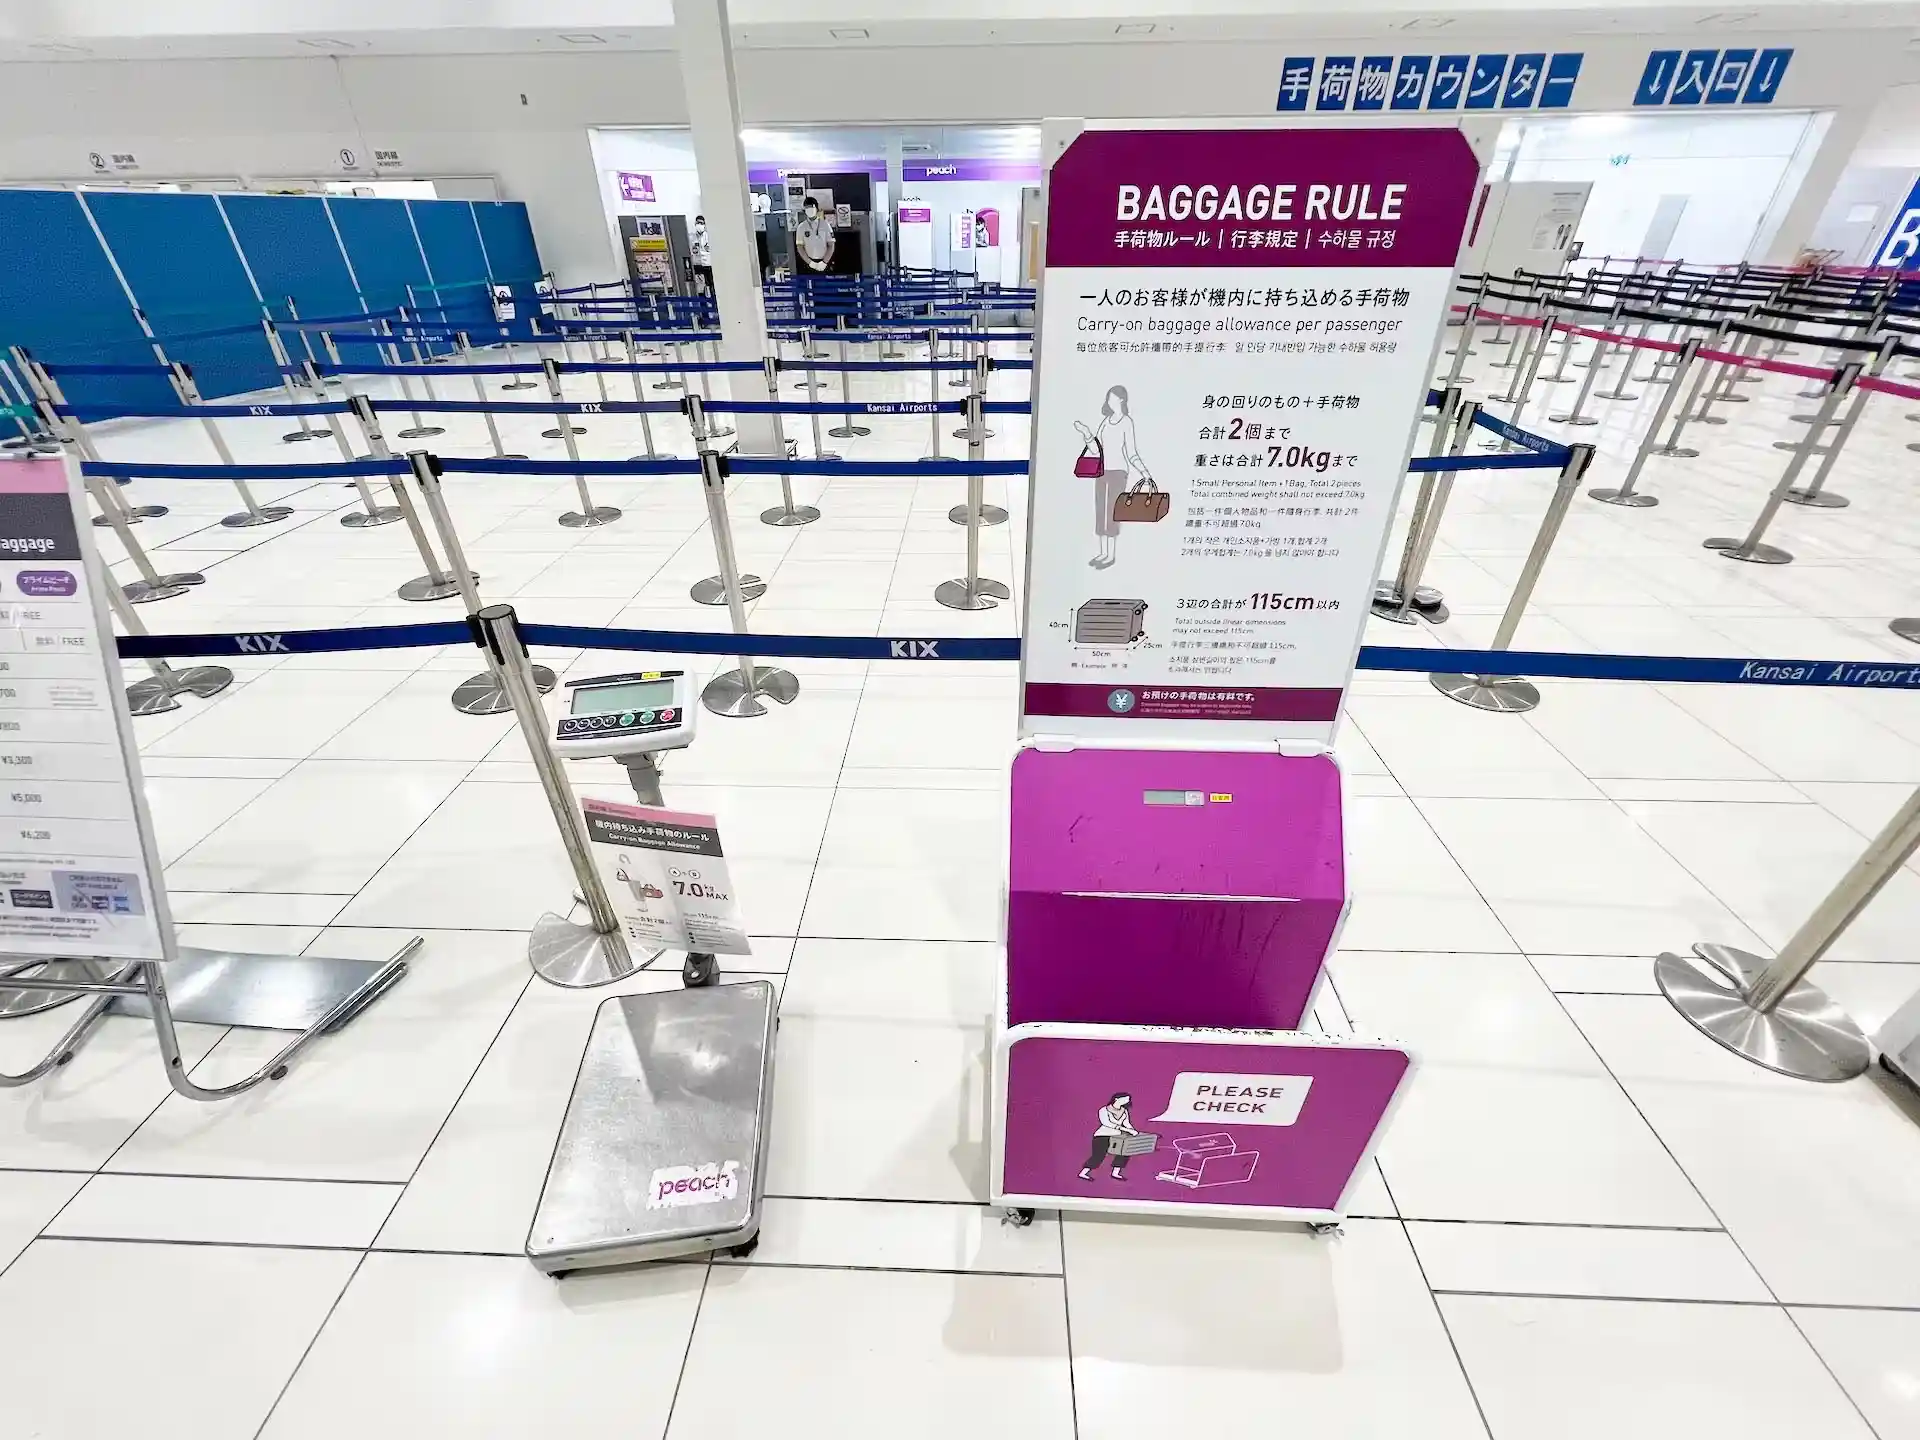 Carry-On Baggage
Peach’s carry-on baggage is limited to 3 dimensions totaling 115 cm or less, a maximum of 2 items, and a total weight of 7 kg.
If it exceeds 7 kg, it will be treated as checked baggage, and additional fees will apply, so it’s recommended to adjust the weight at home in advance. Be sure to measure including the weight of the suitcase itself.
I usually adjust it to around 6 kg with a bathroom scale.
Also, if you have more than 3 items such as backpacks, tote bags, or souvenir paper bags, it will exceed the limit, so be careful not to buy too many souvenirs.
CloseChecked Baggage
Peach’s checked baggage is limited to up to 5 items per person, with a total weight of 100 kg.
Each piece of baggage can weigh up to 20 kg, but if it weighs up to 32 kg, you can check it in for an additional fee.
The size limit is 203 cm in total for all three dimensions (including wheels and handles). Baggage larger than 203 cm cannot be checked in, so be sure to measure it beforehand.
ClosePeach Aviation Carry-on Items & Prohibited Items
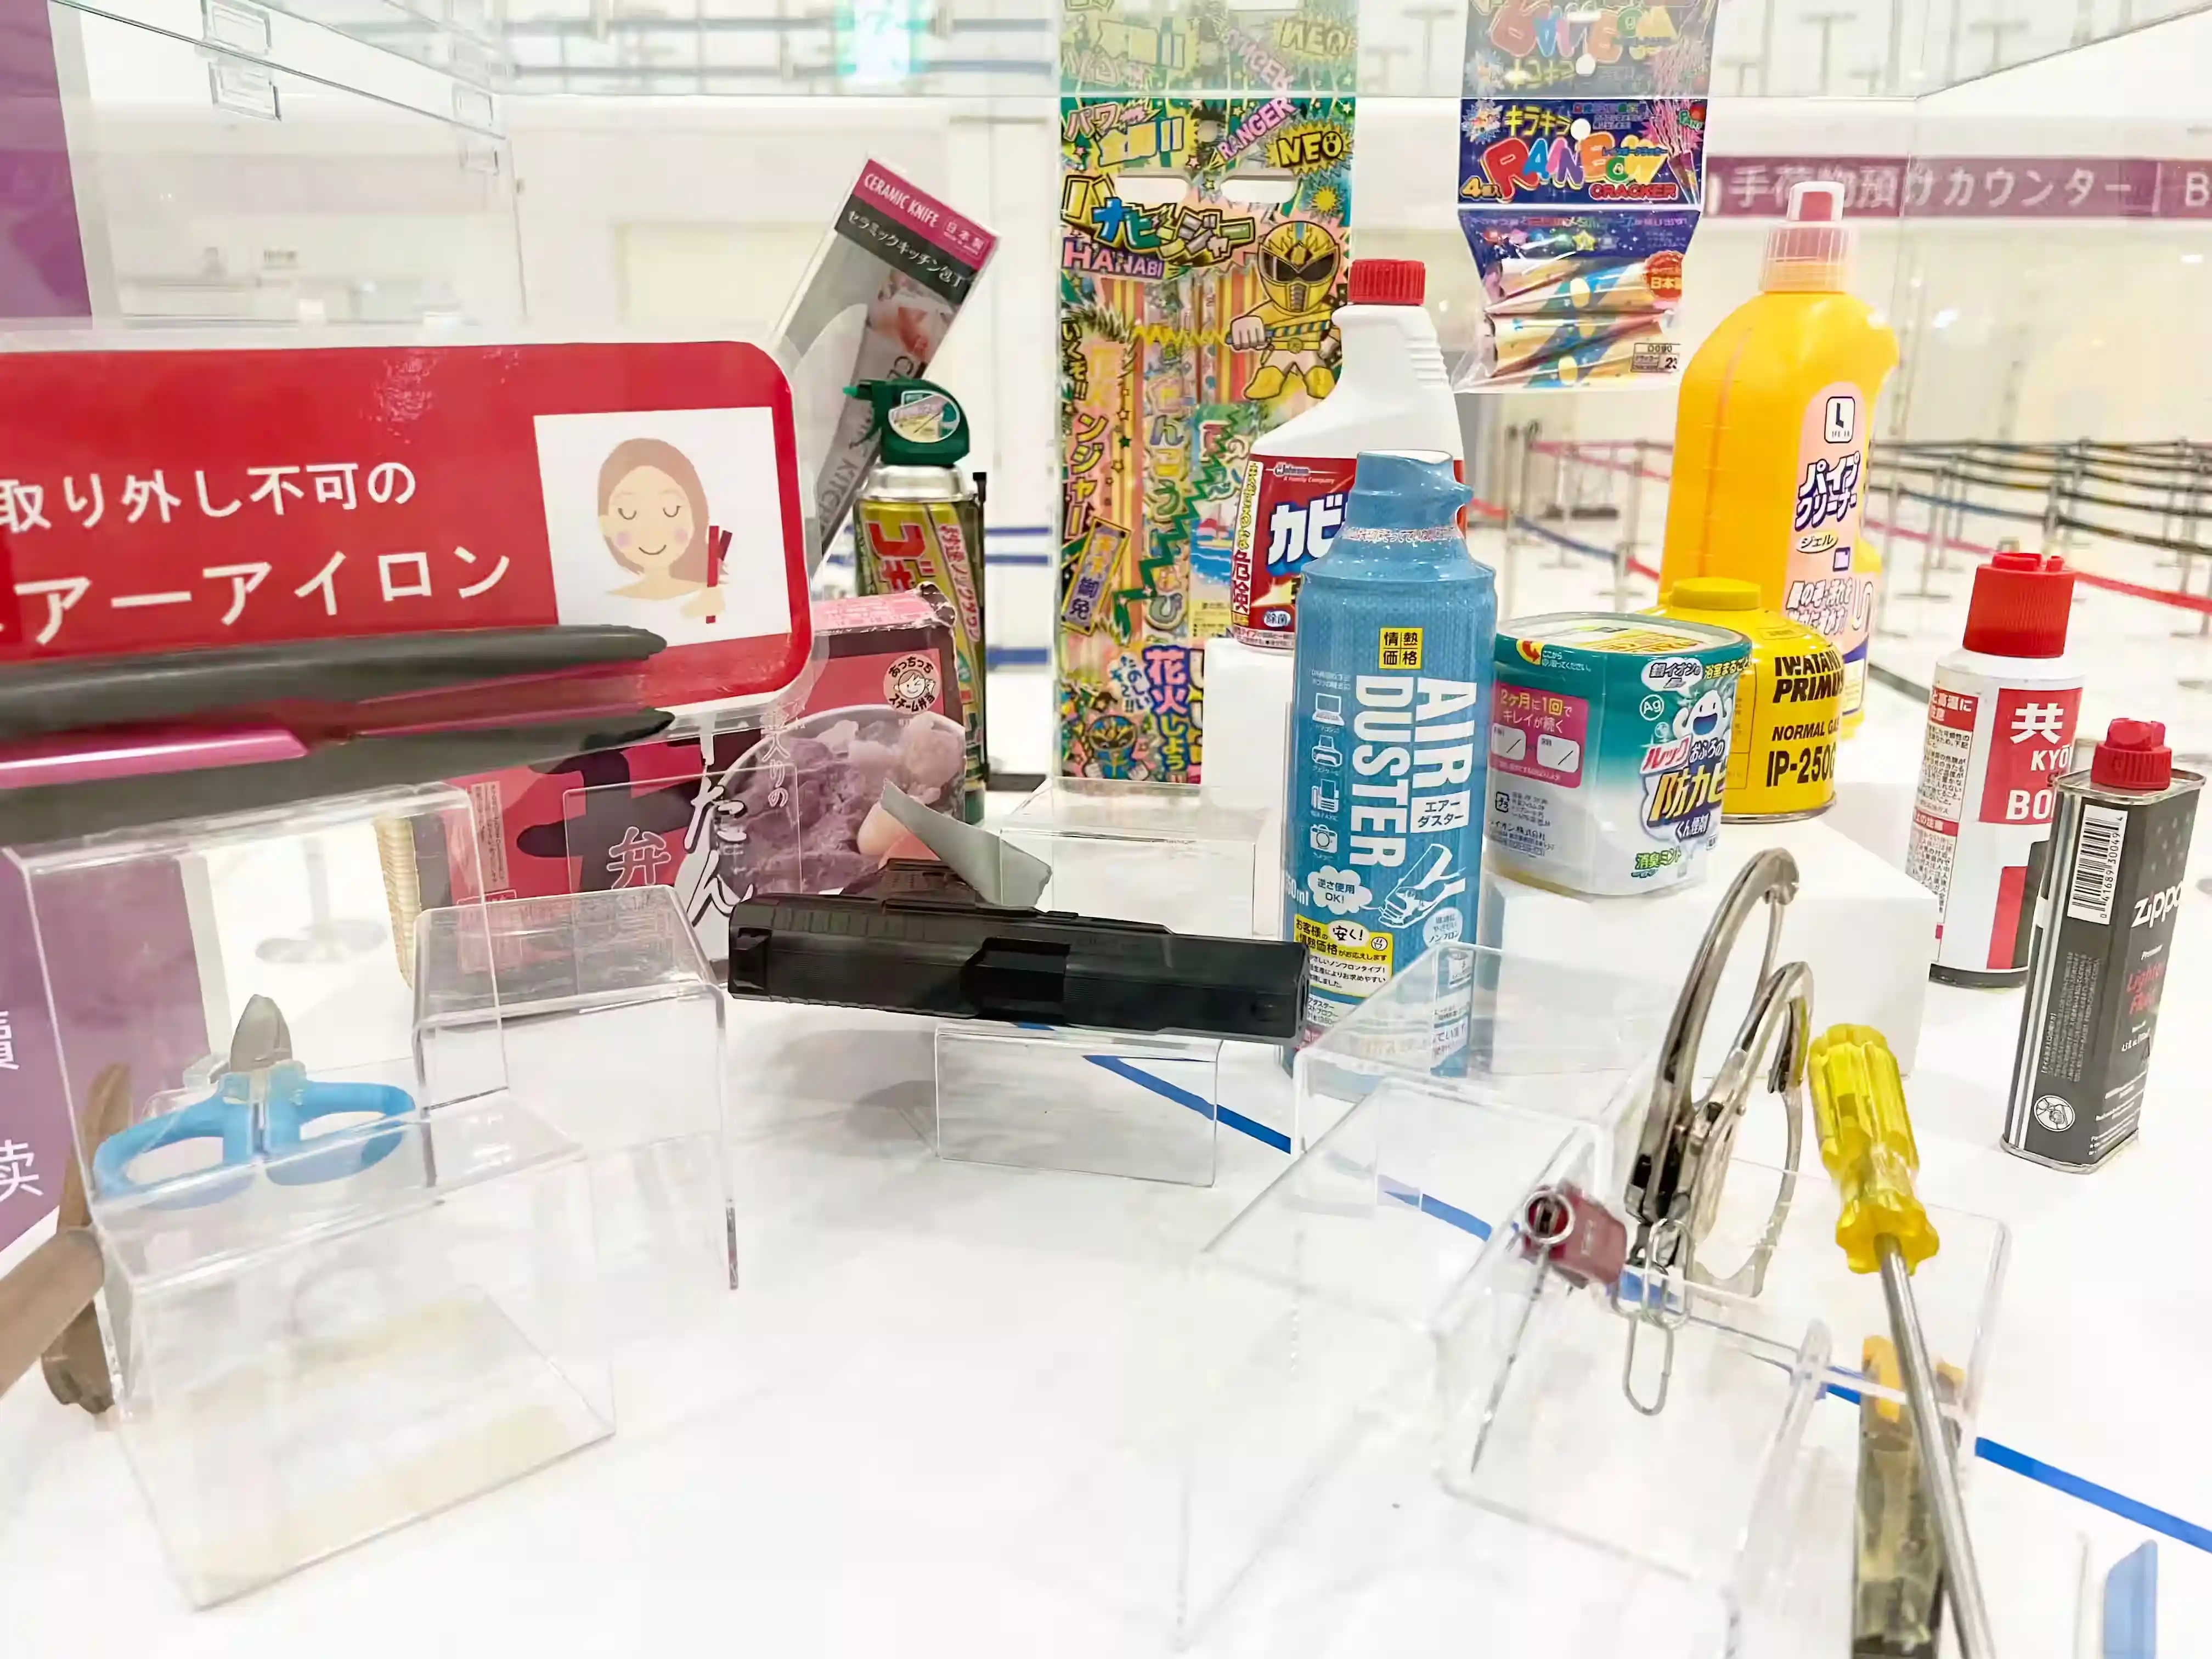 Prohibited Items List
Category Item Explosives Fireworks, crackers, etc. Flammable and Combustible Materials Large quantities of matches or lighter fluid, camping stoves, alcohol-based liquids over 70% ABV, etc. Compressed Gases Camping gas canisters, sports oxygen sprays, dust-reducing sprays, etc. Organic Substances Insecticides, pesticides, etc. Corrosive Materials Liquid batteries (except for those for electric wheelchairs), heated lunch boxes, etc. Radioactive Materials Isotopes, etc. Magnetic Materials Large magnets, etc. Oxidizing Materials Bleach, instant cold packs, etc. Other Hazardous Materials Formalin, etc. CloseAt Kansai Airport Terminal 2, prohibited items for carry-on were displayed in a showcase.
Firearms, knives, lighters, sharp tools like screwdrivers, and chlorine-based bleach are all prohibited. In general, flammable items are not allowed to be carried onboard.
Additionally, aerosol-type hair products and sunscreen liquids are prohibited due to the risk of damage caused by pressure changes.
However, some items may be allowed to be carried or checked in under certain conditions, so check the official website for more information.
▼ Peach Official Site – Baggage Restrictions Page
https://www.flypeach.com/lm/ai/airports/baggage/limited_bagPeach Aviation How to Check in Baggage
 Baggage
Weight Check
• Before heading to the security gate, check the weight of your baggage.
Move to the Baggage Screening Area
• Arrange your items in the designated containers (use multiple containers if needed).
• Remove electronics (laptops, cameras, chargers, external hard drives, game consoles, etc.) from your bag and place each item in a separate container.Pass Through the Screening Machine
• Place your baggage on the conveyor belt and pass it through the scanner.
• If you have many electronics, you may need to pass them through multiple times.Body Screening
• Empty your pockets and proceed through the gate.
• You can leave your watch on while passing through.Following this process will allow you to smoothly pass through security!
CloseChecked Baggage
After Ticket Issuance, Go to the “Checked Baggage Counter”
• Check in larger items like suitcases.
Weight Check
• It’s mandatory to keep the weight under 20 kg.
• Be aware that exceeding 20 kg will result in an additional fee.Body Screening
• After the baggage check, proceed to the body screening gate.
Adjusting the weight in advance is key for smooth processing!
ClosePeach Aviation What You Can Do After Passing Security
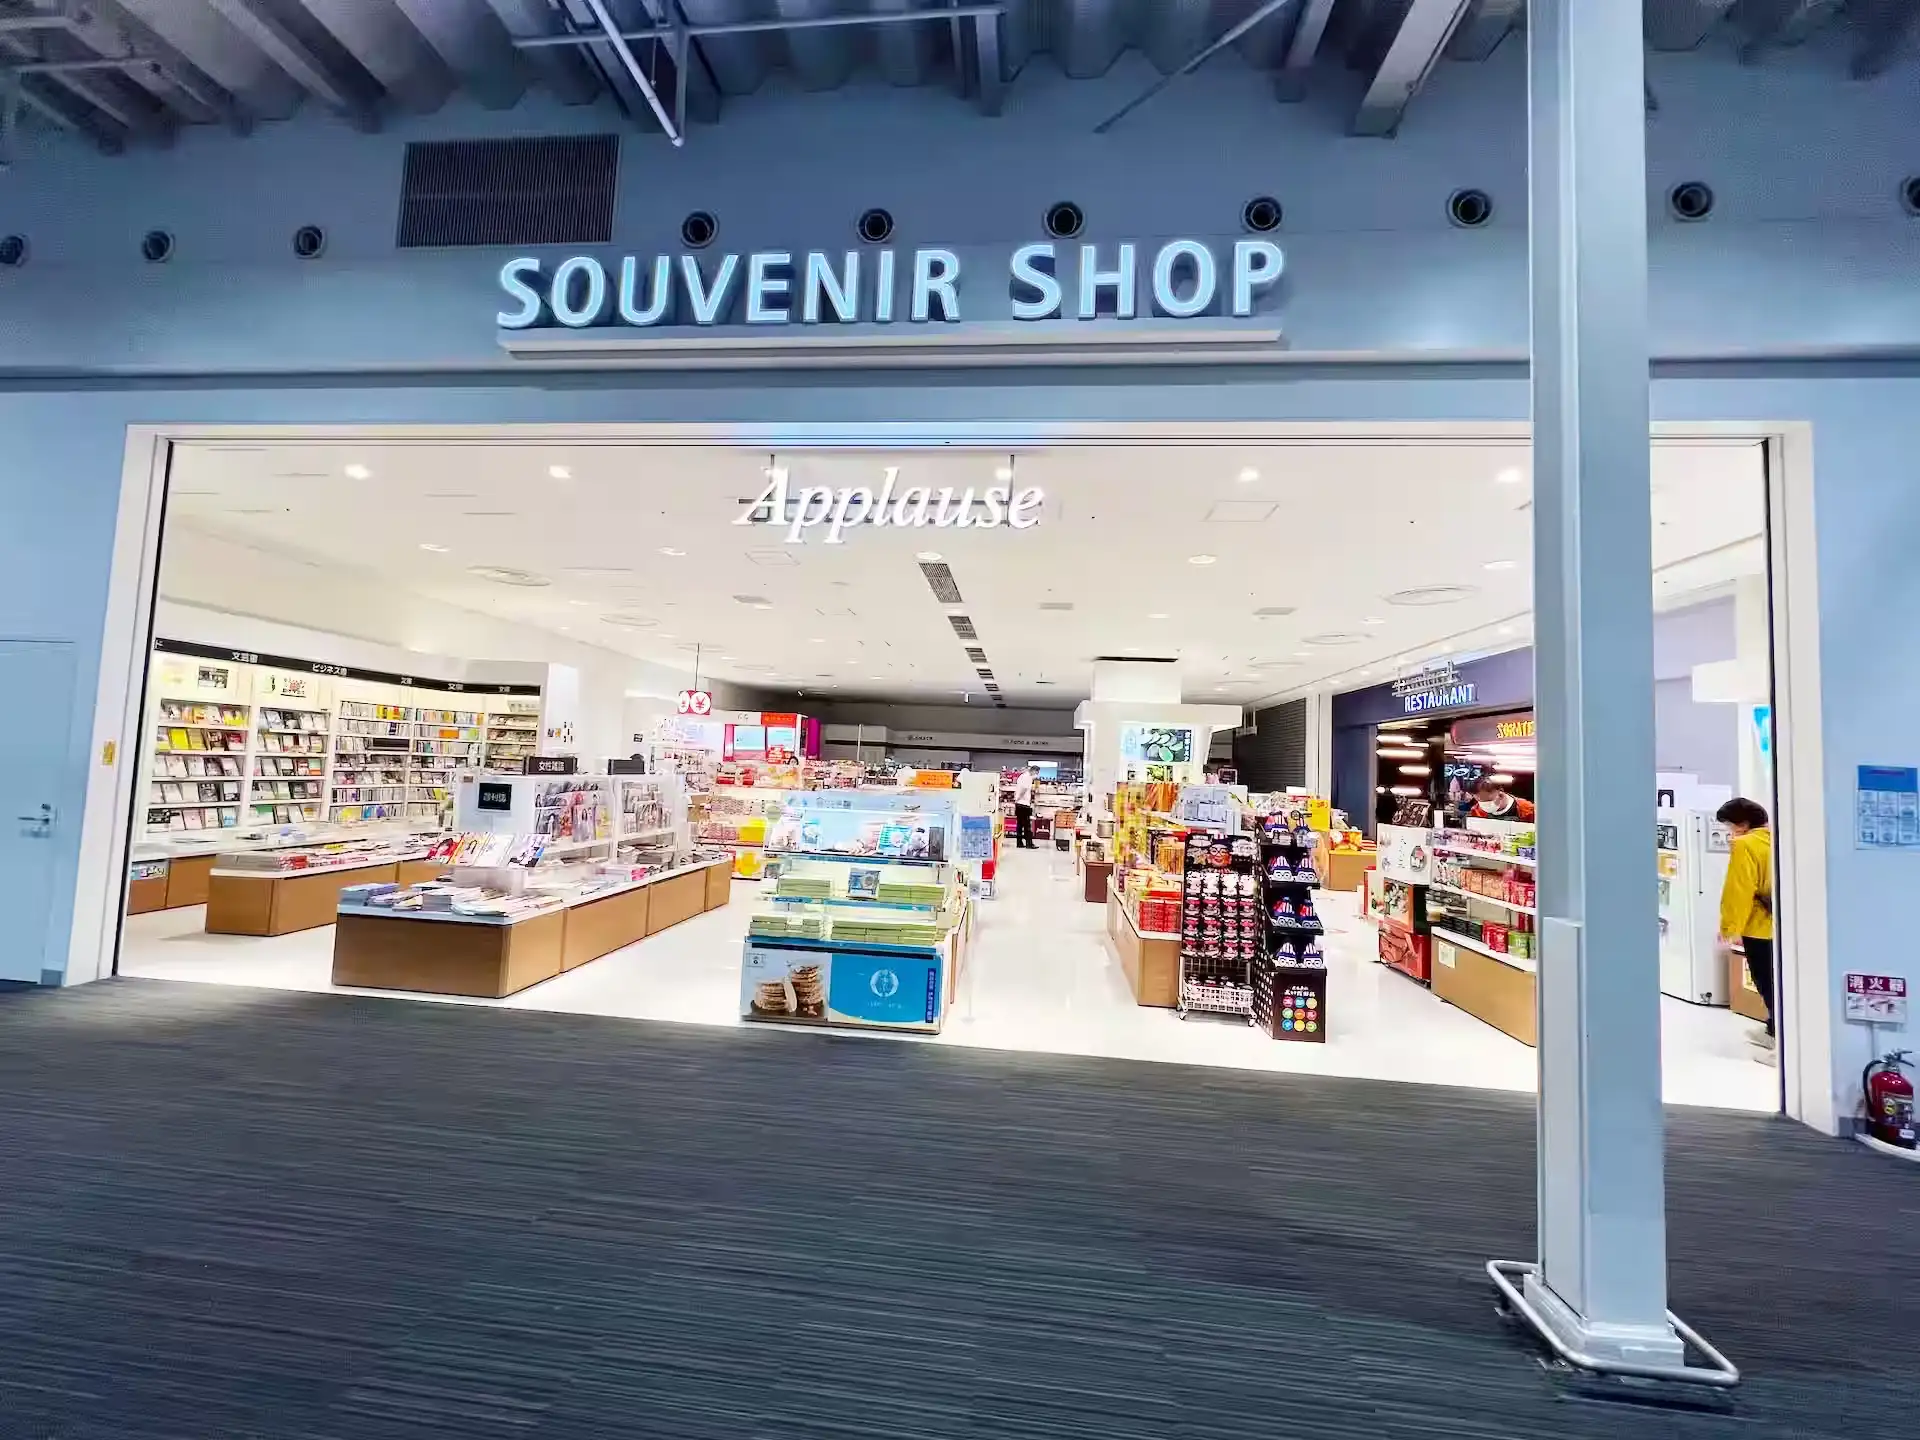
- Make sure to finish meals and use the restroom
- If you have extra time, do some shopping at the souvenir shop
- Be mindful of the baggage item limits!
If you act with plenty of time to spare, you can board the plane comfortably!
Peach Aviation Boarding the Long-Awaited Flight
Follow This Order When the Announcement Is Made
- Passengers in rear window seats (A, F) and their companions
- Rear aisle seats (C, D)
- Front window seats
- Front aisle seats
By boarding in this order, you’ll be able to move to your seat smoothly!
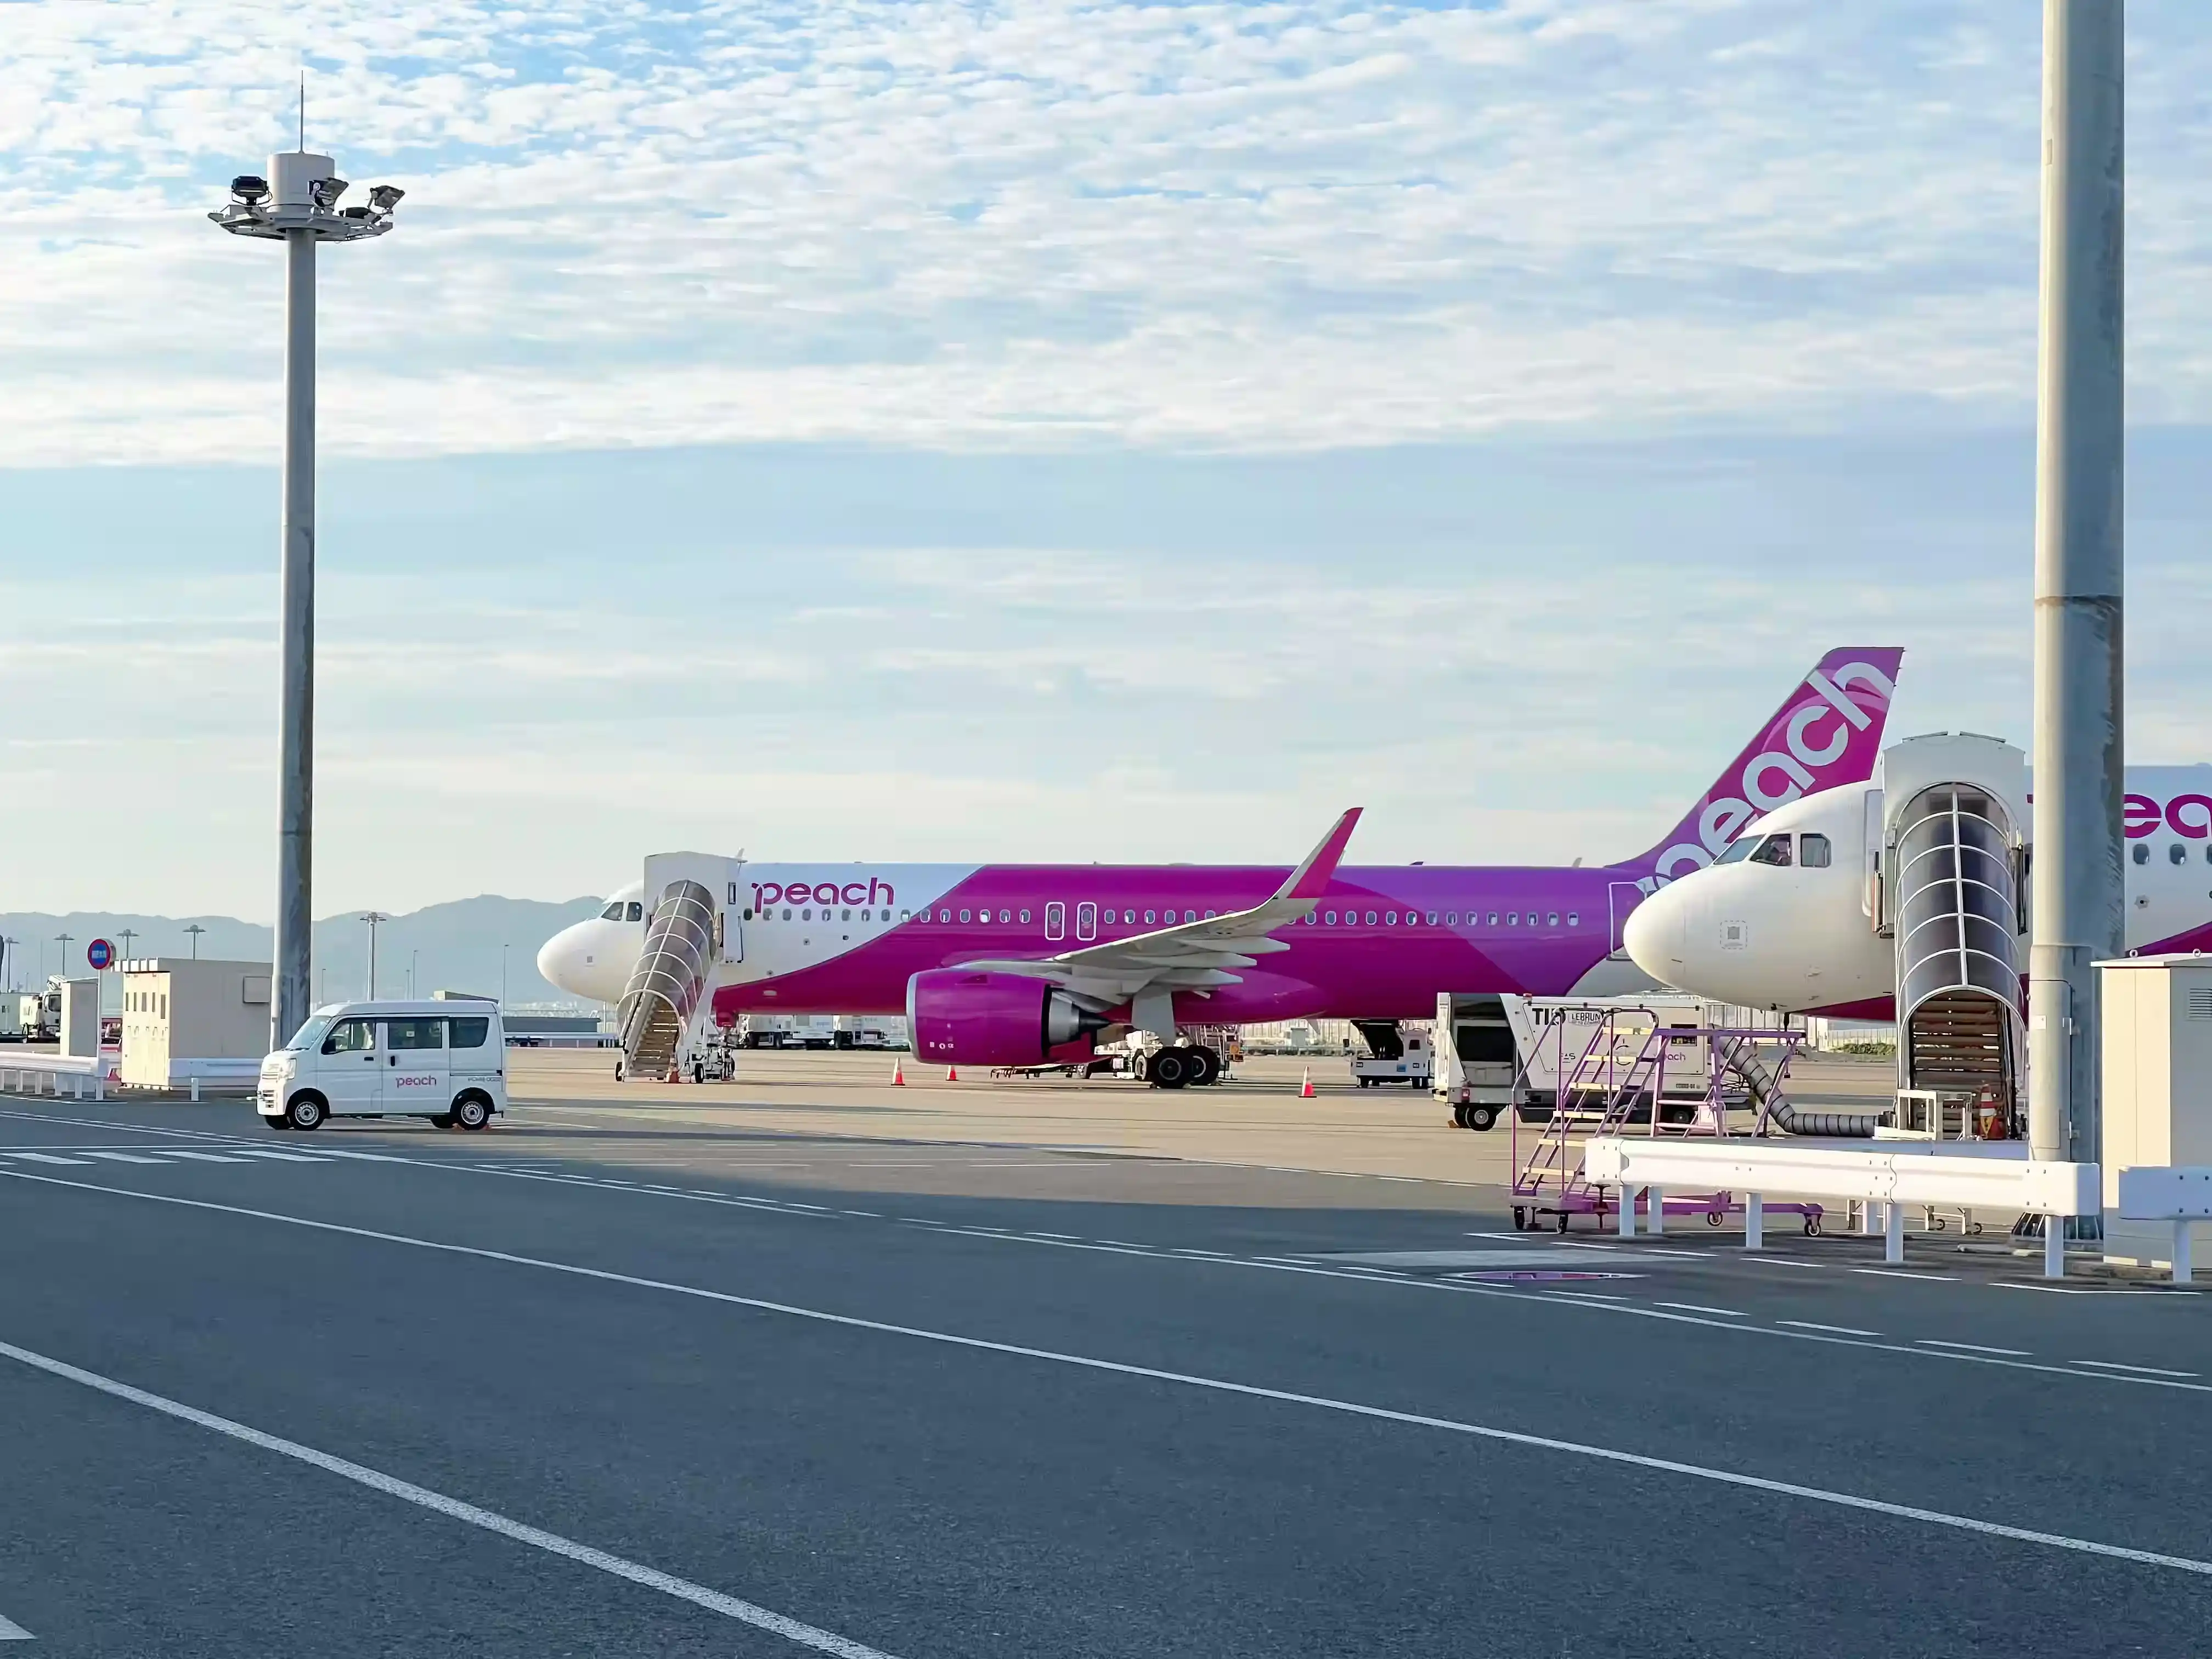
The pink plane stands out, which is a color unique to Peach Aviation. I saw some people taking photos of it.
You’ll board the plane by ascending the stairs (jet bridge). Let me briefly introduce the cabin once onboard.
Peach Aviation Switch Your Devices to Airplane Mode Once Onboard
Before takeoff, be sure to change your smartphone, game consoles, or any other devices that emit signals to Airplane Mode.
Airplane Mode disables communication functions such as phone lines, Wi-Fi, GPS, and Bluetooth to prevent interference with critical equipment during takeoff and landing.
For safe takeoff and landing, be sure to set all your electronic devices to Airplane Mode.
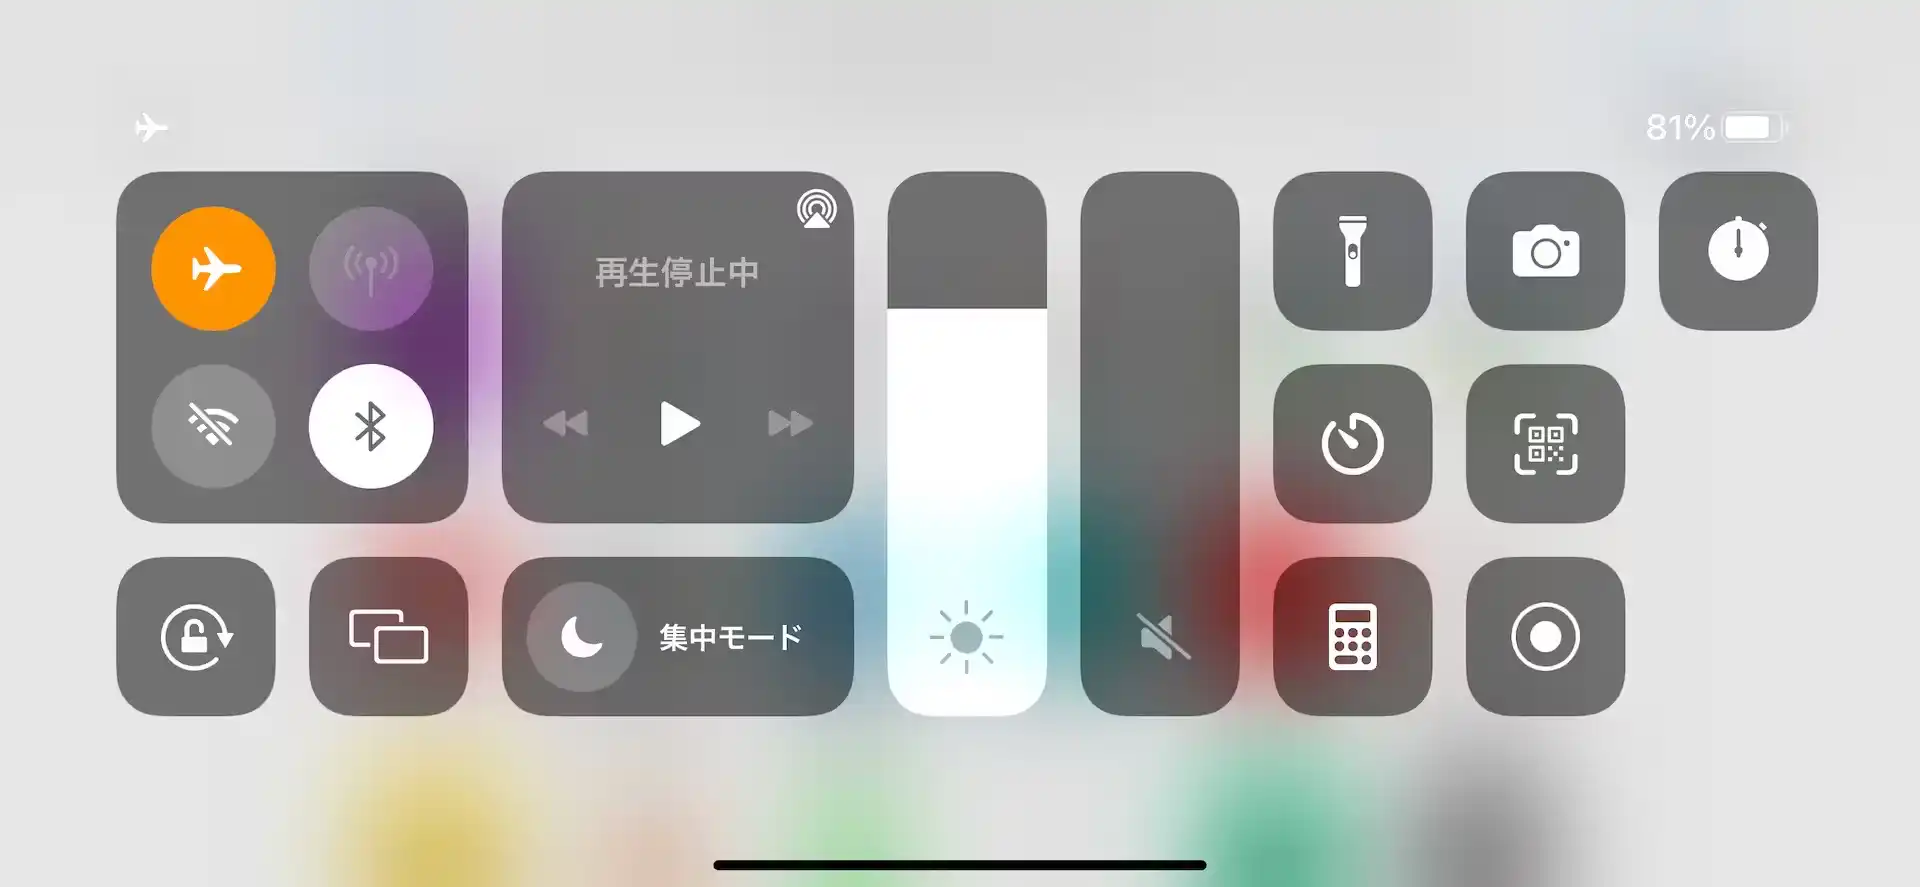
Peach Aviation In-Flight Digital Content Service
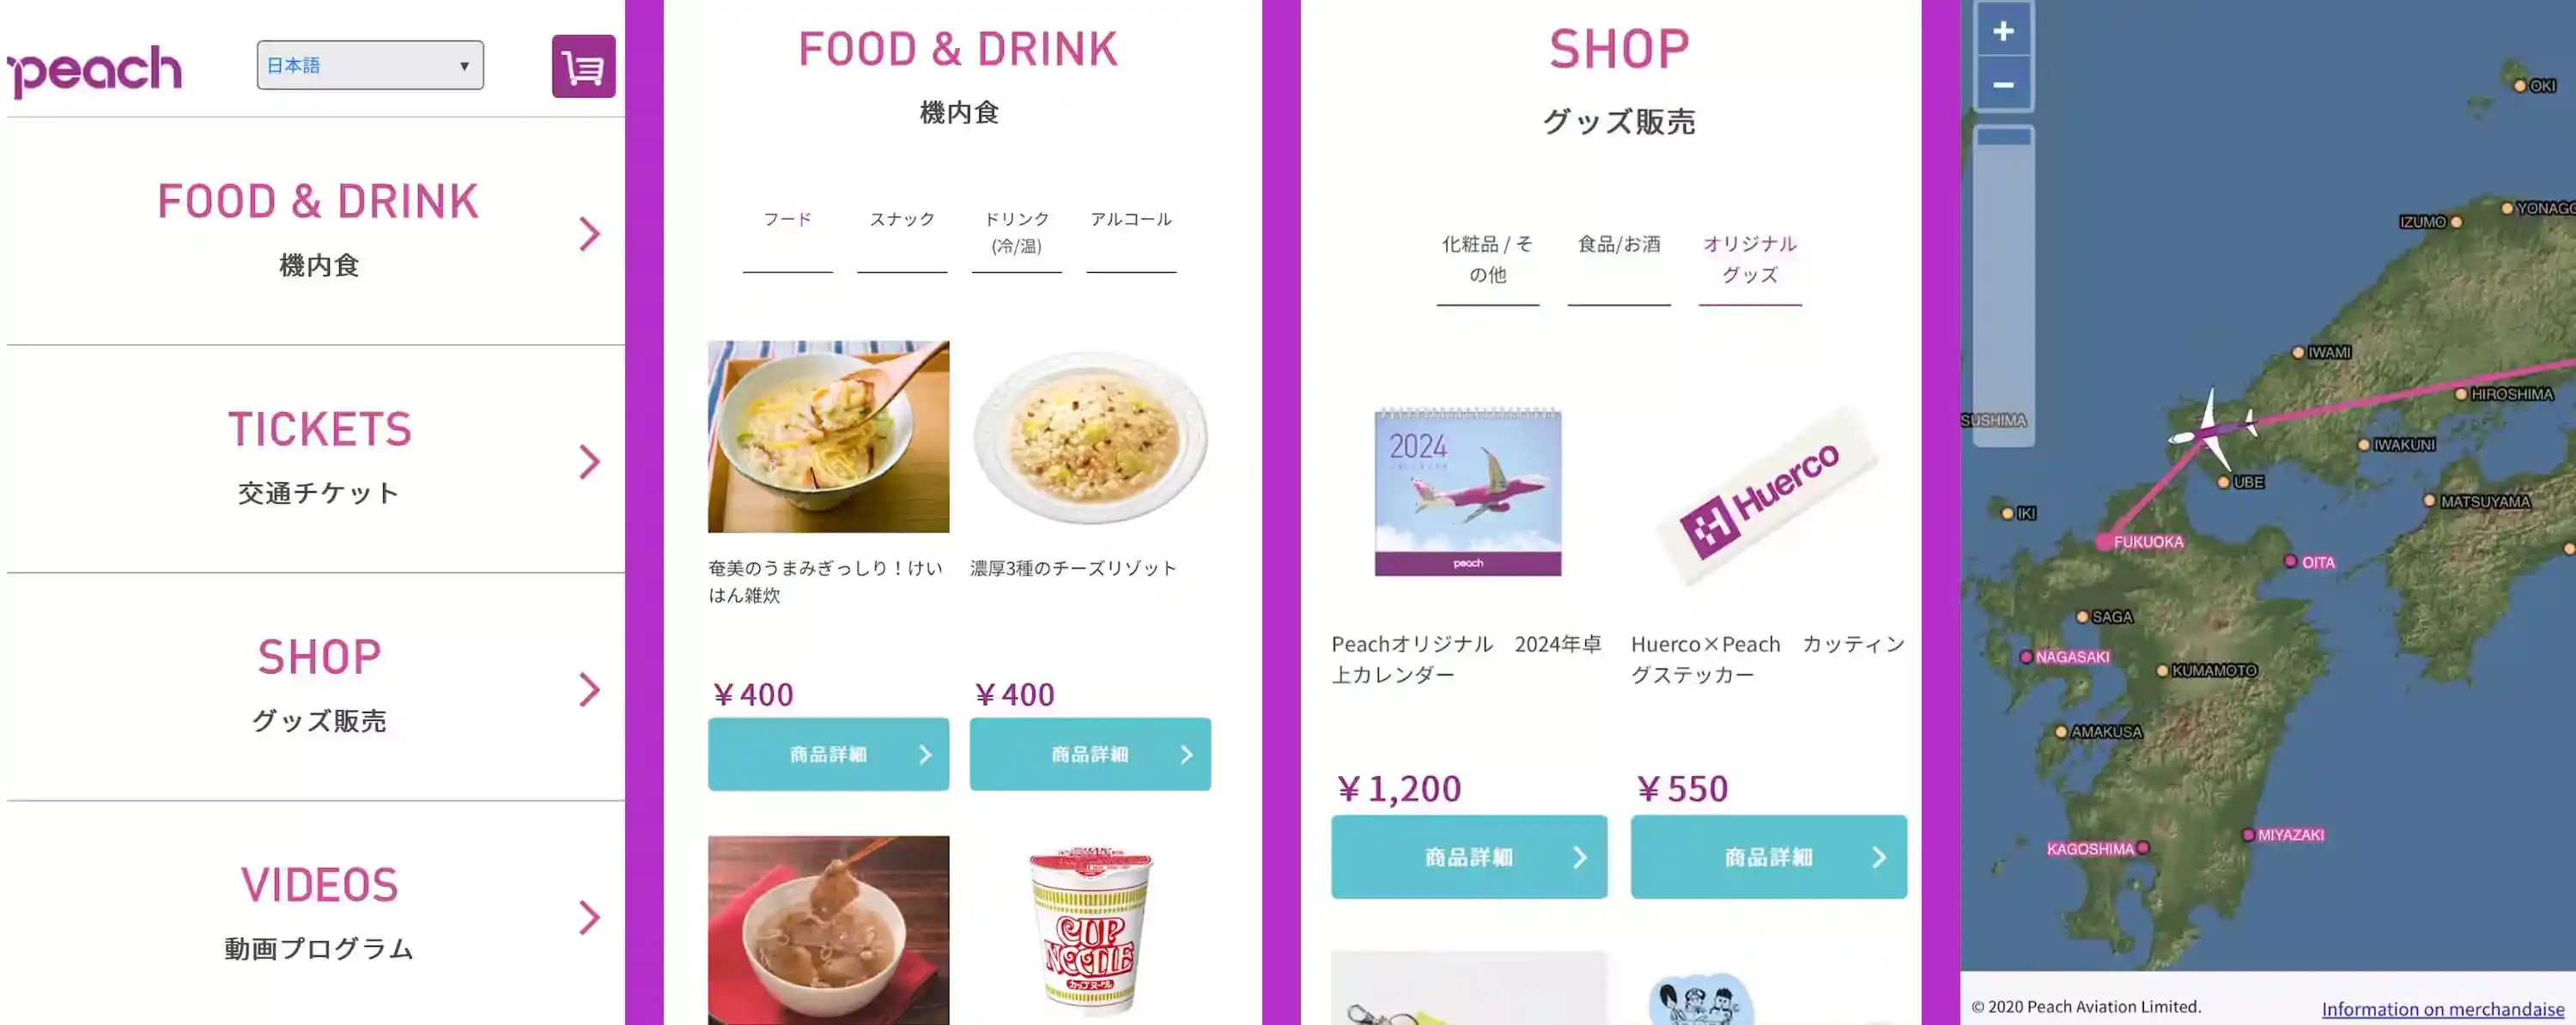
Peach Aviation offers an in-flight shopping service called “In-Flight Digital Content Service,” where you can order items from your smartphone. Please note that this service is available only during stable flight conditions.
In-Flight Digital Content Service Features
- In-flight shopping orders
- Purchase of transportation tickets
- Video programs featuring popular Japanese variety shows
- Flight radar to check your current location
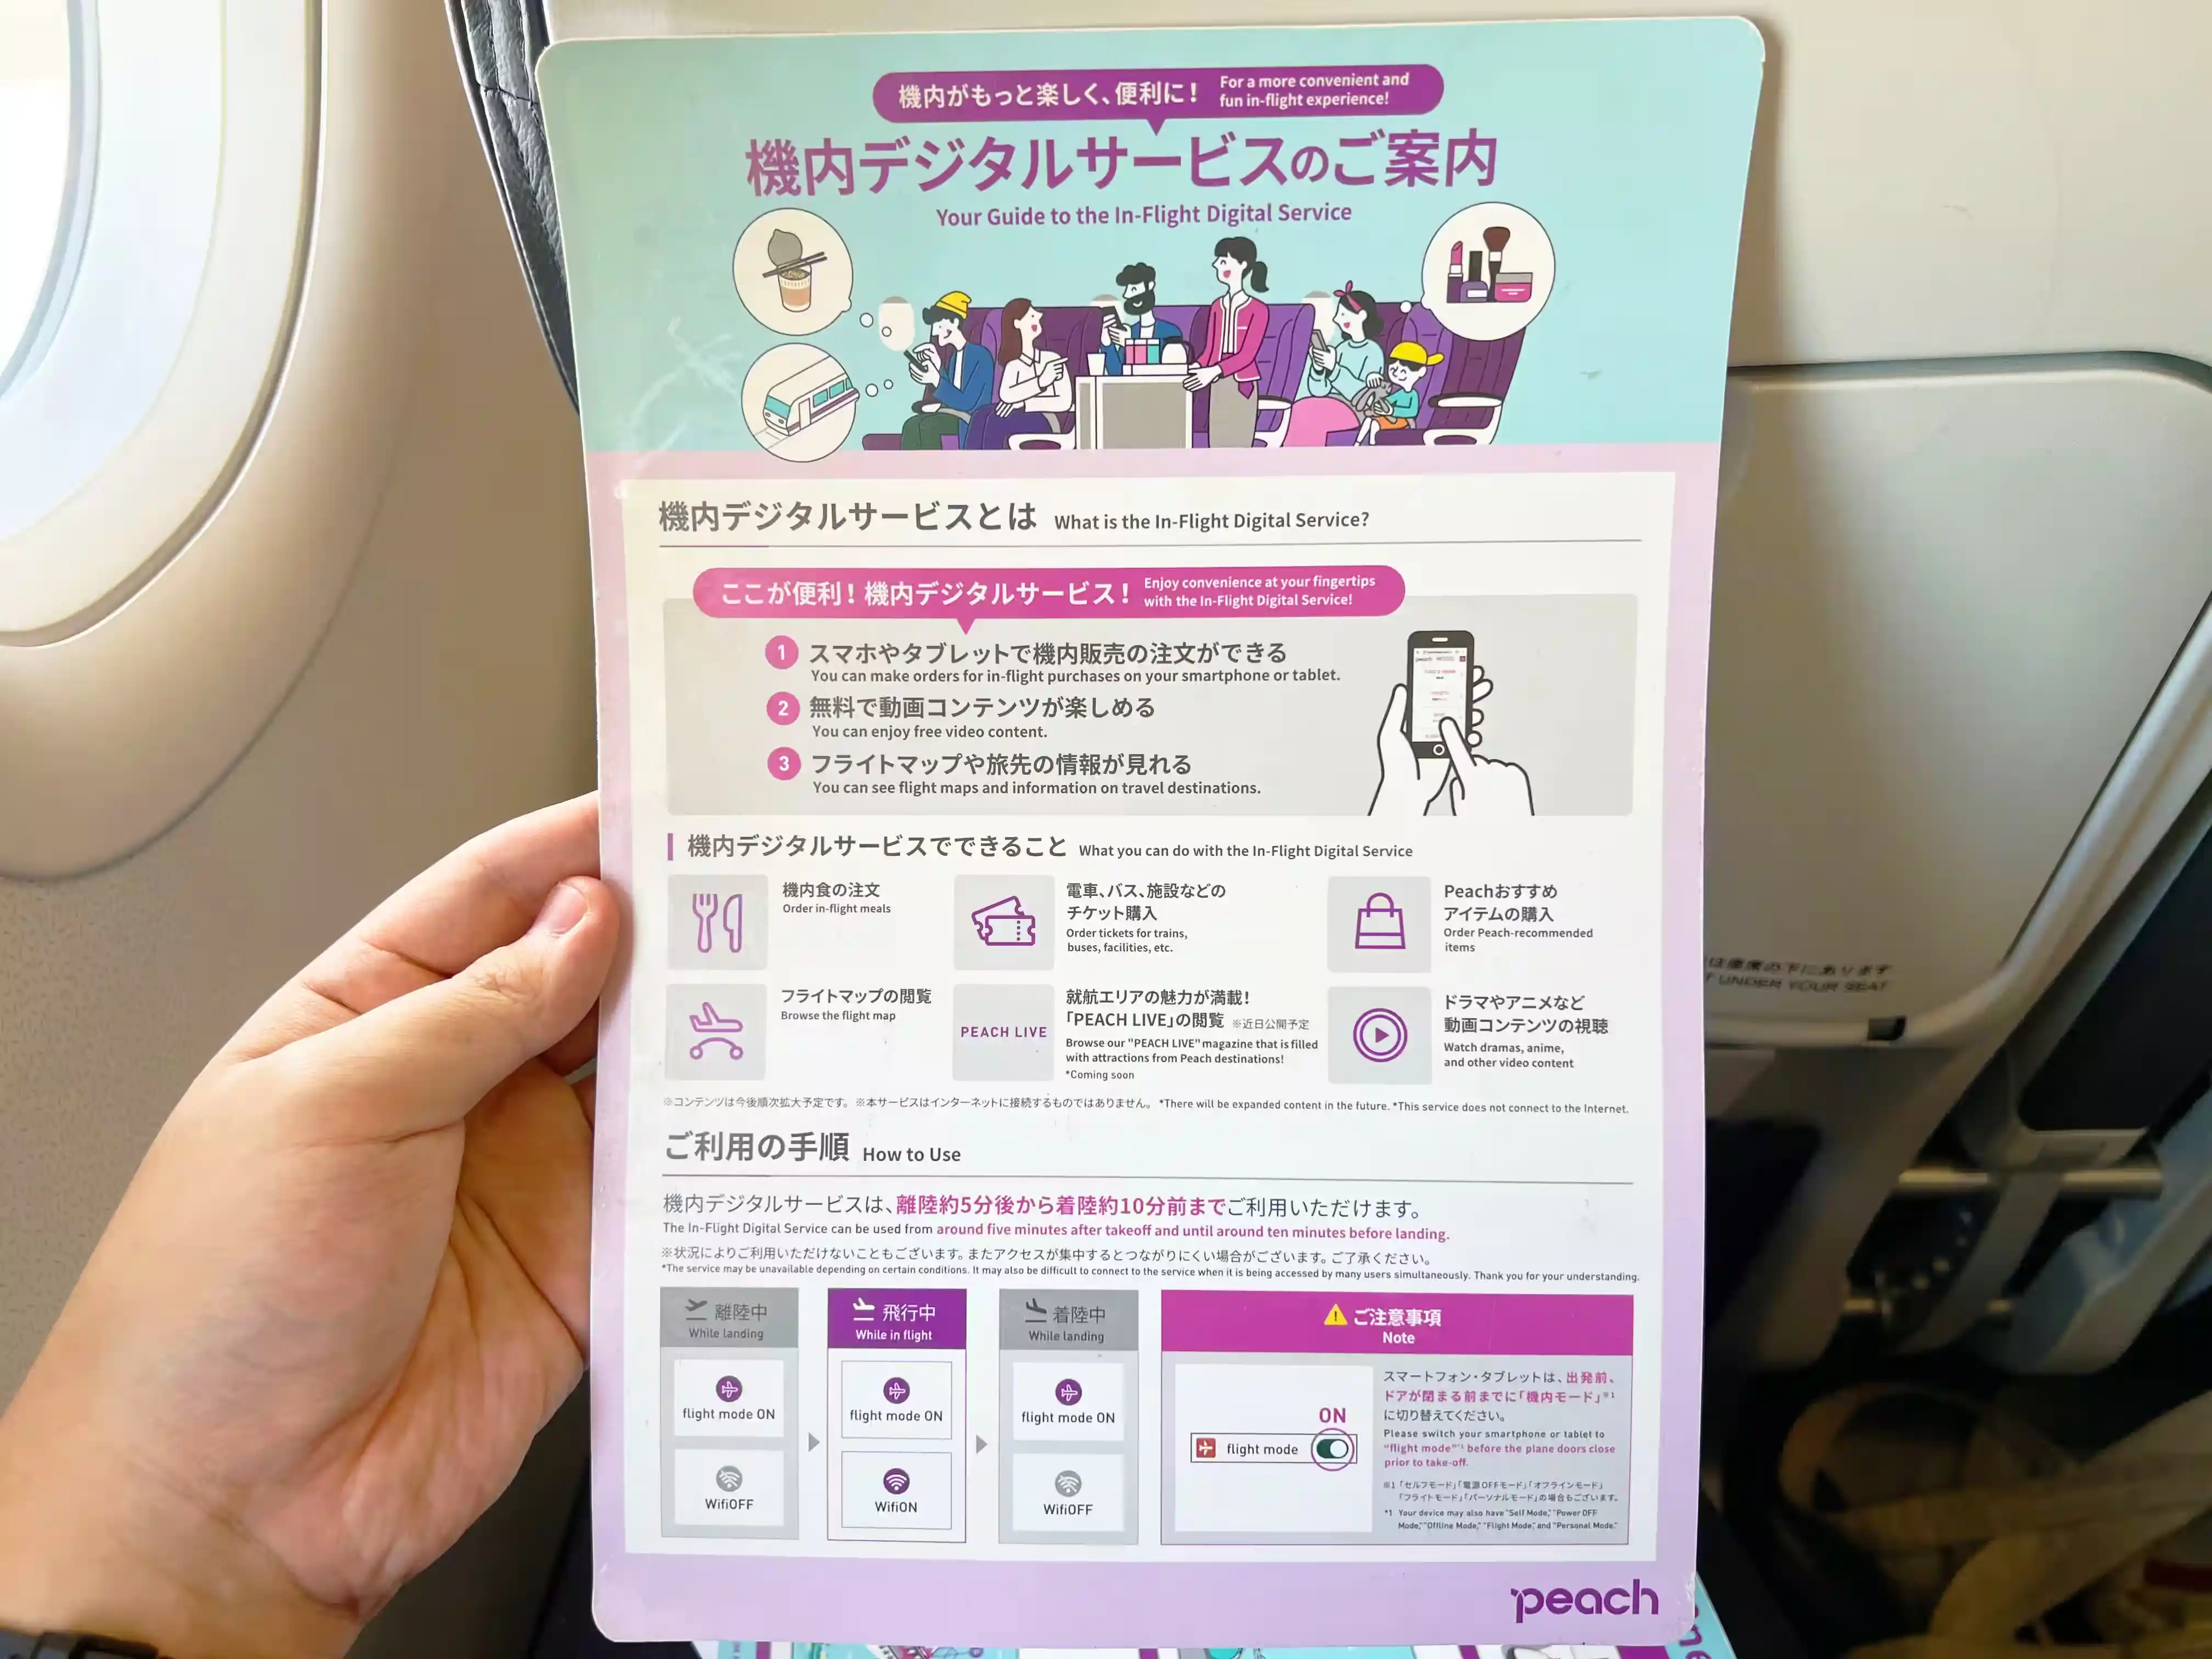
How to Access Peach Wifi Point
While taking off, you need to turn on Airplane Mode and disable Wi-Fi. However, once the flight reaches a stable altitude, you can keep Airplane Mode on and enable Wi-Fi.
When you turn on Wi-Fi, an access point will automatically appear, such as “〇〇-peach1” or “〇〇-peach2”.
After connecting to Peach’s Wi-Fi, you can access the in-flight digital content service by going to “inflight.flypeach.com”.
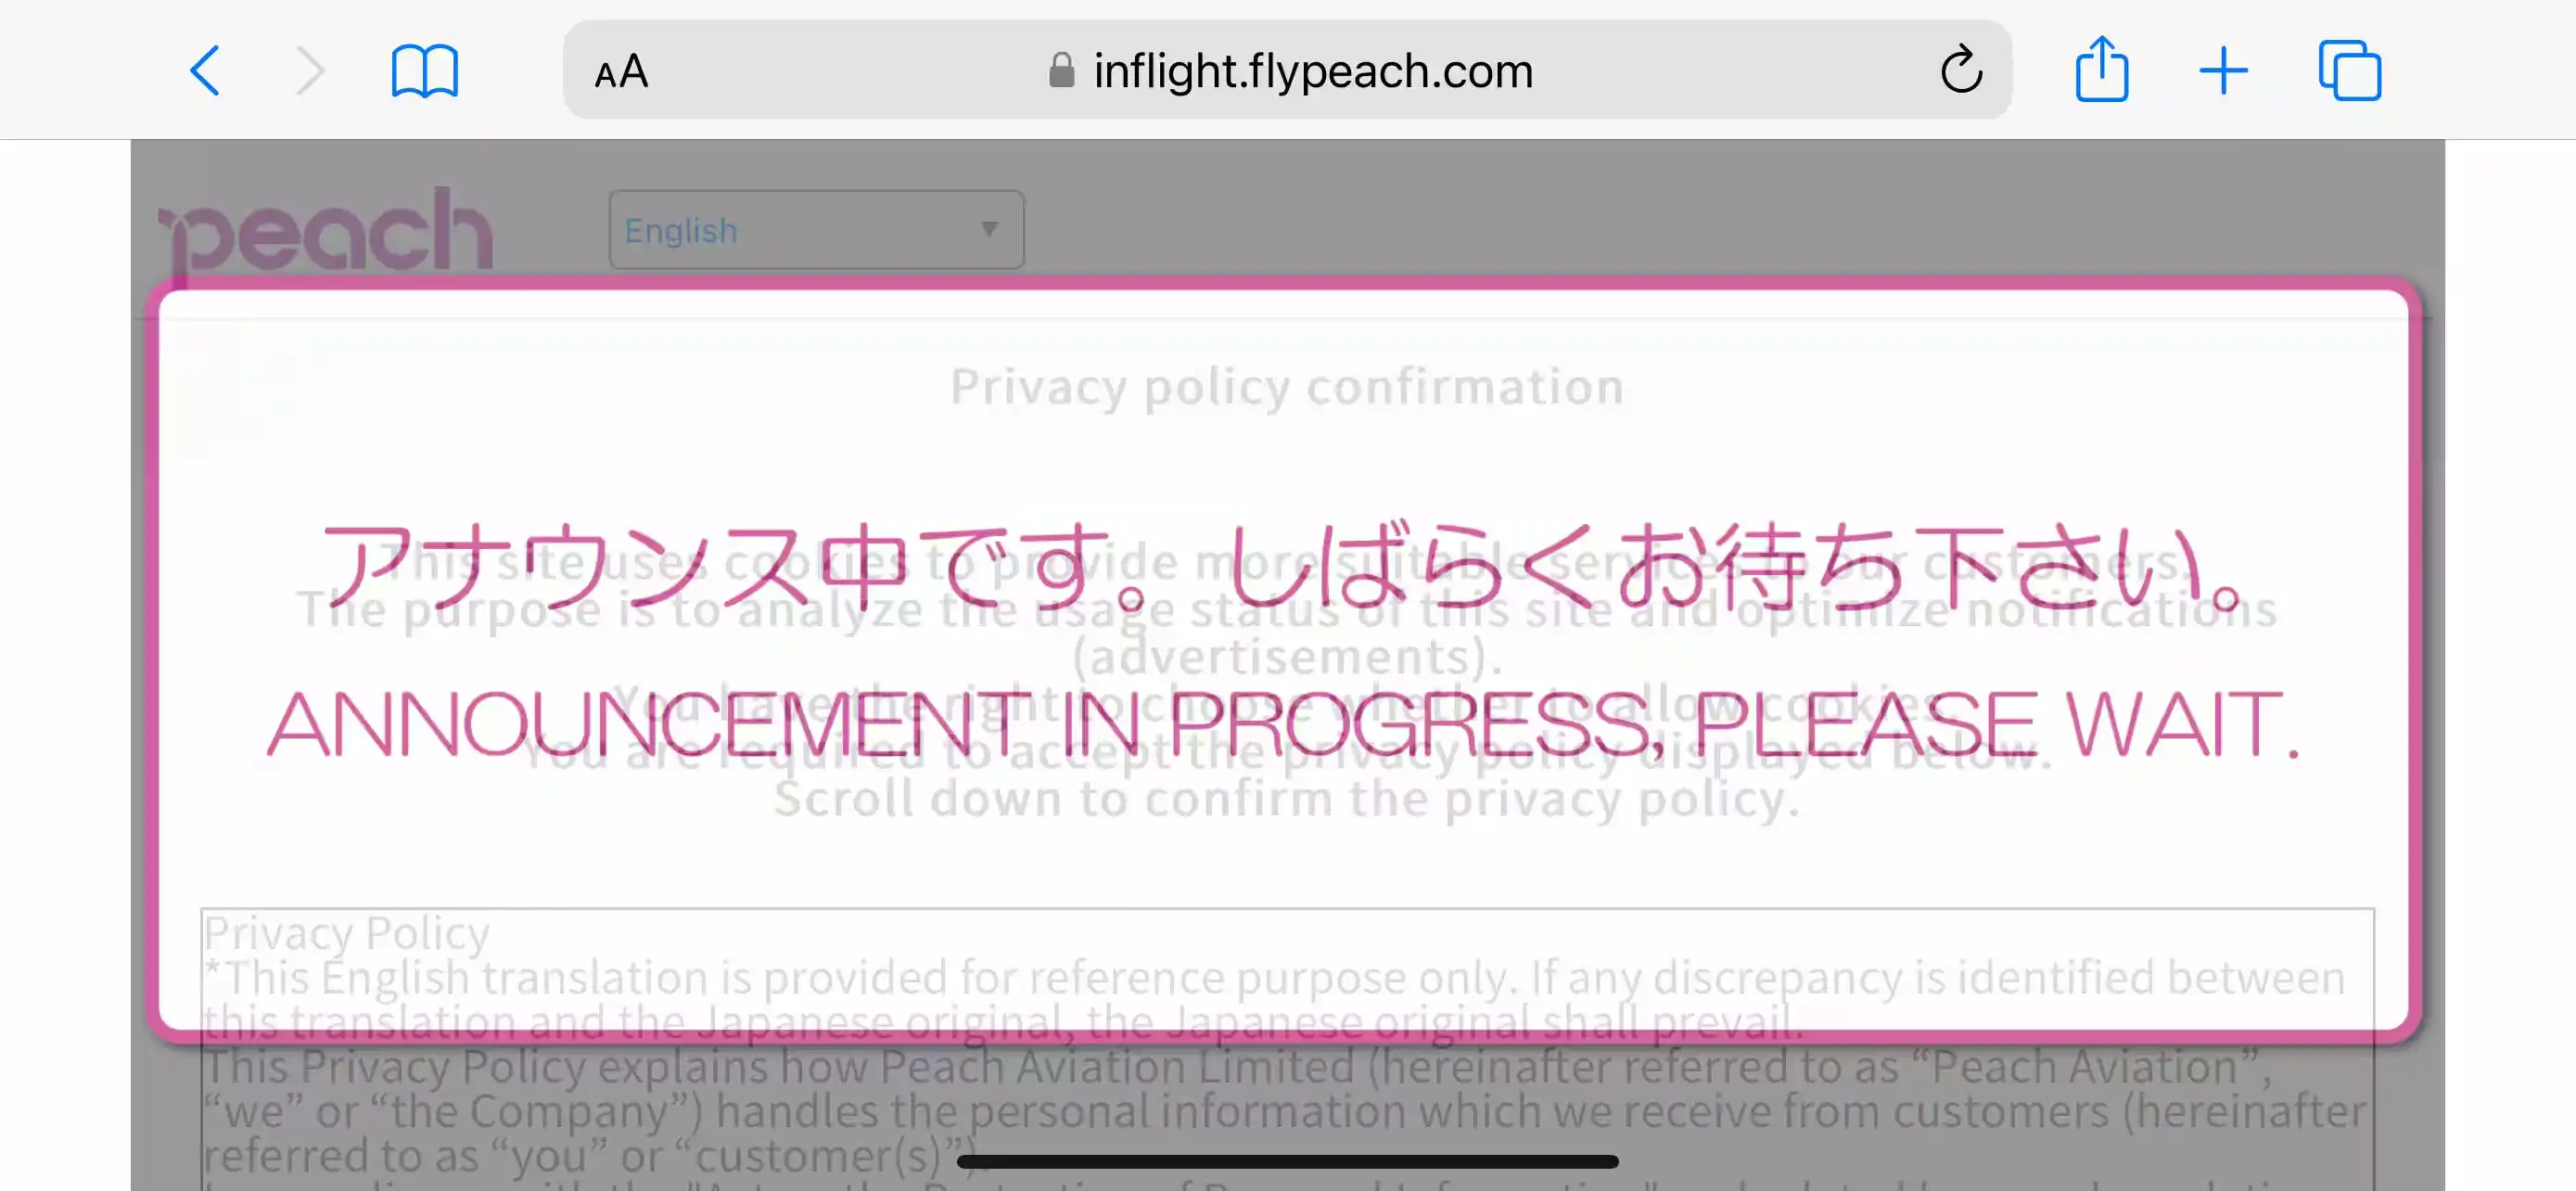
If you try to connect before takeoff or after landing, you may see a message like “The announcement is ongoing. Please wait.” and won’t be able to access the service.
The service became accessible after takeoff, once the flight reached stable conditions at altitude.
Latest News & Flight Status
For the latest sale information and flight status updates, please visit Peach Aviation’s official website.
▼Peach Aviation Official Website
https://www.flypeach.comPeach Aviation Q&A
When is the latest I can select my seat with Peach Aviation?
Seat selection is available up to 3 hours before departure.
Seats are usually available the day before departure, but on the day of the flight, they tend to fill up quickly. If you’re unsure, it’s better to select your seat as early as possible.
CloseWhy is Peach Aviation so affordable?
Peach cuts costs meticulously to offer the lowest fares among airlines.
For example, they’ve introduced self-developed automated check-in machines, simplified traditional airline services, and even made some services available for an additional charge. By primarily handling ticket sales online, they’ve significantly reduced labor costs.
They’ve also made detailed efforts in reducing costs, leading to the current fare structure. (Thank you!)
For safety, professional maintenance checks are rigorously conducted, ensuring a safe and enjoyable flight experience.
CloseWhen does Peach Aviation hold sales?
There is no fixed time for sales, but flights during off-peak seasons tend to be cheaper.
For example, after the graduation season in March and April, during the rainy season (May to June), when there are fewer passengers, they hold sales to secure travelers in advance.
Occasionally, one-way tickets go on sale starting from 999 yen~ which is hard to believe (lol).
In mid-February, there may be sales for flights in June, so it’s worth checking out!
▼Peach Aviation Official Reservation Page
https://www.flypeach.comCloseWhat is the current operation status of Peach Aviation?
The status may change depending on the situation, and sometimes the final decision is made just before the scheduled departure time.
If weather conditions such as typhoons are expected, delays or cancellations will be announced as early as possible, and you can check the status on Peach Aviation’s official website “Flight Status Page” starting the day before the scheduled departure.
CloseWhat are the baggage limits for carry-on and checked luggage with Peach Aviation?
Size – Total of the three dimensions must be within 115cm
Number – A maximum of 2 items per person, including personal items
Total Weight – Maximum 7kg per personCloseWhat items are restricted for carry-on with Peach Aviation?
Lighters/Matches
– A maximum of 1 per person
– For personal use and smoking onlyElectronic Cigarettes/Smokeless Tobacco
– For personal use only
Fireworks/Crackers
– Not allowed for both carry-on and checked luggage
Scissors
– Only scissors with blades shorter than 6cm and no sharp tips are allowed
Large Tripods
– Only those measuring 60cm or less when folded are allowed
Close* The information posted is based on the publication date: 2025年5月16日.
* This site provides information only and does not guarantee accuracy, completeness, or timeliness. Use at your own risk.
* Contents, plans, and prices may change. Always check the official site for the latest details.
* This site does not substitute for professional medical, legal, or other advice. Consult experts when necessary.
* External links are included, but this site is not responsible for the content or privacy policies of linked sites.
* All content on this site is protected by copyright. Unauthorized reproduction, distribution, or copying is prohibited.
* The site reserves the right to update disclaimers without notice. The latest disclaimers take effect upon publication.
* The site is not responsible for any damages incurred by using its content.
* Technical issues or interruptions may occur, but the site is not liable for any resulting damages.
* This site respects all religions and beliefs and does not intend to discriminate against any.
-
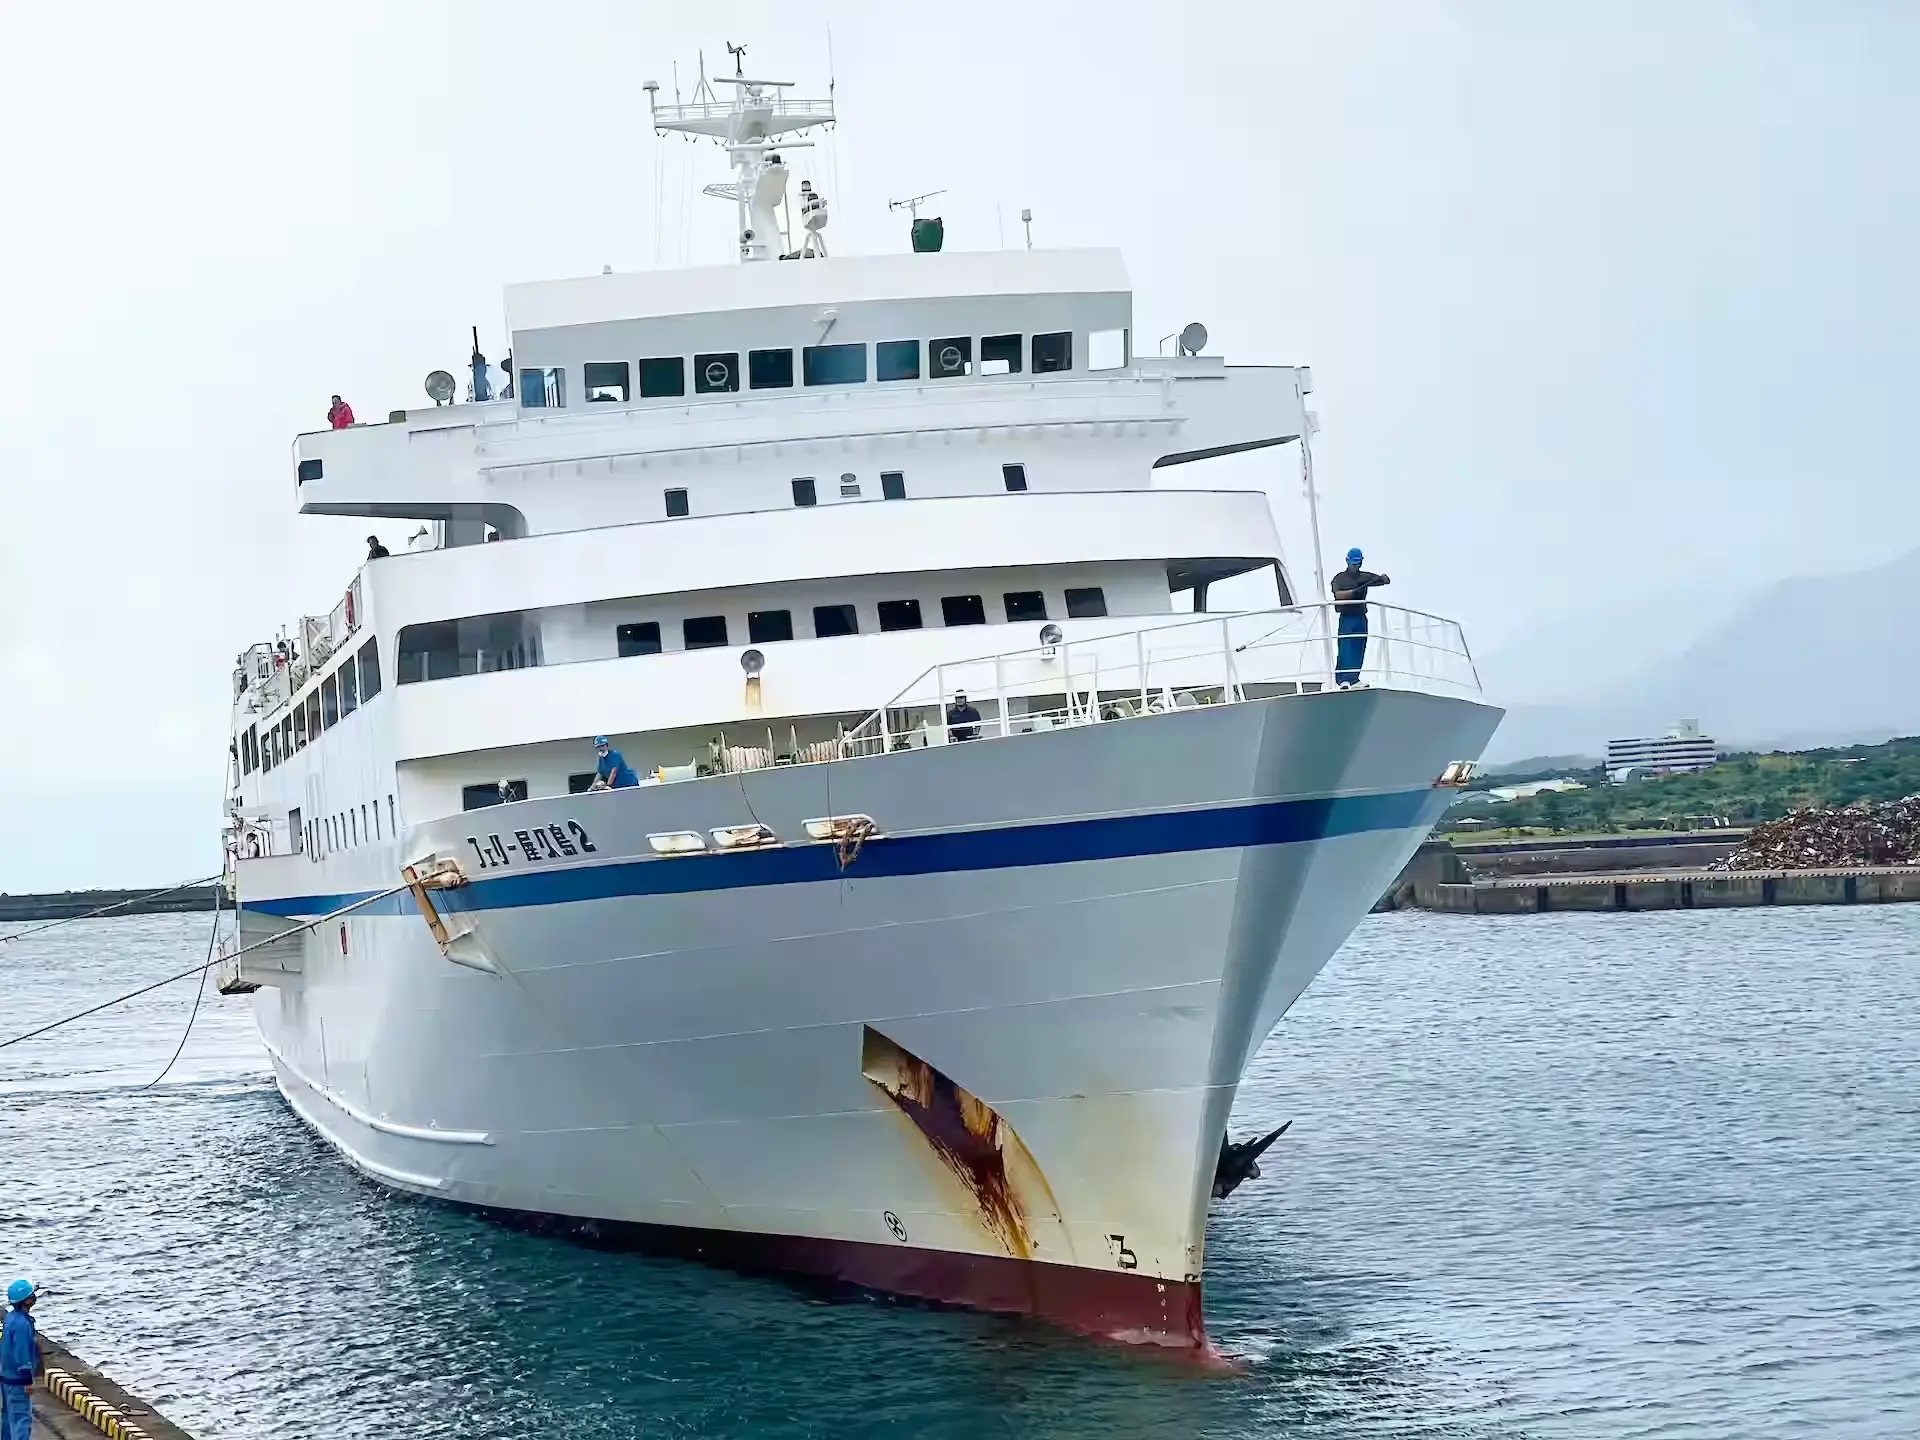 Ferry Yakushima 2 Cruise Review | How to Travel to Kagoshima
Orita Kisen Ferry Yakushima2 Experience! Ride Japan's Ferry linking Kagoshima to Yakushima. How to Fare
-
Ferry Princess Wakasa Cruise Review | How to Travel to Tanegashima
Kagoshima North Pier - Tanegashima: CosmoLine Princess Wakasa Experience! 3.5 hour Japan's Ferry Ride
-
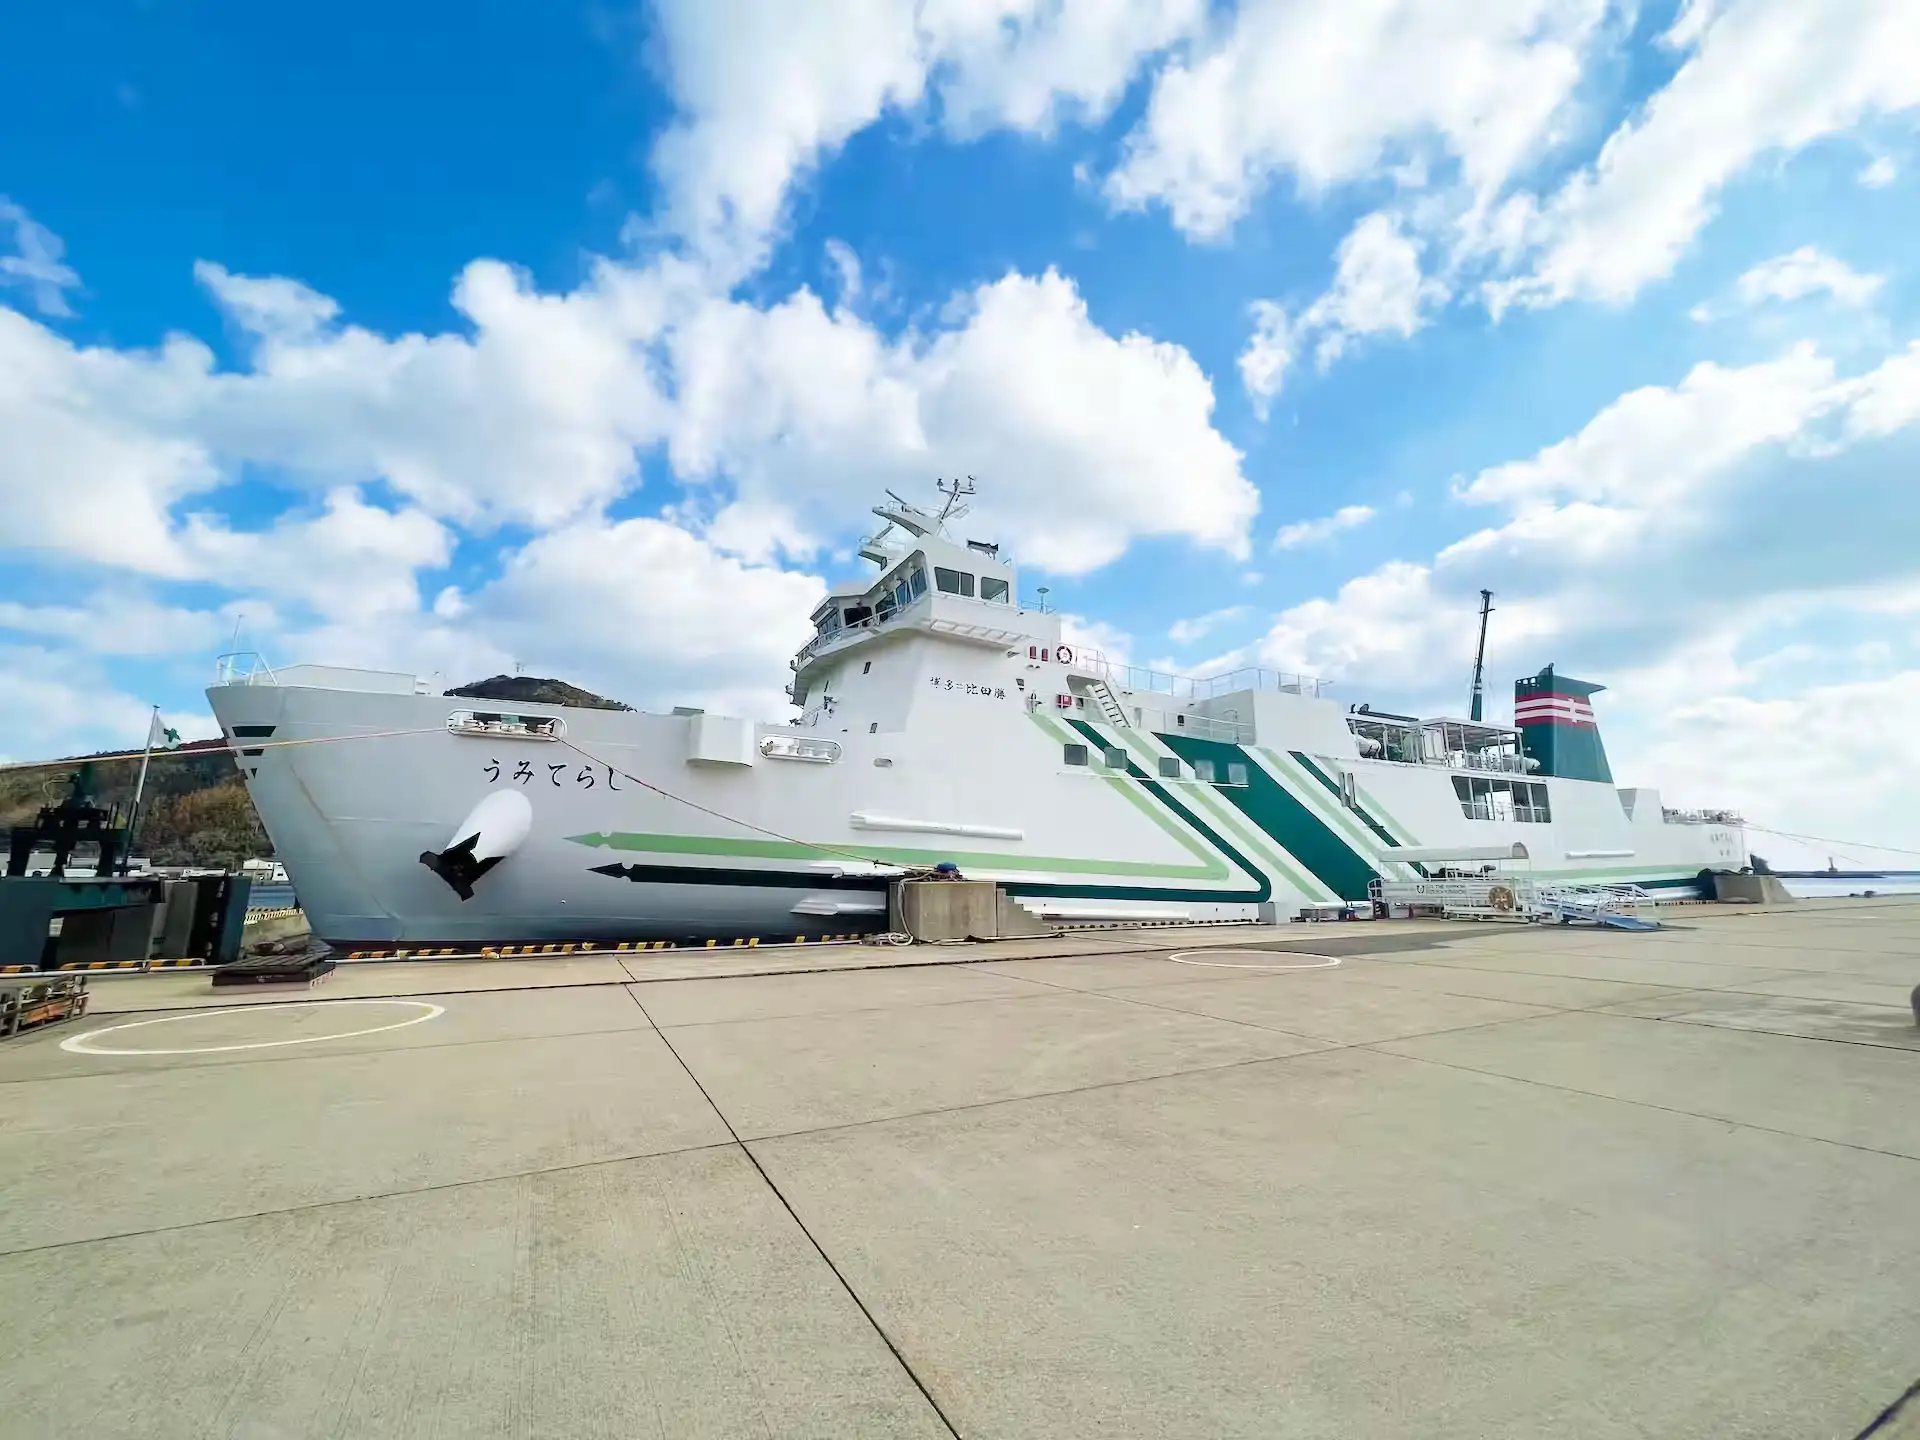 Ferry Umiterashi Cruise Review | Tsushima to Fukuoka Travel Guide
Hitakatsu, Tsushima - Hakata, Fukuoka: Kyushu Yusen Umiterashi Experience! 5 hr Review of Japan's Ferry
-
 Kintetsu HINOTORI Limited Express Review | Osaka to Nagoya Train Ride
Osaka-Namba - Kintetsu Nagoya: Limited Express Hinotori Experience! Time Required 2 hour Japan's train Ride
-
 Eizan Railway Momiji Tunnel | Kyoto’s Best Autumn Train Ride
Demachiyanagi - Kurama / Kibune: Eizan Railway KIRARA Experience! 30min Japan's Maple Tree Train Ride in Kyoto
Copyright © mitemil All rights reserved